


 Has anyone else been frustrated with those awful pumpkin shaped plastic buckets that kids carry around for Halloween? Every year I buy a new one because they are too big to store in our Halloween decoration tote and I don’t like them to begin with. Half the time they break in the middle of the street and my kids candy is scattered on the road like a tempting pinata and they are constantly putting it on the ground so they can have their hands free to adjust their costumes or to choose which candy they want at the door steps of our patient neighbor’s homes.
With that said, I knew there had to be a better way! My 11 year old and I went to the Hancock Fabric store near our home and scoped out the options. I know a lot of kids carry around a pillow case to put their candy in, so we thought why not make a mini pillow case with a strap (like a messanger bag) so it would be easy to sew AND easy to carry around as well as durable the way we sewed it.
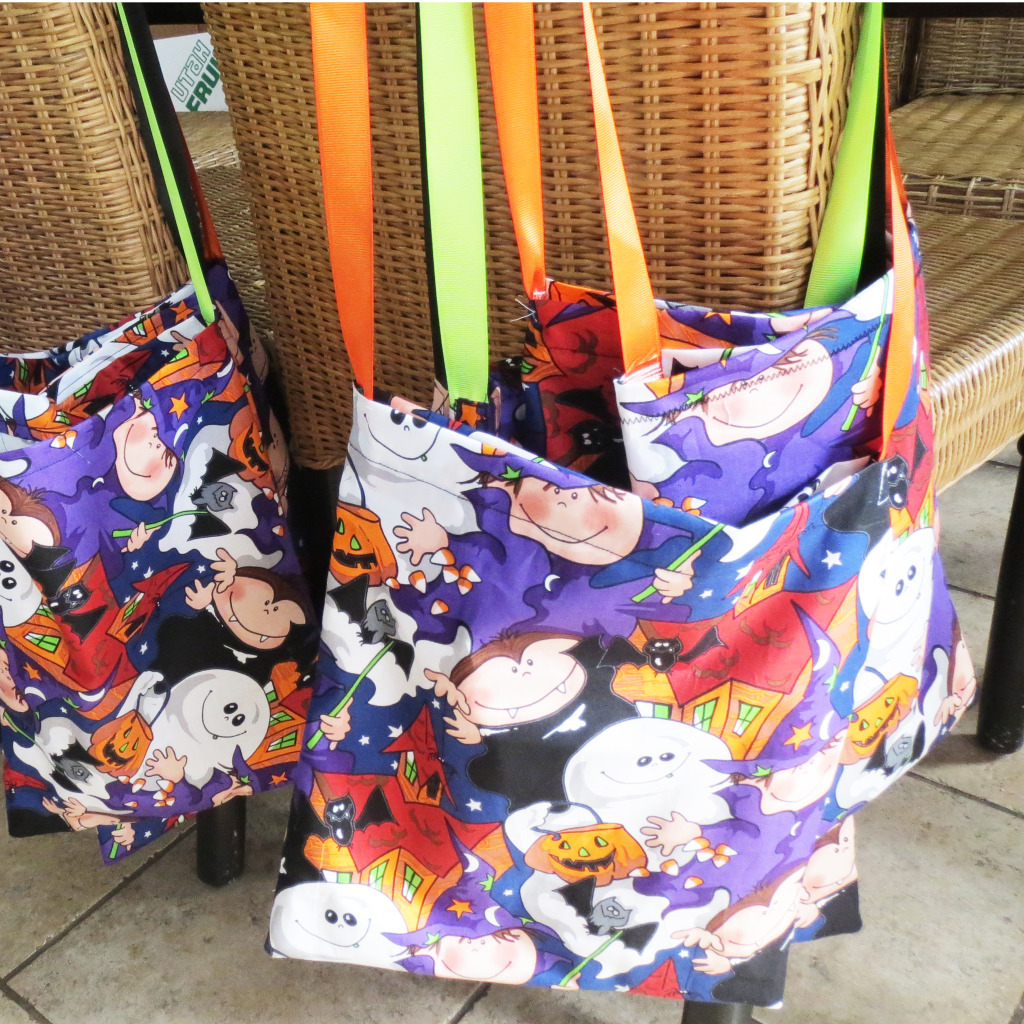
We ended up with 2 yards of half price nice quality cotton Halloween Fabric ($4/yard). I made 10 treat bags from the 2 yards and still have some fabric left. With the remnants I made some hair scrunchies and hair bows. If you are asking what am I going to do with 10 treat bags and 3 kids, that’s a good questions… I’m going to give them to my friends’ kids of course. We’re also giving away one to a lucky reader. See the end of the post for more details.
How to Make a Halloween Treat Bag & Giveaway
This is so easy. Don’t let all the steps scare you away. Once you get the hang of it, you can make one of these in 15 minutes. You can cut out some steps to make it easier if you compromise quality a little bit. I like mine to be higher quality, but it’s up to you.
You will need
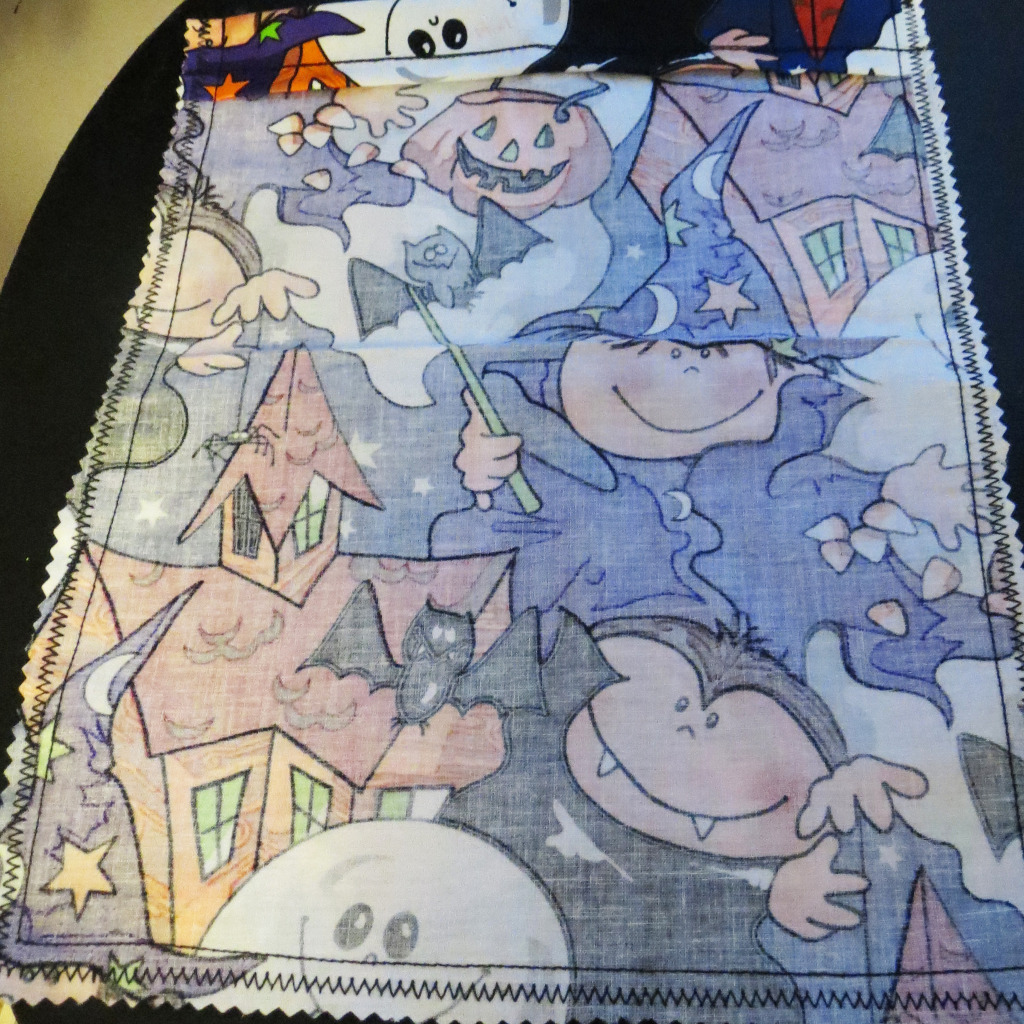
- 1/2 yard of Halloween fabric
- 7-10 inches or coordinating trim (optional)
- Fabric glue (optional)
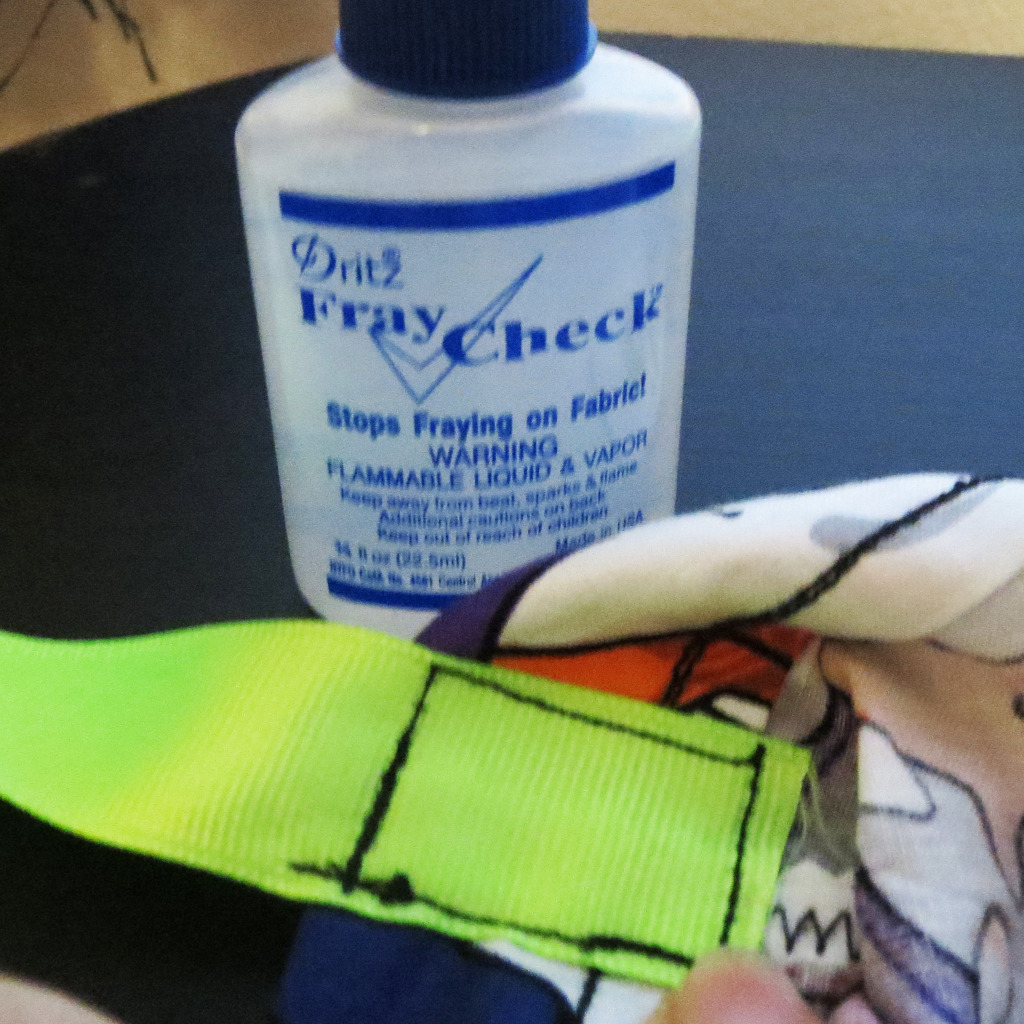
- Fray Check (optional)
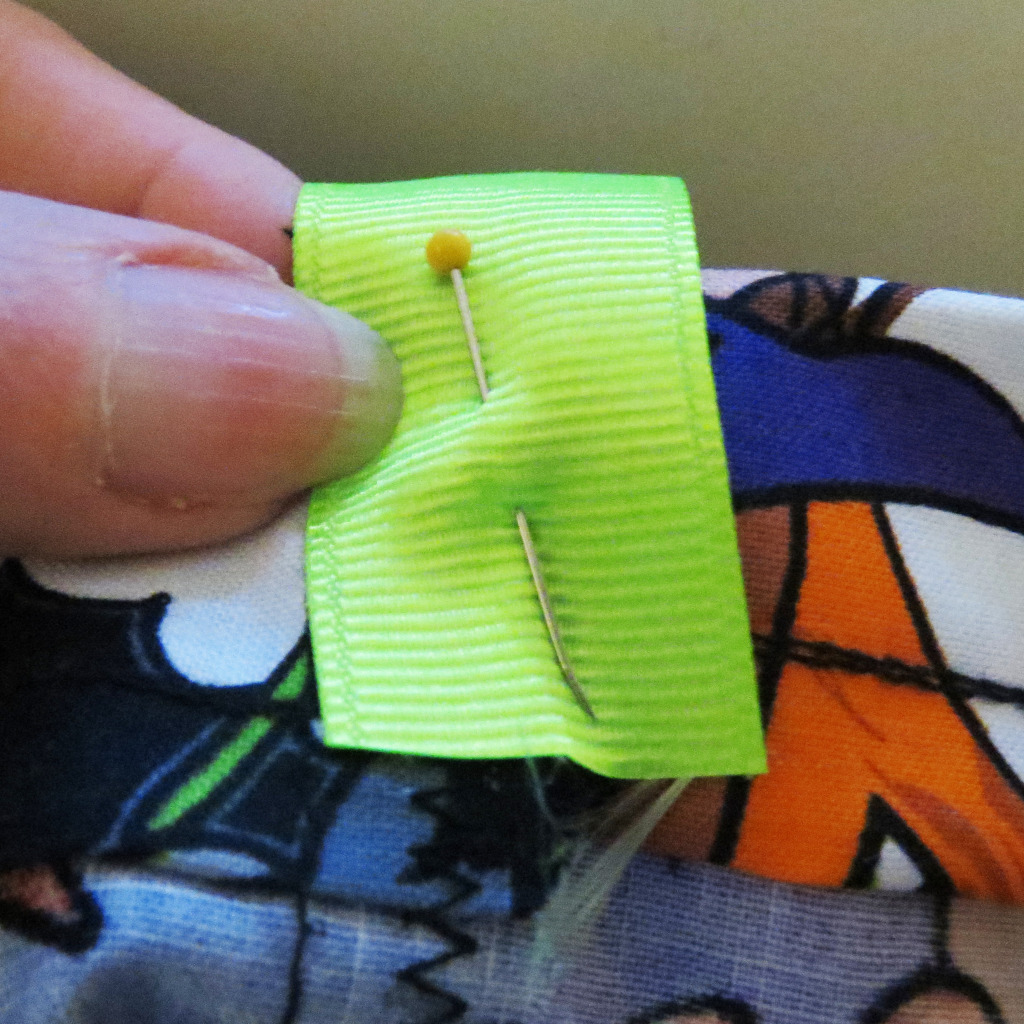
- 42 inches of coordinating grosgrain ribbon (for the handle)
- thread
Step #1
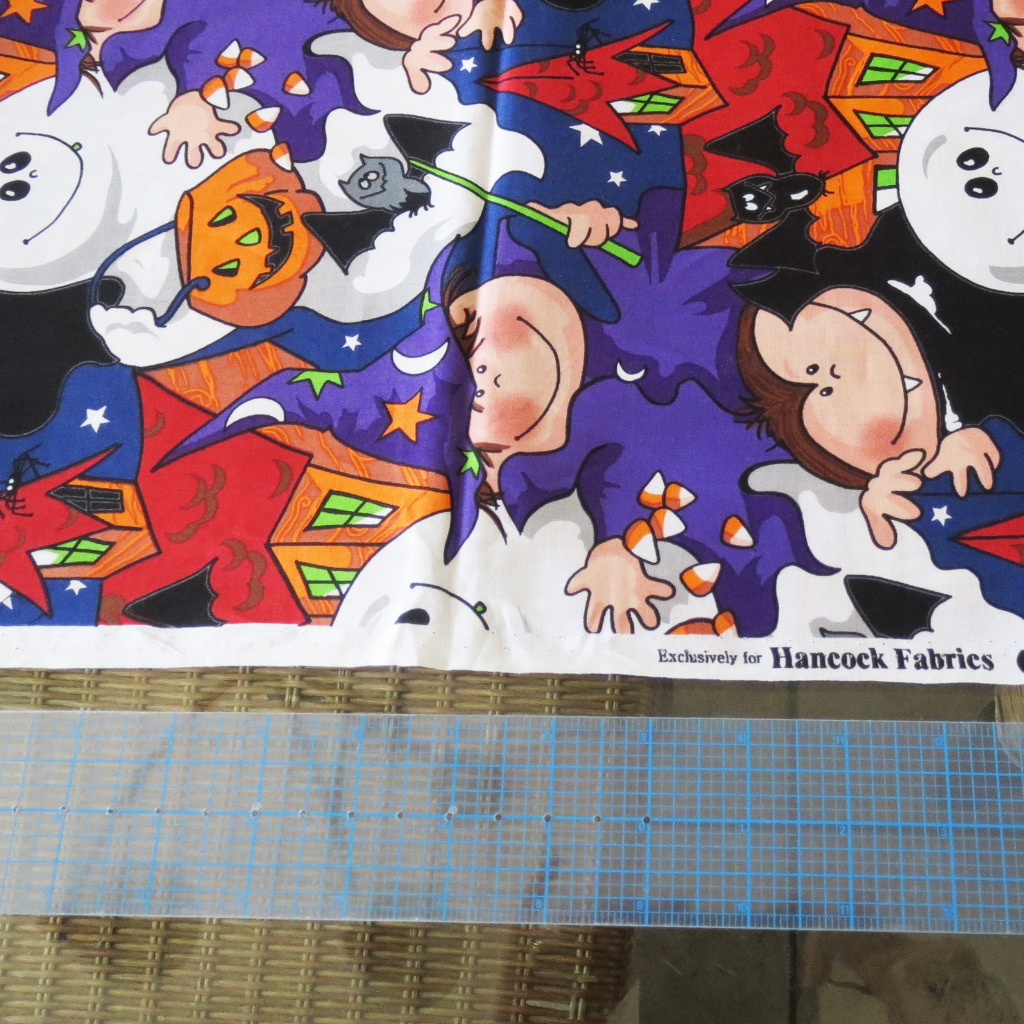
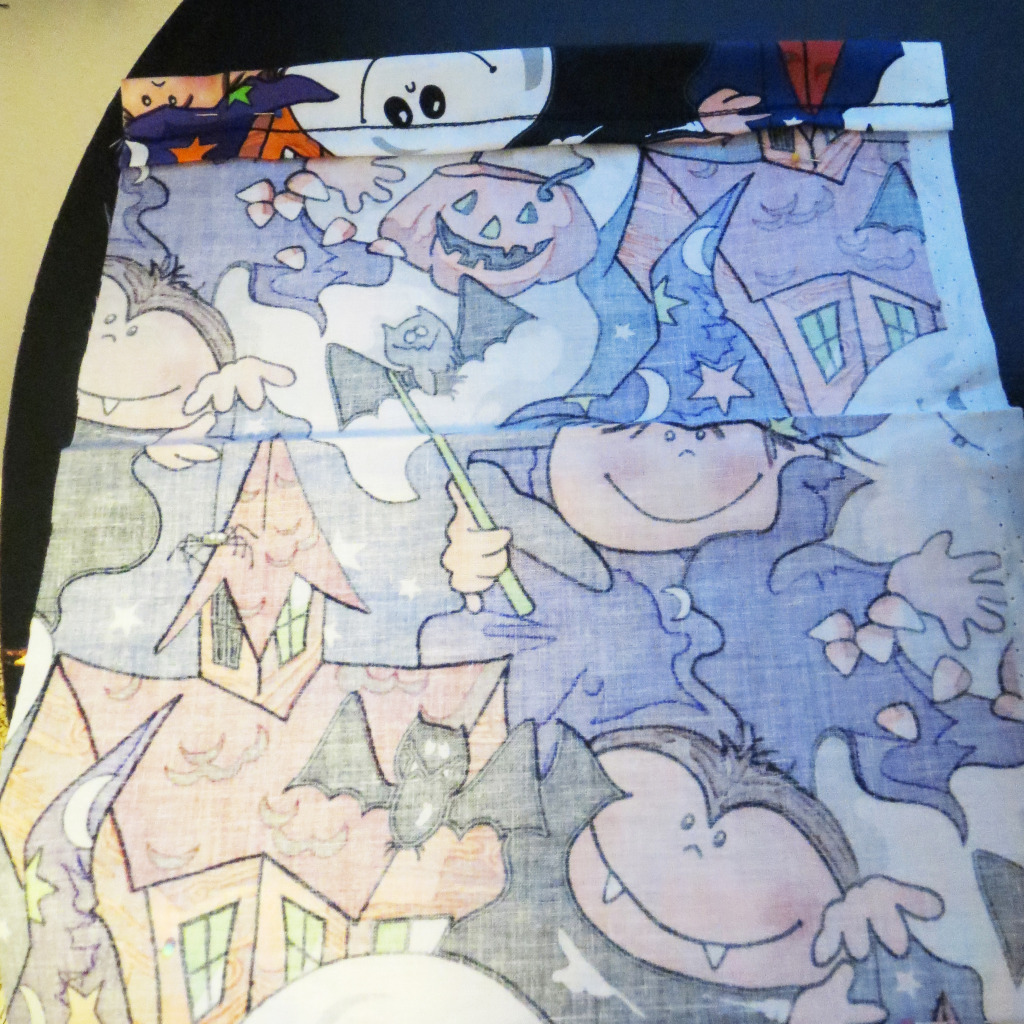
Measure your fabric using a quilting ruler or measuring tape and mark with a chalk pencil. You can use the folded edge to save some time sewing. I’m showing you without the fold, so you can see how to do it that way too. I cut out this toddler (ages 3-6) sized bag 12.5 inches long by 10 inches wide. This allows for a 5/8′ seam allowance on all sides. It should hold about 2 pounds of candy. If you wanted a bigger one for a larger child, you could make it 14 inches long by 12 inches wide with a 5/8′ seam allowance. I made some of both.
You can iron your fabric before you start cutting to make sure you have a very flat and even piece of fabric. I didn’t bother because I wasn’t looking for perfection, and I hate to iron. Did I mention I hate to iron? I really hate to iron! You can also wash and shrink the fabric before you start, but I didn’t because I was lazy and I hardly ever do that. But, you can if you want to be a super thorough sewer.
TIP: Before you cut, if you have a one way fabric where there is a side you want facing up, make sure you having it facing the way you want it before cutting. I made this mistake on a couple bags, they were still cute, but not perfect.
Step #2
Cut at markings. Make sure you make a straight cut, so your bag won’t be crooked. This is where I like to use my see through quilting ruler pictured above. I used my Gingher dressmaker scissors for a clean cut.

Step #3
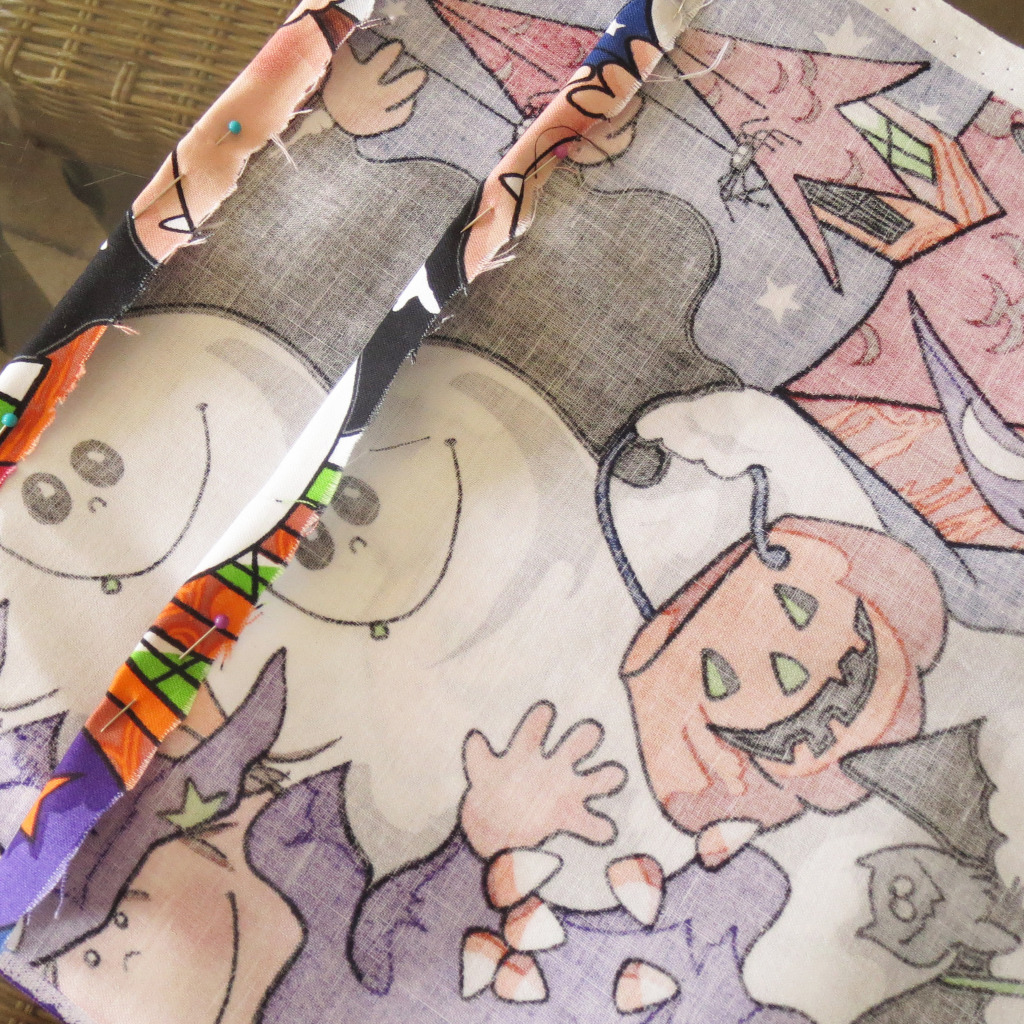
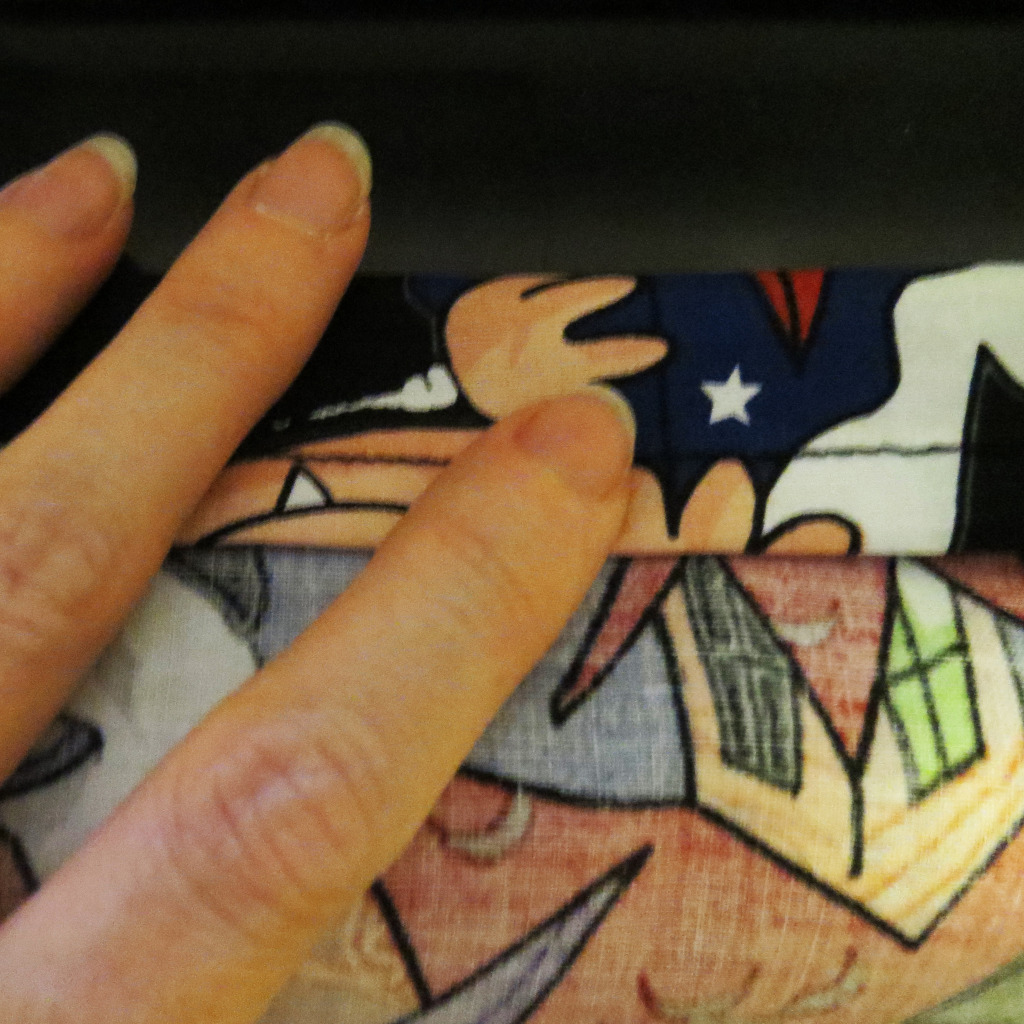
Fold over the top hem 1/4′ and pin. So you fold the right side of the fabric over the wrong side of the fabric as pictured below.
Step #4
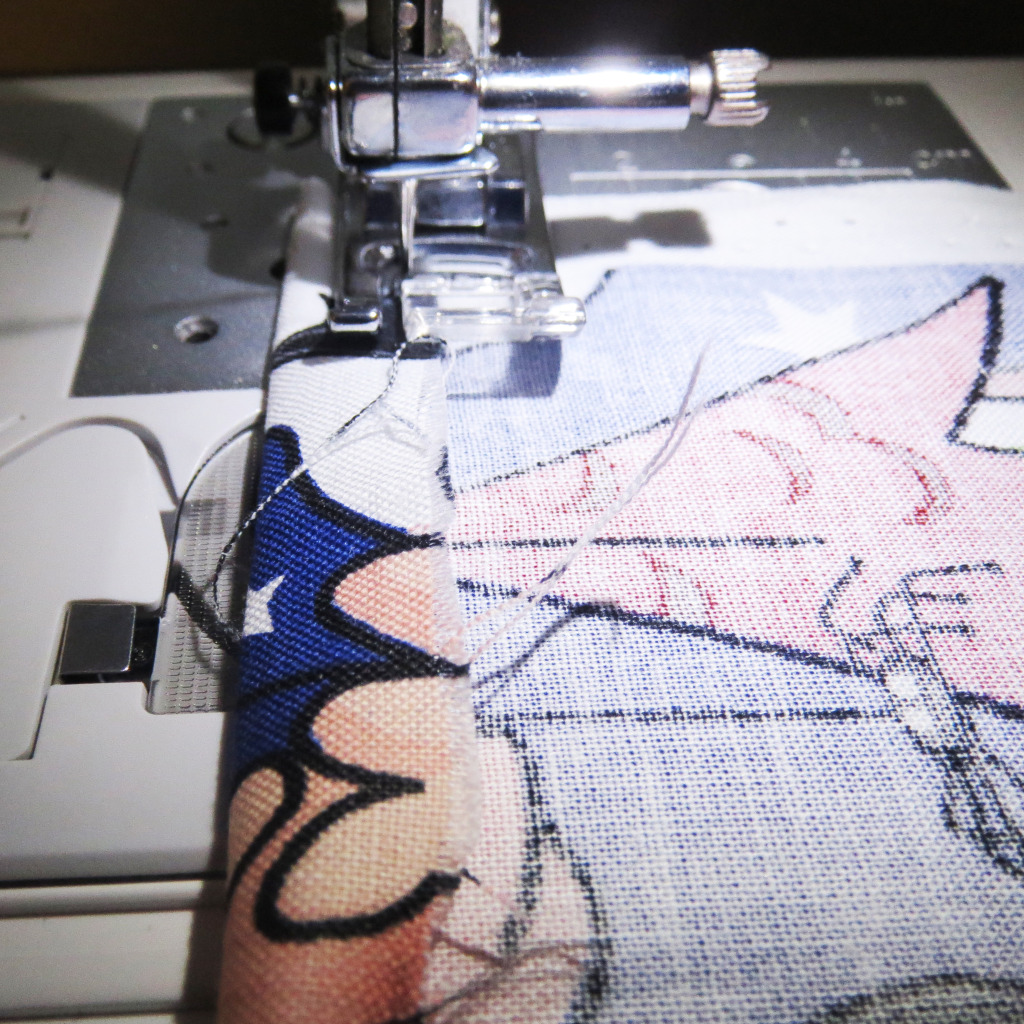
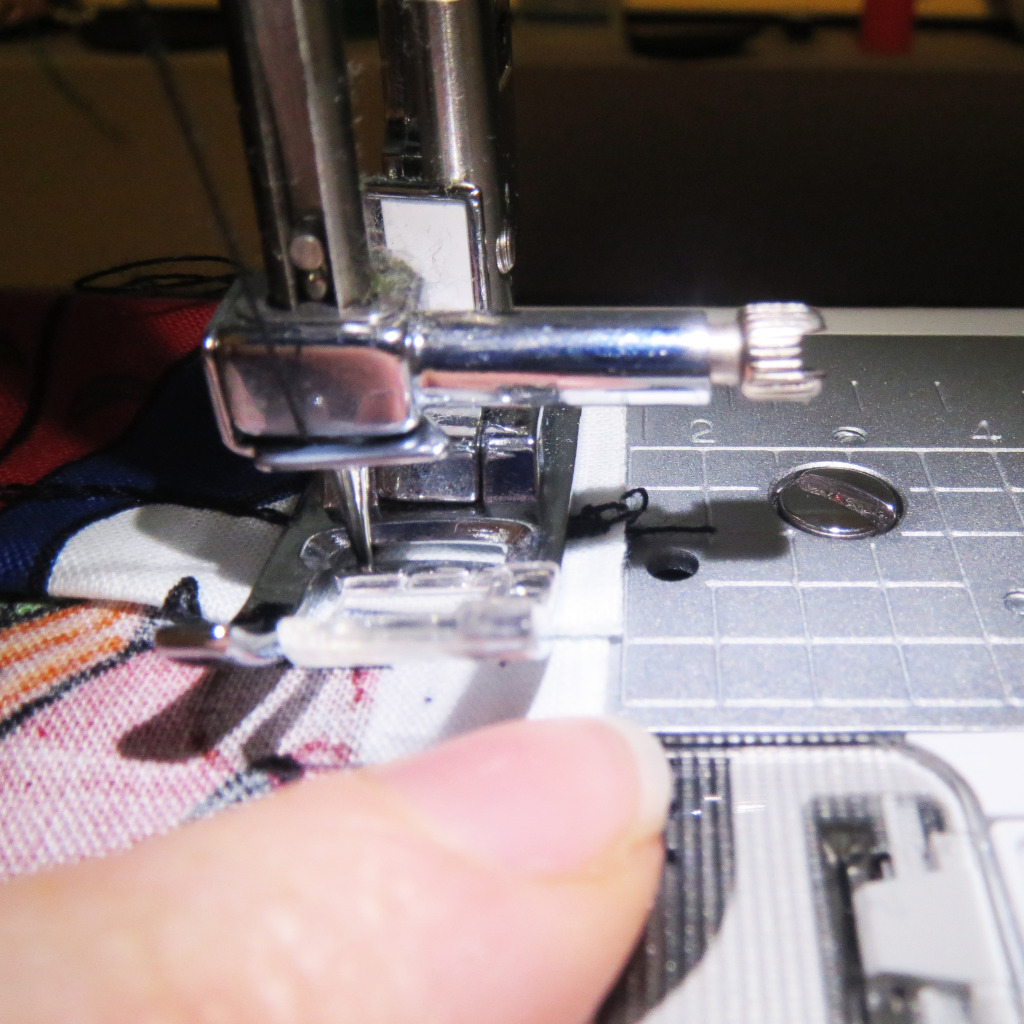
Sew the 1/4″ hem you just turned and pinned using a coordinating thread. You are making a “clean hem” here so there won’t be any frayed edges on the top of your bag.
Step #5
Fold over the hem you just made over again another 1″. Pin and sew to make a clean hem.
 Sew directly over the line you made when you sewed the 1/4″ seam to make it look clean and nice. DOn’t worry if it’s perfect, it’s only going to show up on the inside.

Step #6
Match right sides of fabric together and sew a 5/8″ seam along the 3 edges, making sure to keep the top open (where you just hemmed it). Pin sides.
Step #7
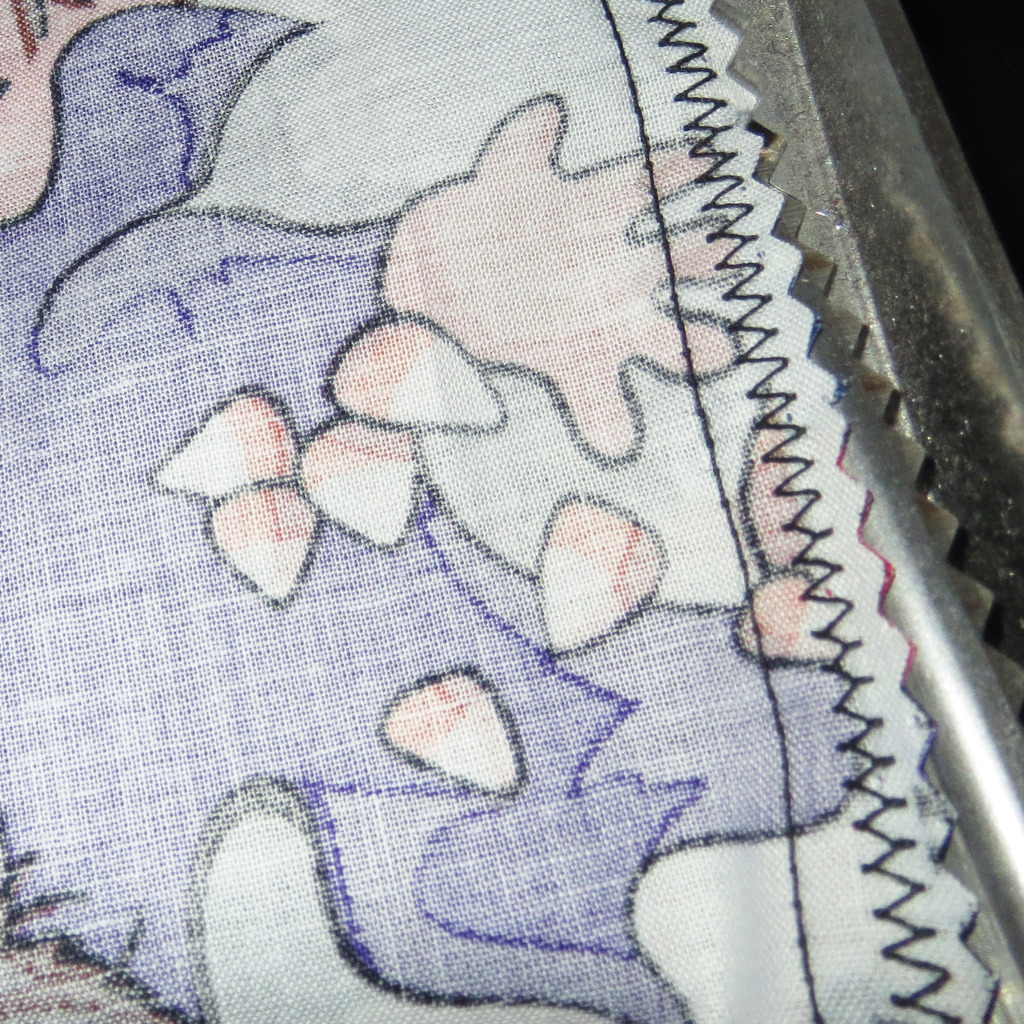
Zig Zag along all side seams to reinforce seam and make the bag stronger and more durable (optional). Then trim the seams with pinking shears to discourage fraying.
Step #8
Turn your bag right side out making sure to use a point turner or your finger nail (or even a pencil) to get a sharp corner on the bottom corners.

Step #9
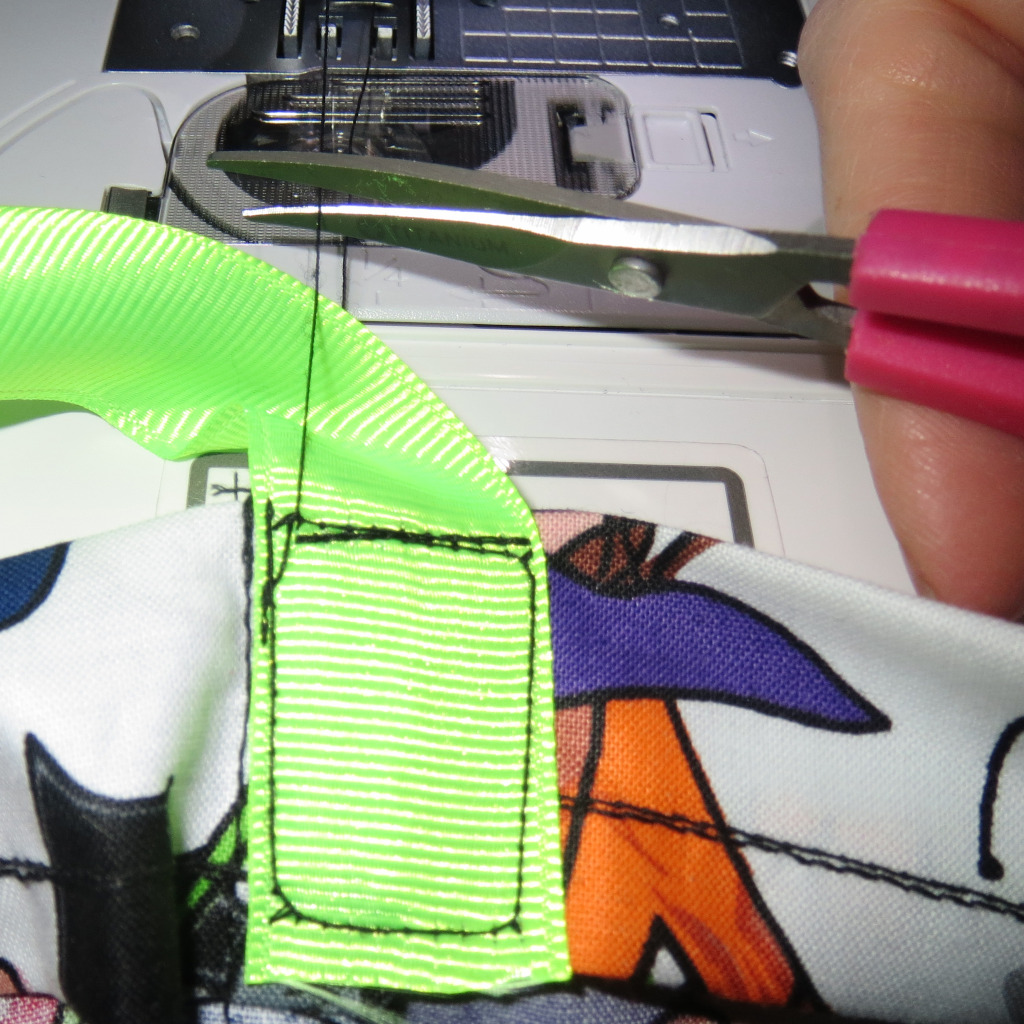
Measure your child to see if 40″ of grosgrain ribbon will be a good size for him or her. This is a messenger style bag, so measure across their body. I made mine a little long so they can loop the top and use it for another year. Remember there will be a 1″ seam allowance for the ribbon on each side, so make the ribbon 2′ longer than what you measured on your child. I used 42′ of ribbon. Pin on one side of the bag and sew a square around the ribbon. Repeat on the other side, making sure the ribbon stays straight.
 Step #10 (optional)
Use fray check check on the ribbon to stop it from fraying. If you don’t have this around, just skip it, although it’s pretty handy stuff to have on hand and it literally lasts forever because you only use a tiny bit on each project.
Step #11 (optional)
If you don’t want to have trim on your bag, you’re done! I wanted something reflective on my kids bags, so I added some sequin trim remnants I had on hand. They are really hard to keep in place so I used Alene’s Fabric Glue to glue it on. This glue is permanent and washable so I can wash the bag and the trim won’t come off. Handy, yes!
I put a thin line of the glue on the back side of the trim , then covered up my 1″ seam with the trim and pinned it in place for an hour. Then I took the pins out and put a heavy book over the trim overnight so the glue could completely dry. You could sew it on if you feel it’s easier. It was easier for me to glue it on, so that’s what I did. Do make sure to take the pins out before the glue dries, or you will have a ruined bag as the pins will get stuck in permanently. I know from experience!
Well, I hope you enjoyed this tutorial about how to make a Halloween treat bag. If you have any questions, please post a comment and I will answer them.
GIVEAWAY!!!
We are giving away one treat bag to a lucky winner. Please enter by posting a comment here on the blog (1 entry) or by posting a comment on our facebook page (additional entry). Share with your friends on facebook and get 5 extra entries. The winner will be chosen at random and contacted on Friday 10/19/2012 at noon MST.
Disclaimer:
**All content provided by Positively Mommy is for informational purposes only. Positively Mommy makes no representations as to the accuracy or completeness of any information found on this site or found by following any link on this site. Positively Mommy will not be liable for any errors or omissions in this information nor for the availability of this information. Positively Mommy will not be liable for any losses, injuries, or damages from the display or use of this information. This policy is subject to change at anytime.
2 comments
1 ping
Rachel – These are really cute. I was having that thought about having to buy more candy buckets just on Saturday. I too refuse to store them…maybe someday I will start sewing again.
Rachel Doyle
Author
Thanks Rachel… they are so easy. They would take you less than a half hour to make.
… [Trackback]…
[…] Read More: positivelymommy.com/how-to-make-a-halloween-treat-bag-easy/ […]…