


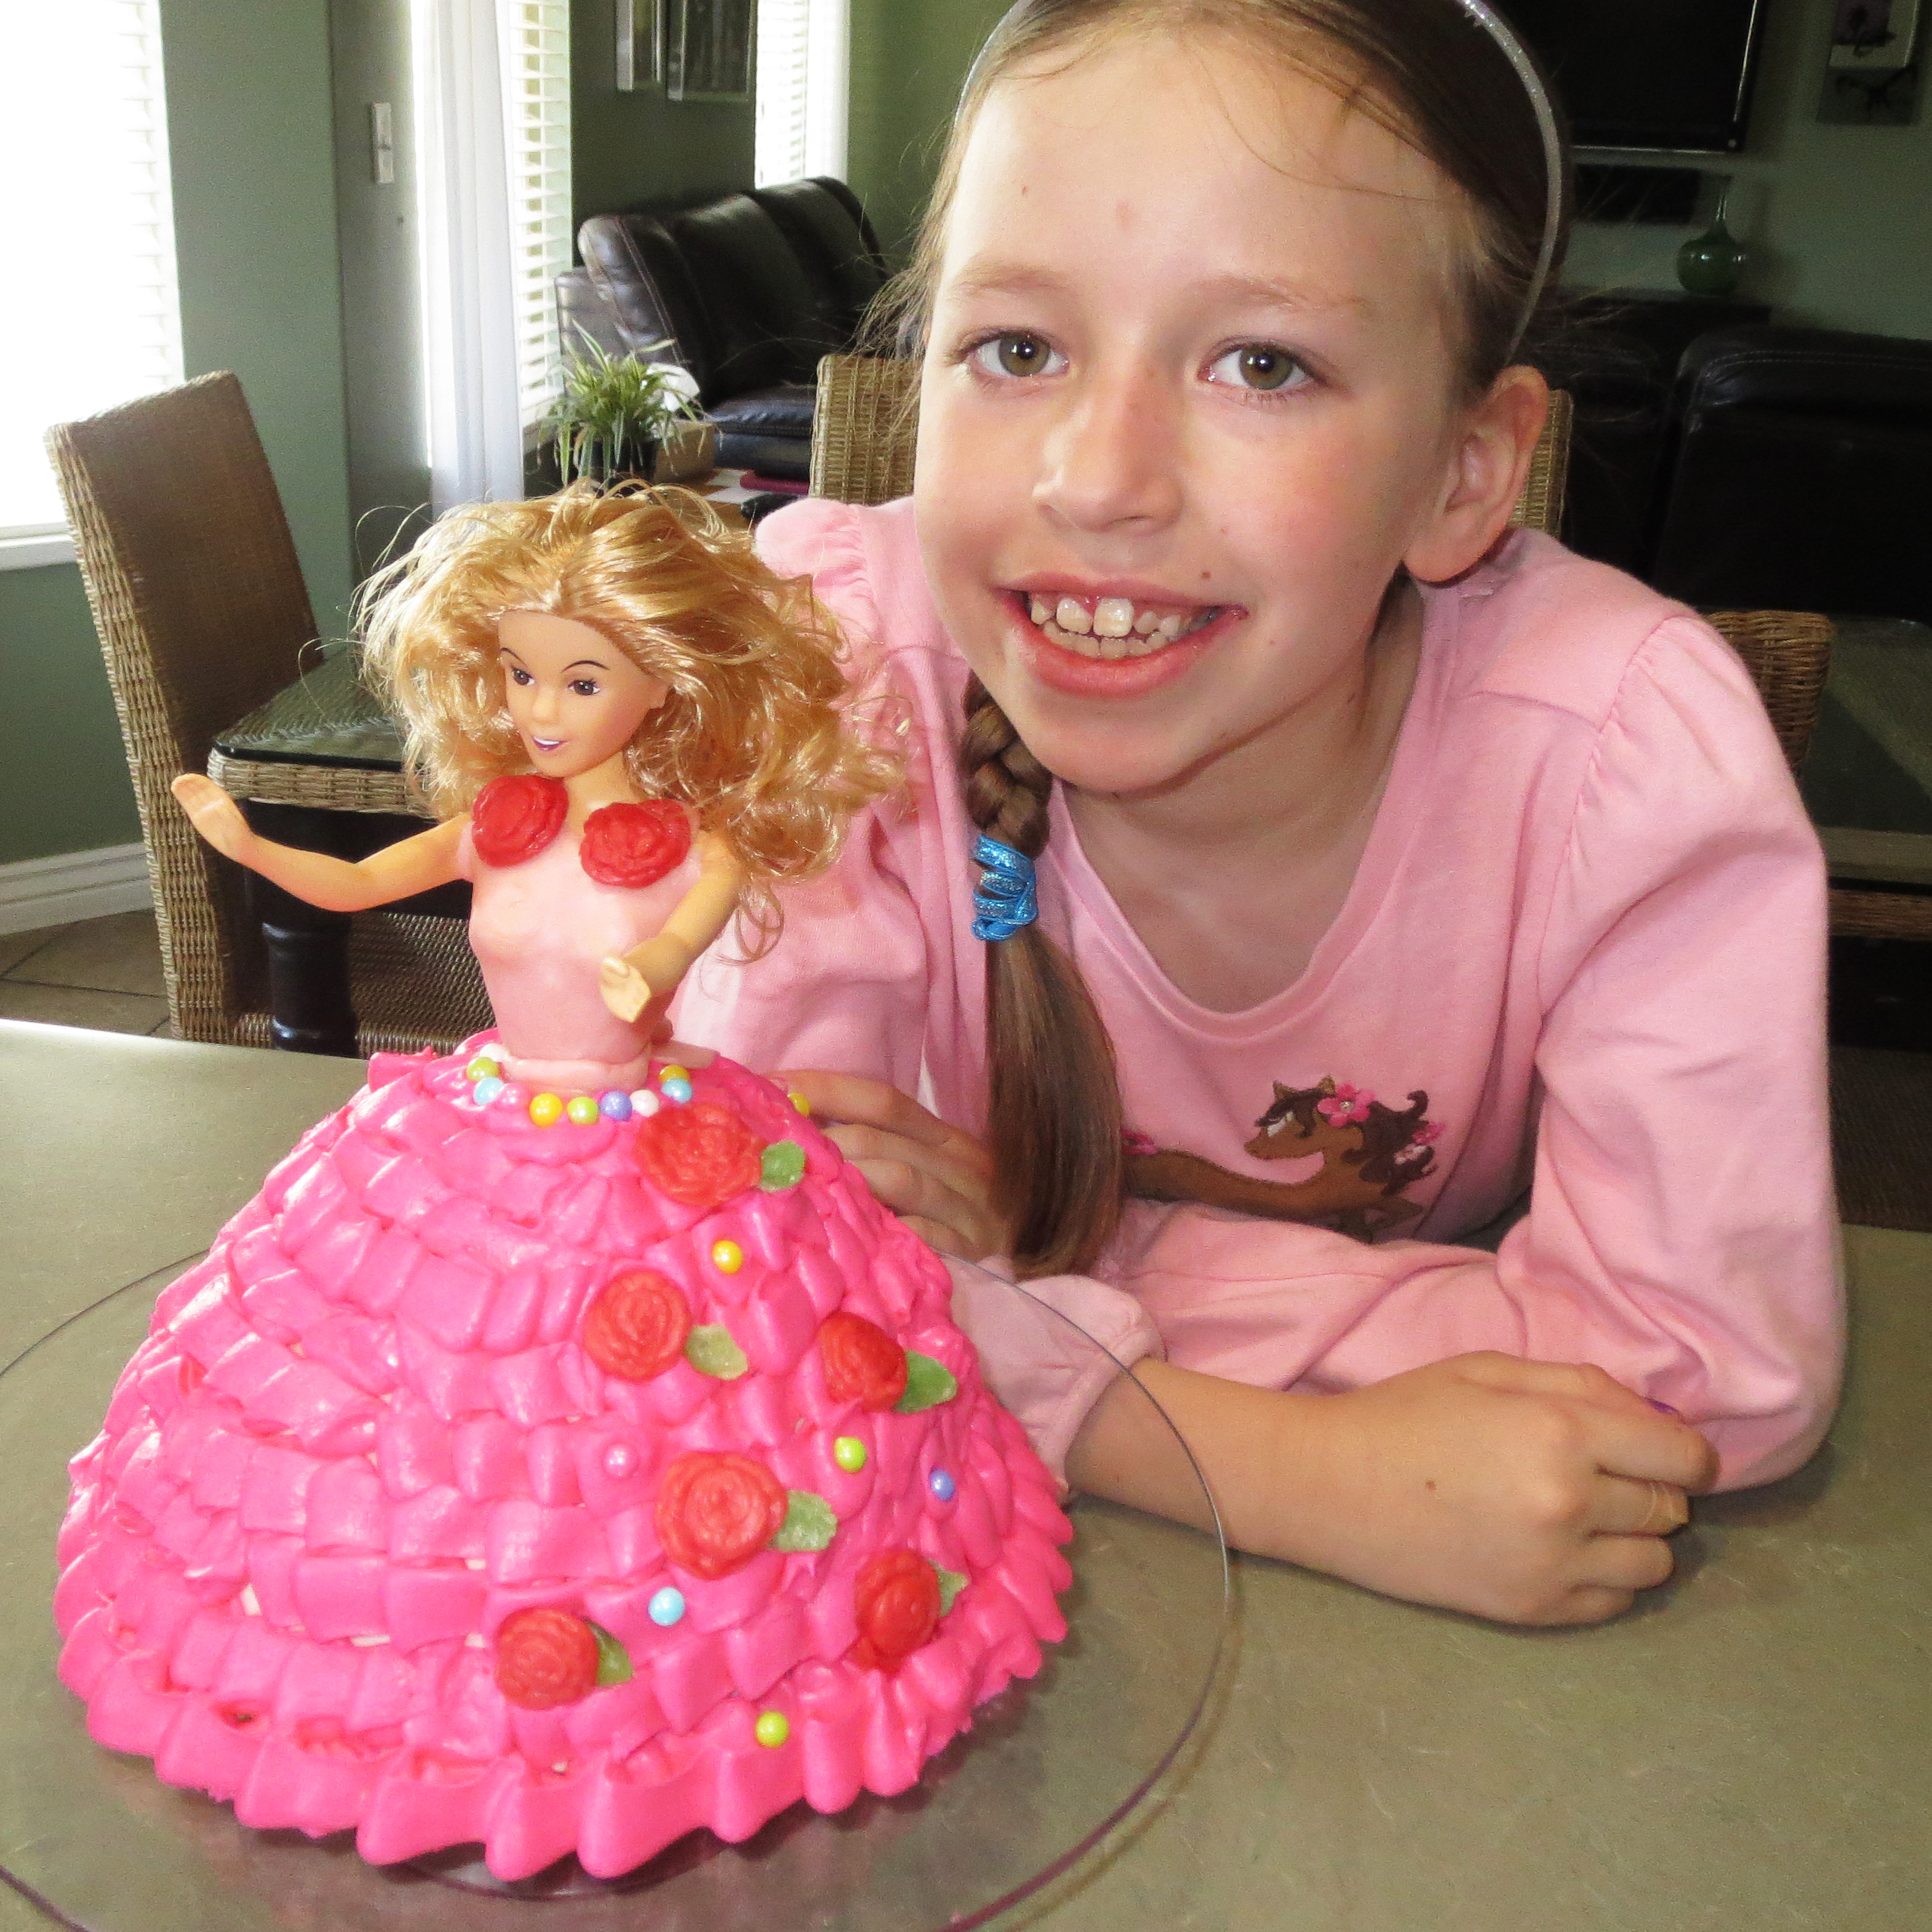
 My daughter desperately wanted a Barbie cake for her 9th birthday. And, when I say desperately, I mean DESPERATELY. I got the puppy dog eyes and everything! I thought, easy enough, I will just go to the grocery store and order one. Sure, that was easy enough all right, but the Barbie cake was $40 at the store! I couldn’t do it. I couldn’t spend more money on the cake than I did on most of the party… so I ventured out to find out how to make a Barbie cake on my own.
First, I borrowed a Wilton Cake Pan from my neighbor and this makes the skirt. I don’t think any of my kids will want a Barbie cake again, so I didn’t really want to buy a pan for myself for just one use. A friend of mine used the pampered chef batter bowl for making a Barbie cake and said it came out well. I can’t say since I didn’t use it. But, it is another option. I liked how the Wilton pan had a tube down the middle so the cake wouldn’t be raw in the middle and cooked along the sides.
Then I did some research online about how to actually make and decorate the cake. This is what I found.
Here’s what you will need to make the cake:
- Cake pan (mentioned above). If you buy the Wilton pan, it will come with a Barbie doll cake topper.
- 1 box cake mix (we used white).
- 1/4 tub of premade frosting from the grocery store (will be hidden under the decorations) – same color as cake
- 1 box of buttercream frosting. You are welcome to make your own homemade recipe for icing if you want to save the money. Buttercream will hold it’s shape.
- Wilton tip #123 or #61 will give a smaller detail. It’s up to you. I used the #123 on my cake, but I have both tips.
- A plastic clay mold to make the flower embellishments (optional but suggested)
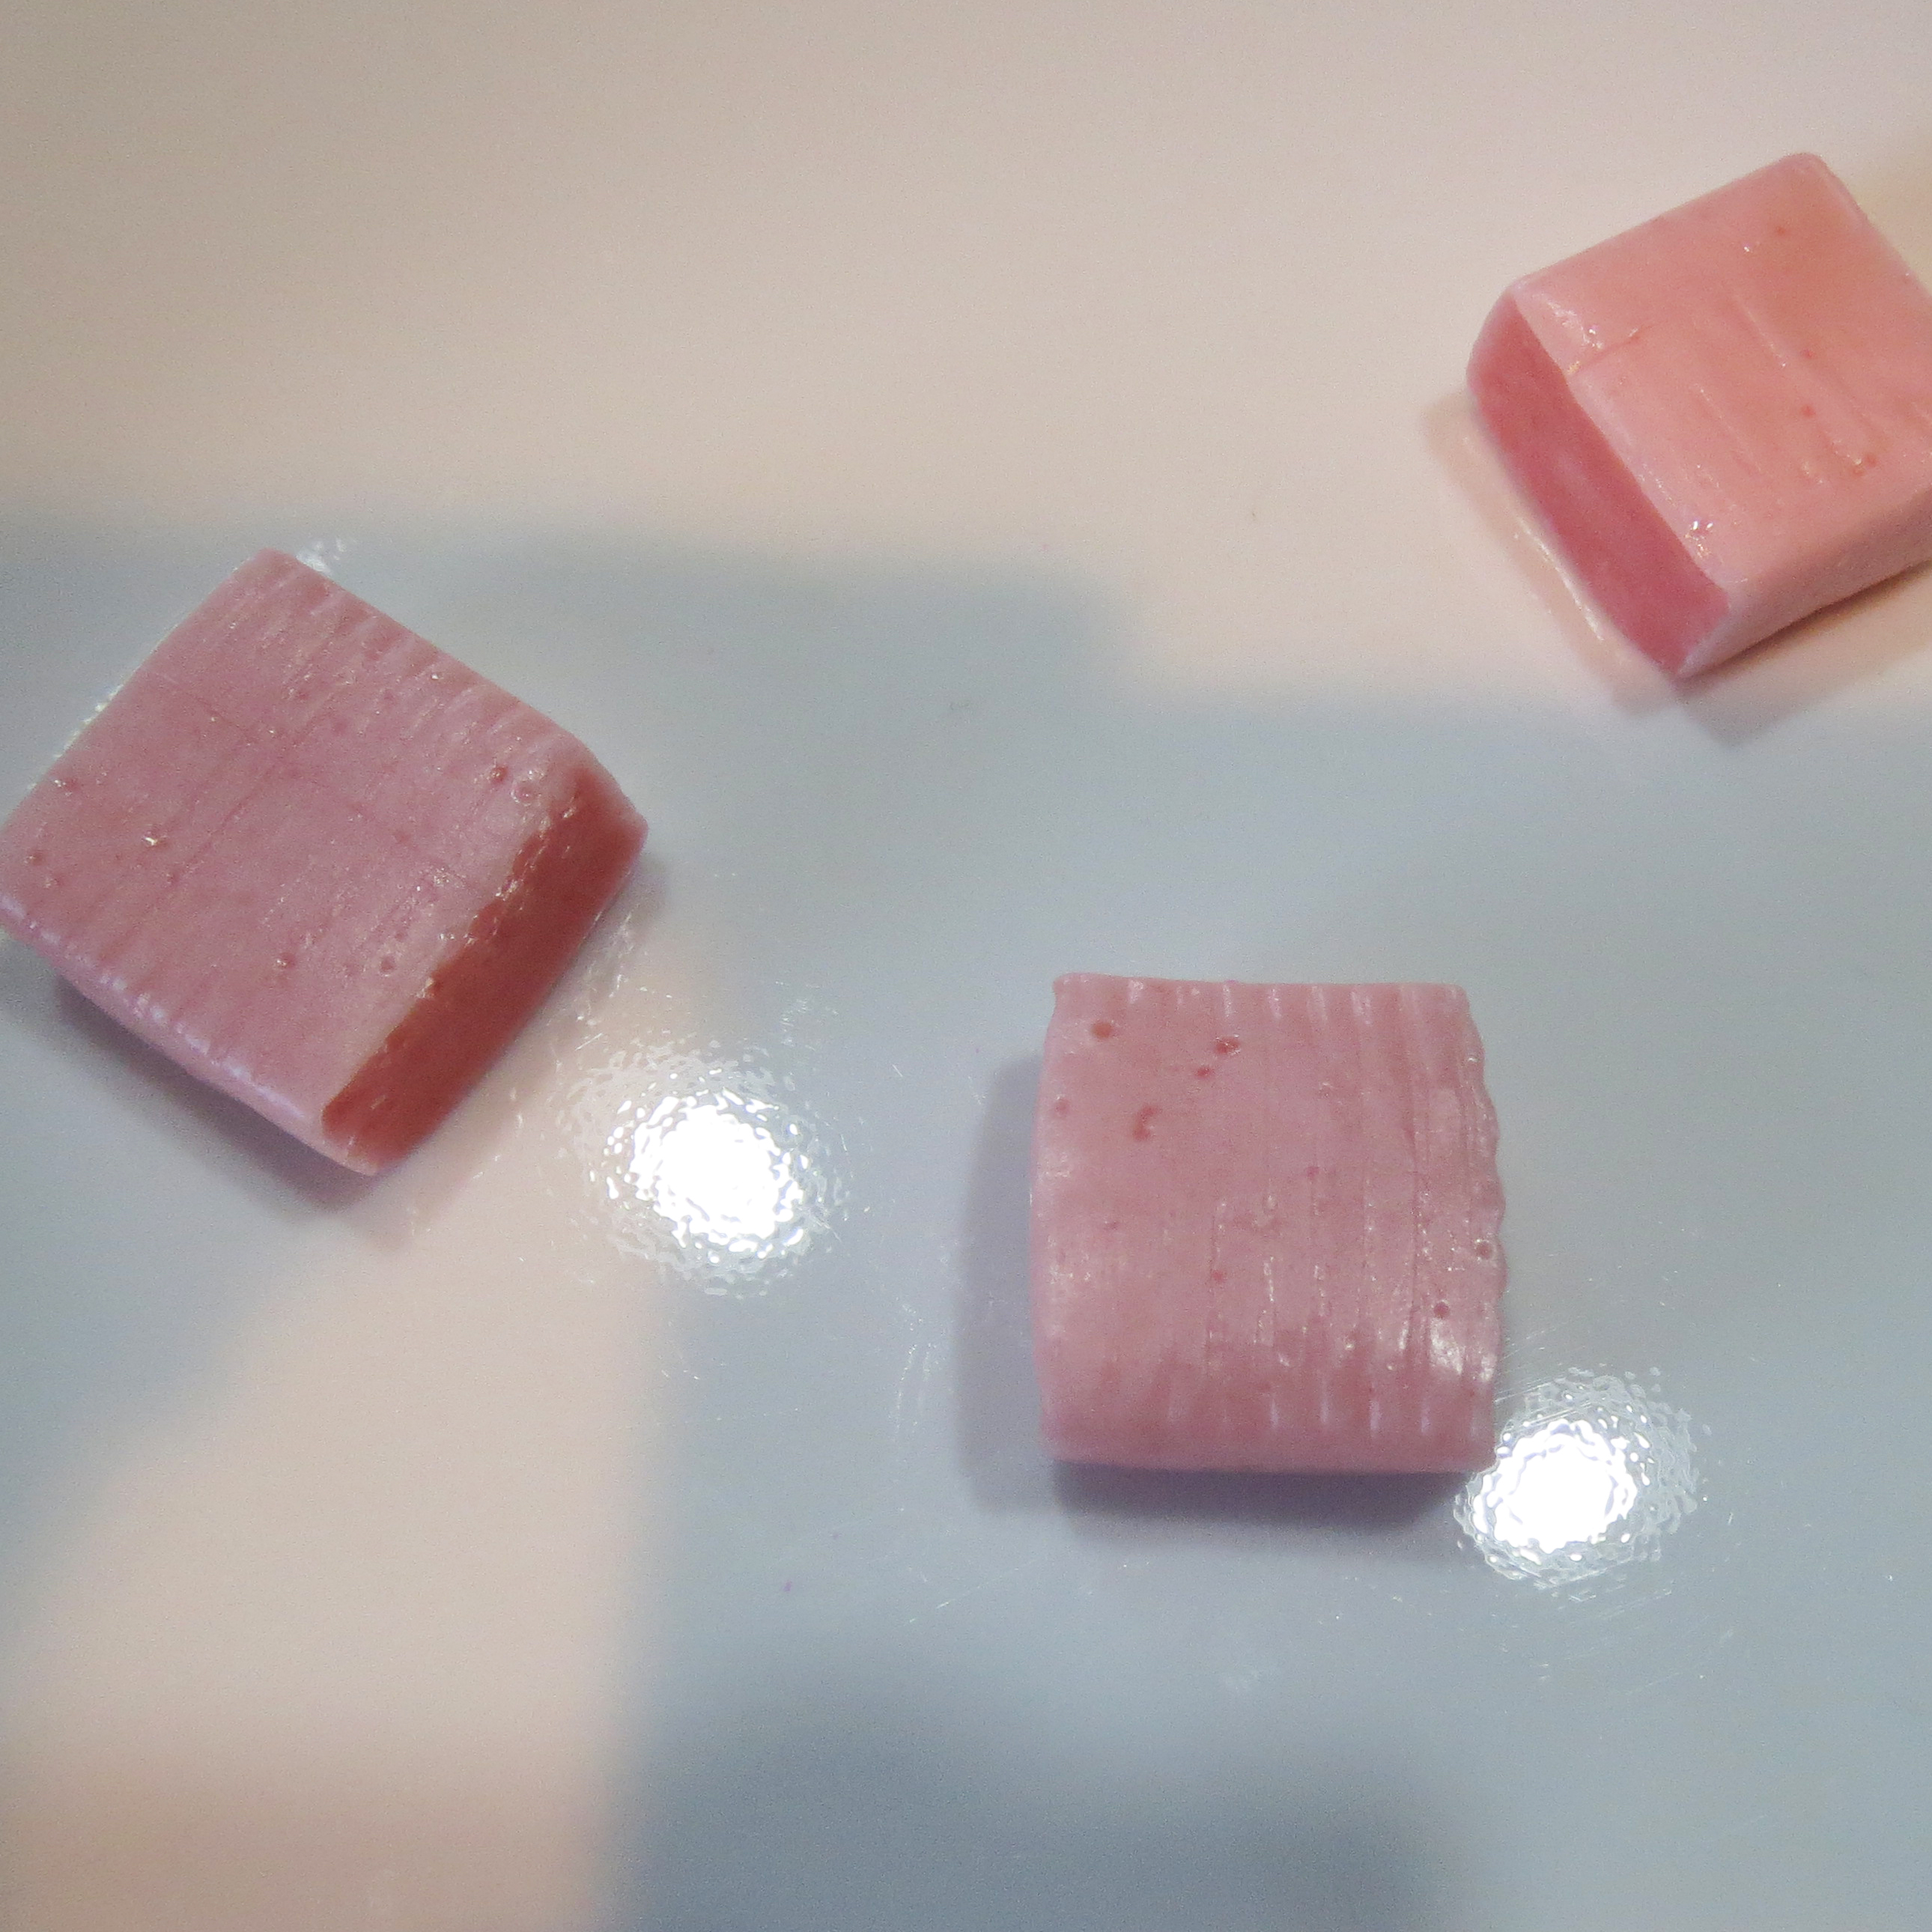
- Starburst candy in the colors you want for the flowers. We found a special pink blend at Target.
- Green gummy candies for the leaves. We used sugared fruit slices from Target
- Pearl Sprinkles (optional). They come in various colors.
- Food coloring for frosting – I used this color.
- Parchment paper
- Frosting bags (or use a ziploc)
- heart and bow cookie cutters (bow cookie cutter is very optional)
I know this sounds like a lot of stuff, but you may already have many of these things on hand, or you can buy many of them at Hobby Lobby with the 40% off one item coupon. I already had the tips, frosting bags, food coloring, the frostings, the cake mix, and the pan, so it was only around $15 to make this. Maybe less. It was so fun to make and my child and I made it together for some good quality time. It also looked a lot prettier and more customized than the one at the grocery store. It tasted delicious too!
Instructions
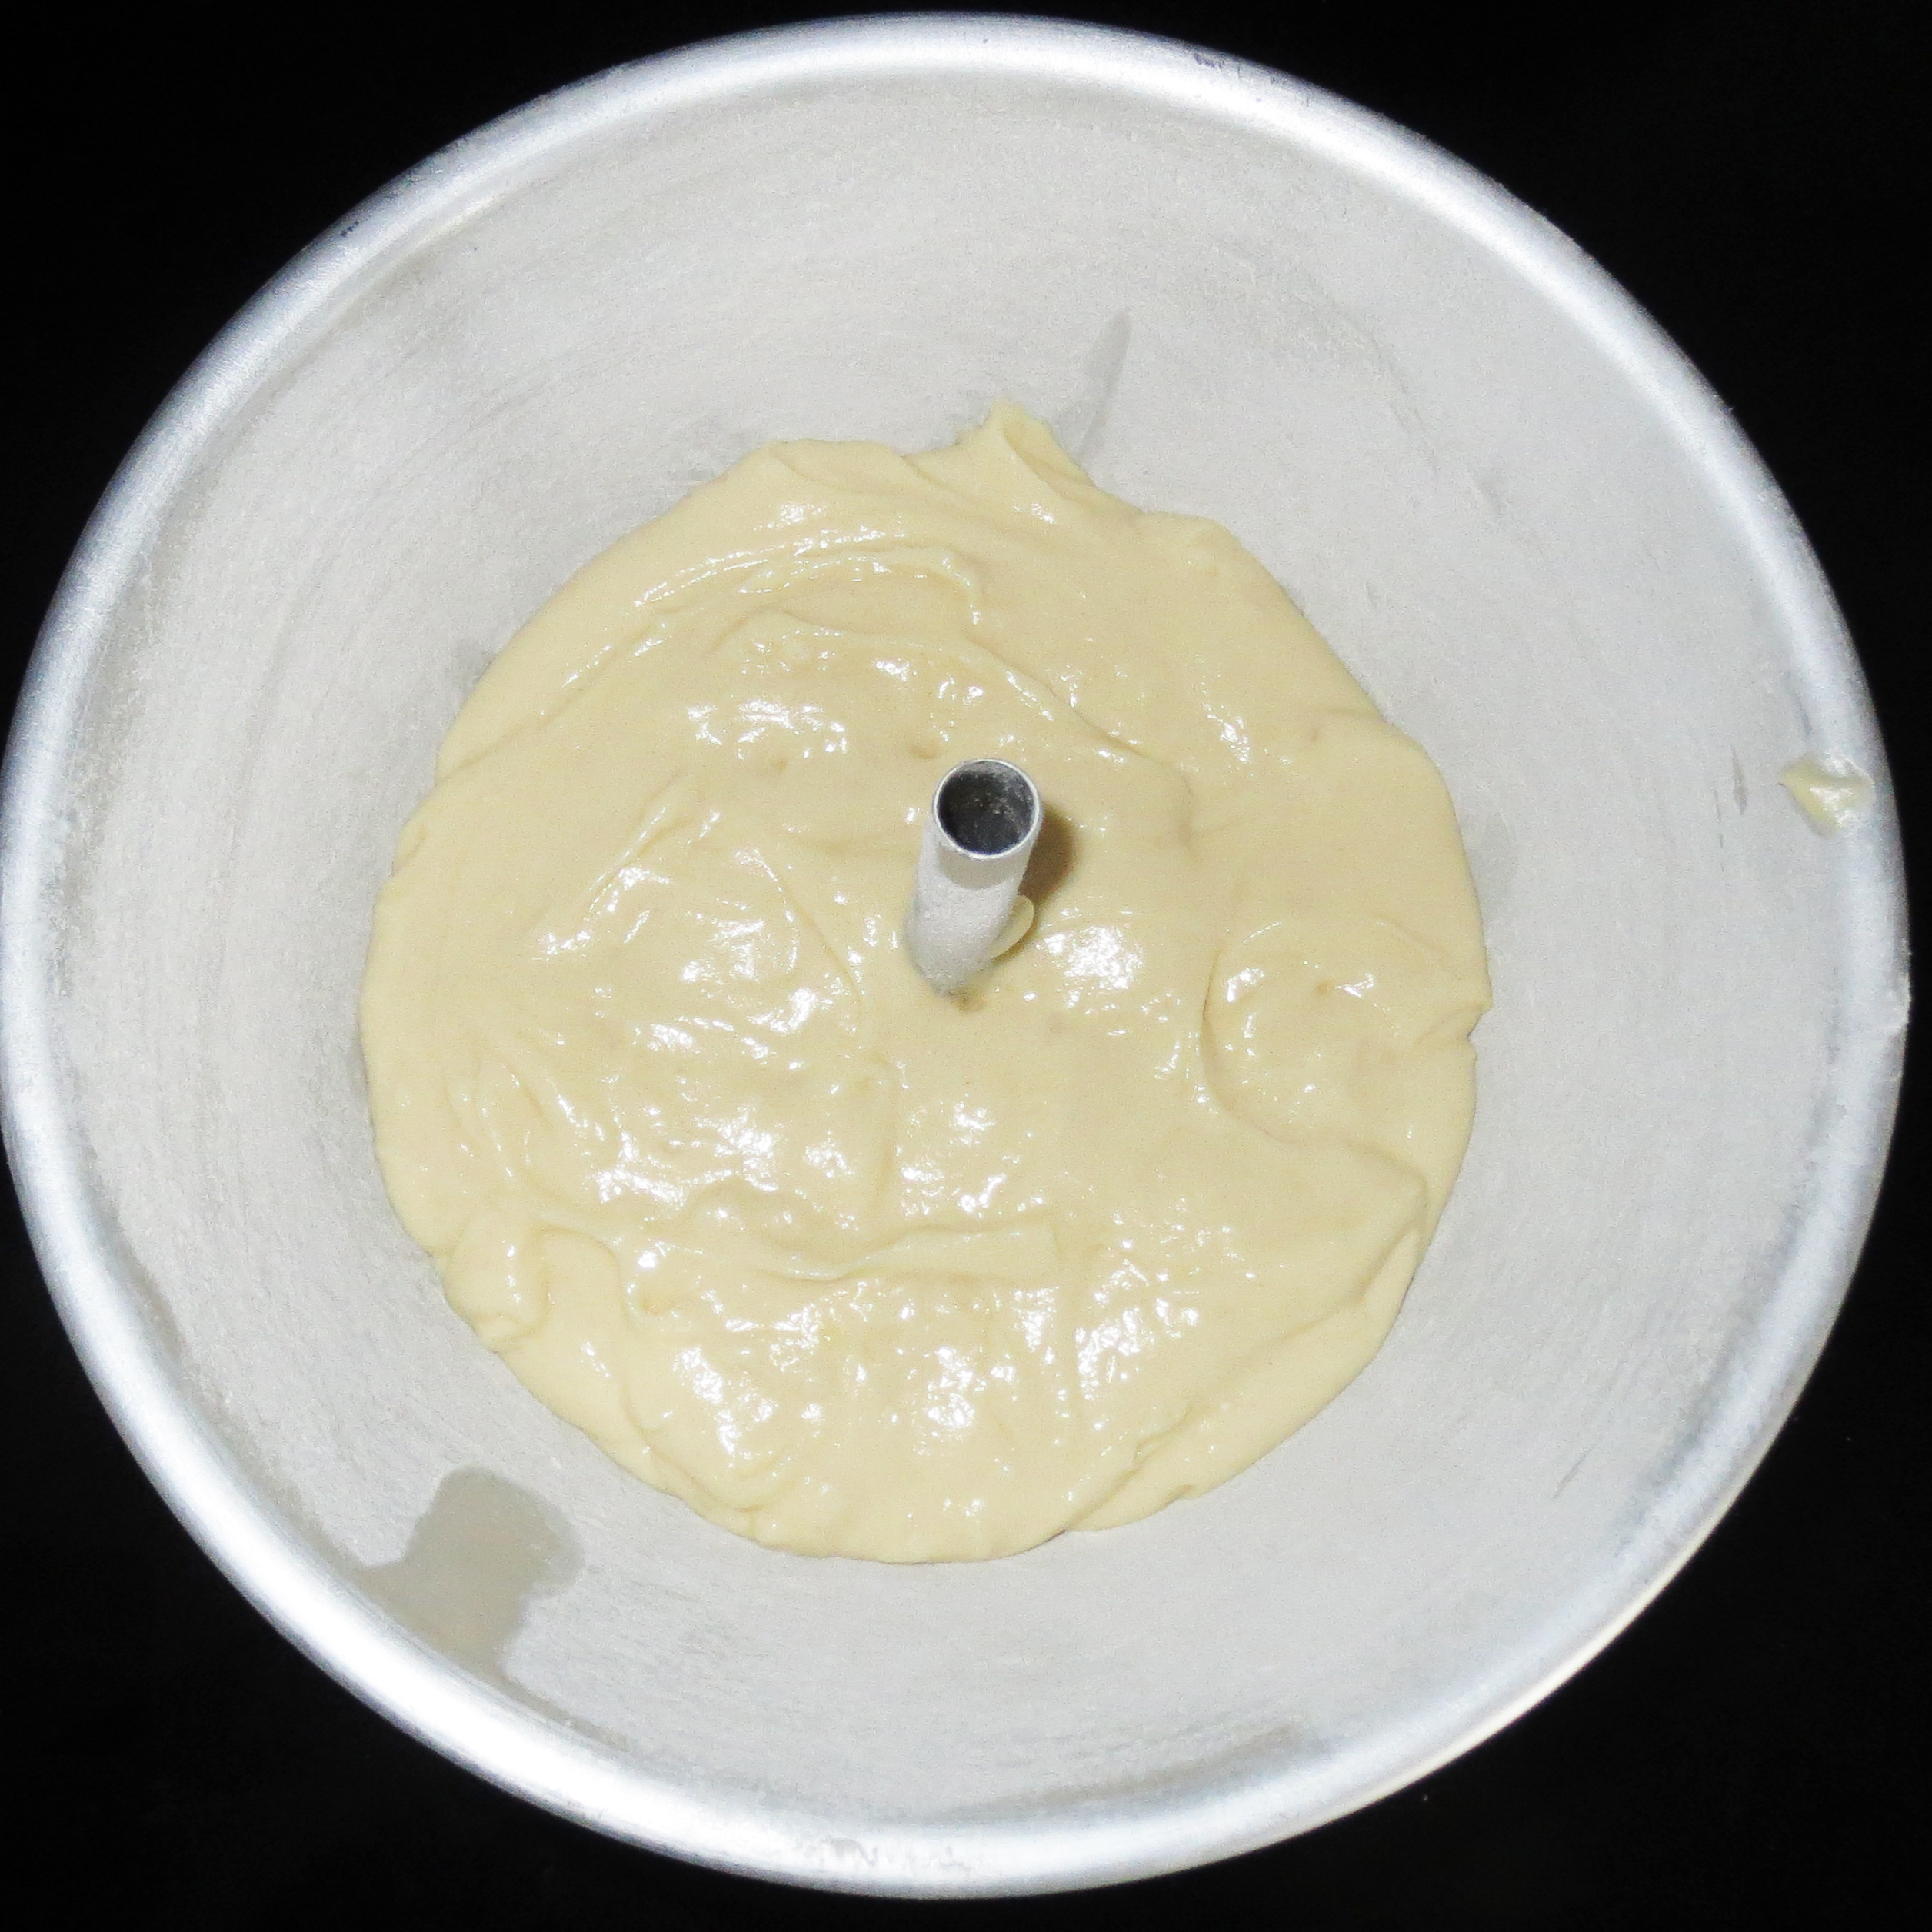
I made the cake in the pan a week before the party and then froze it in a zliploc freezer bag. Use 1 entire prepackaged cake and mix according to package directions. Butter and flour the pan prior to putting the cake mix in. I baked mine for about an hour.
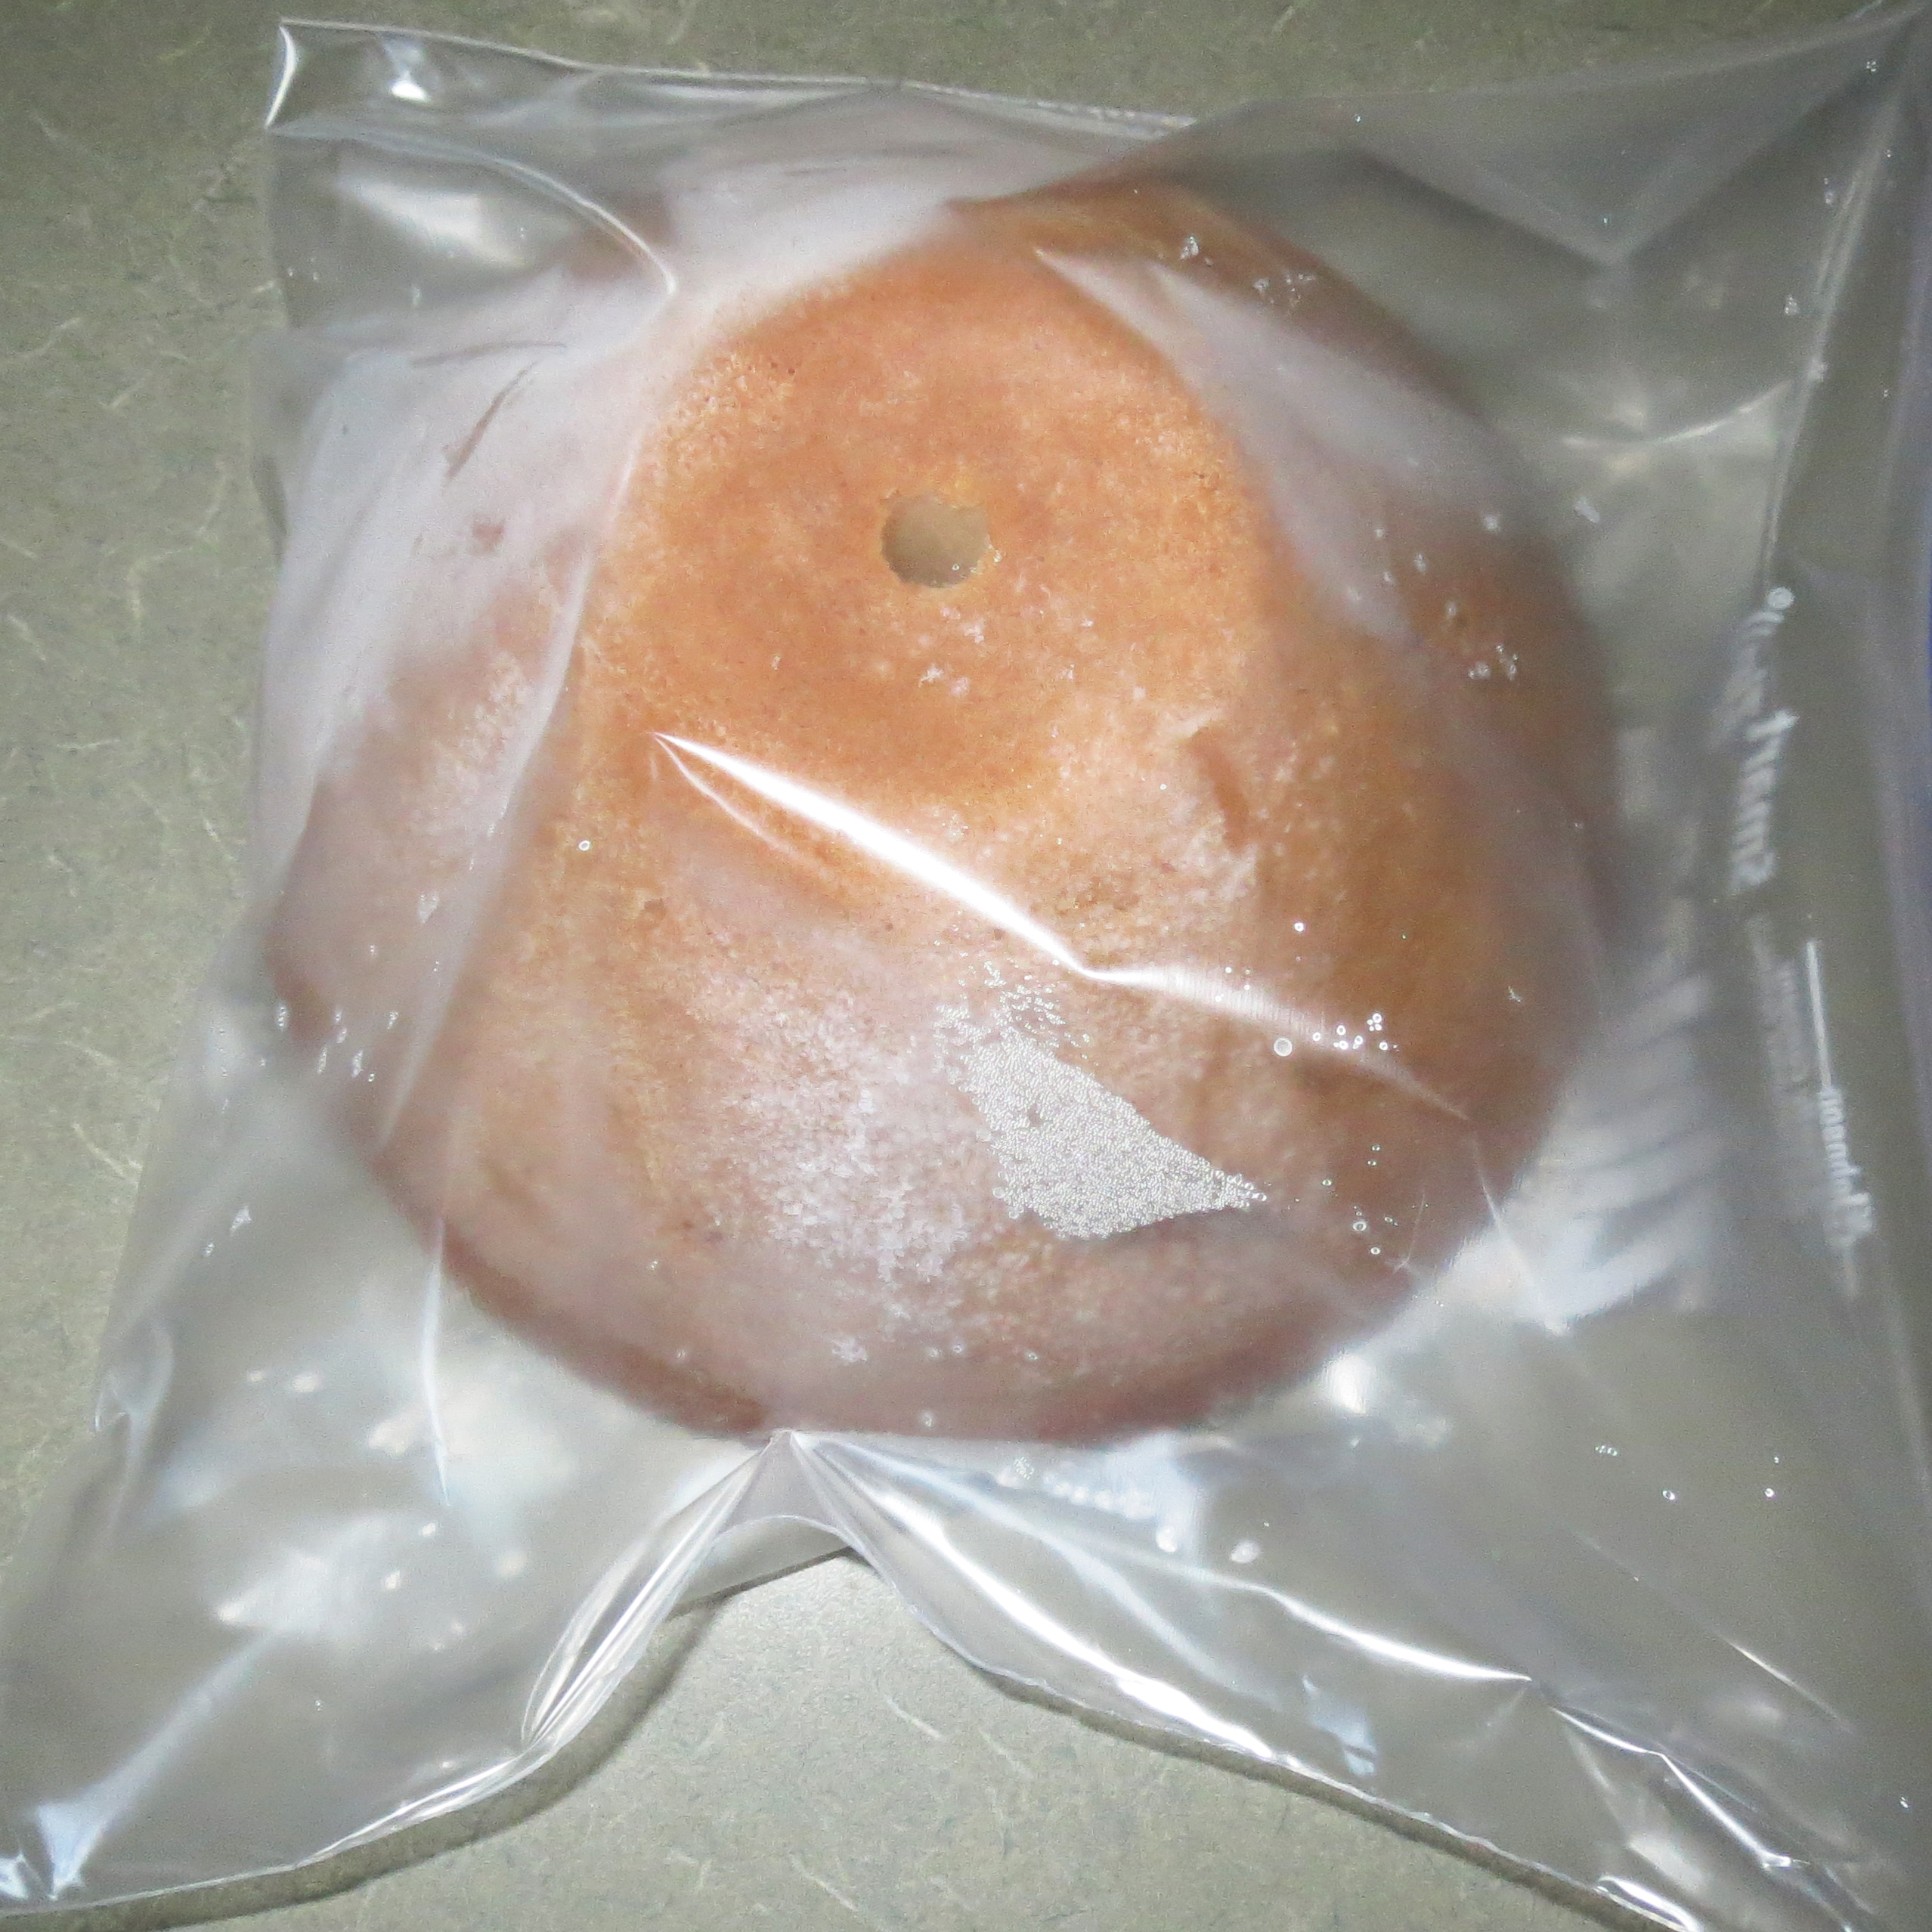
TIP: Don’t defrost the cake before decorating! Cakes are much easier to frost when they are frozen.
Take the cake out of the freezer bag and put it on your revolving cake plate. You really do need a revolving one for decorating this. I liked the one linked to above because the base comes off for easy storage or if you just want to use if for a basic cake or serving plate.
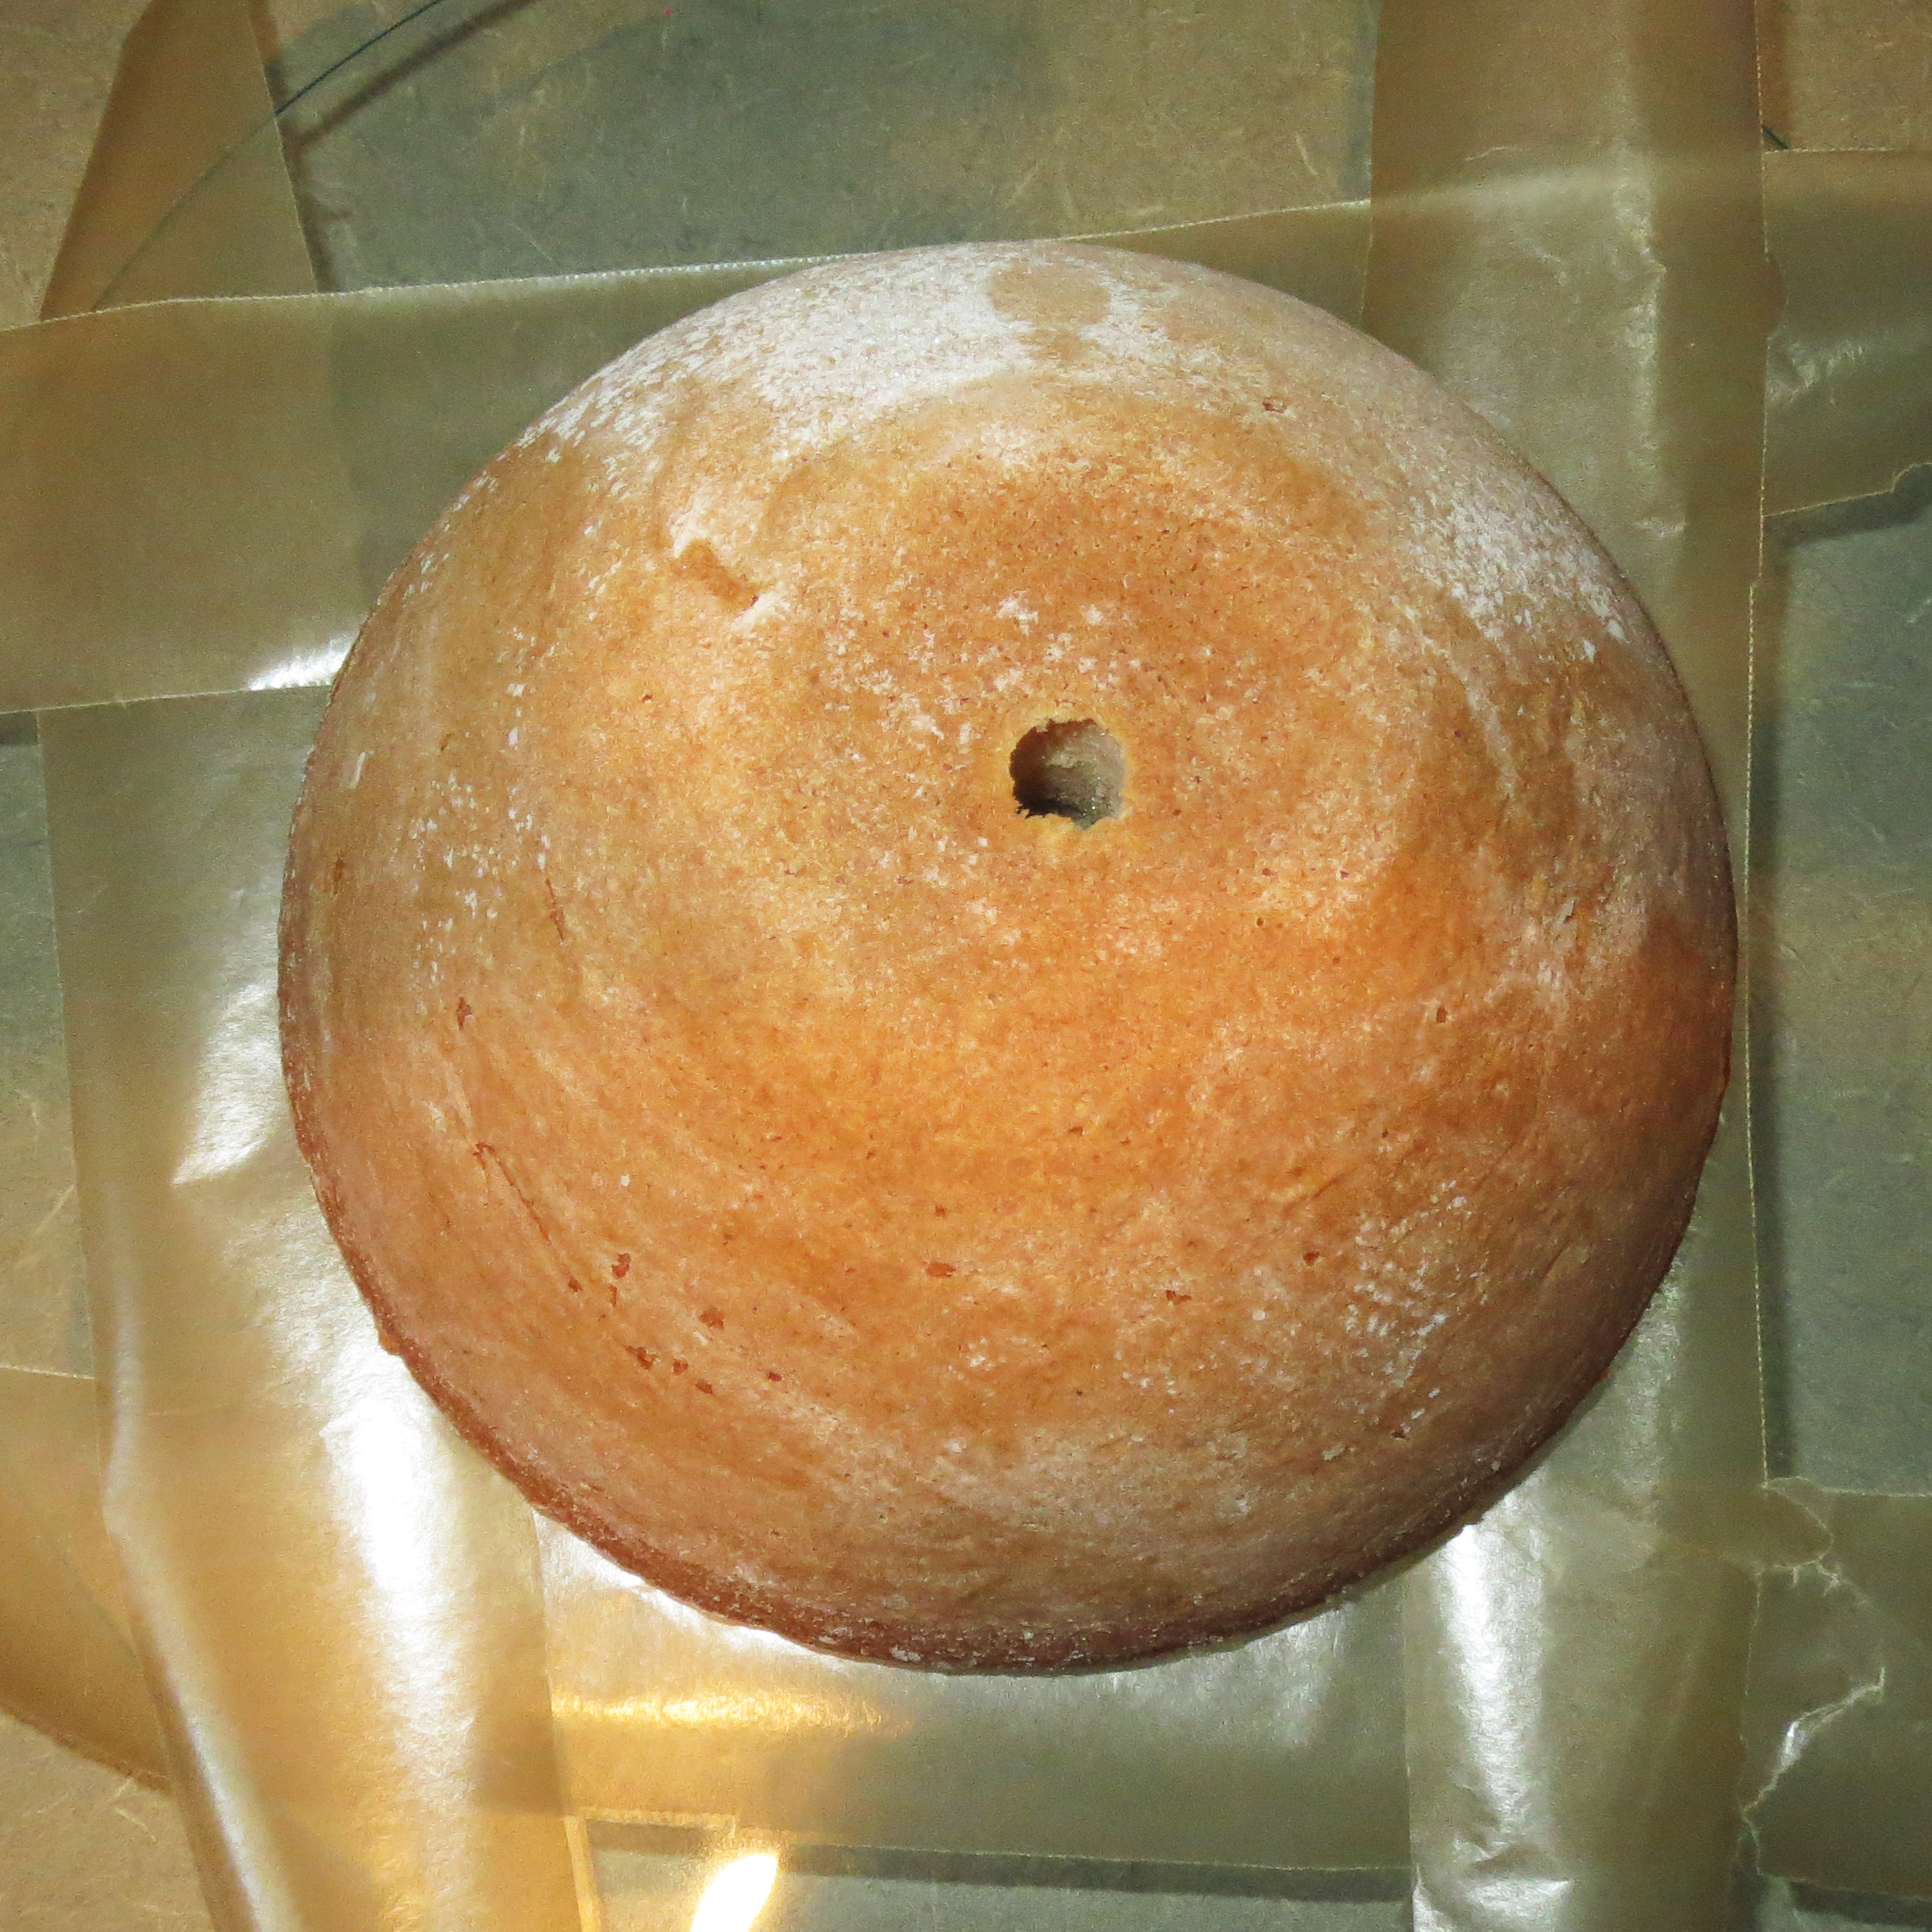
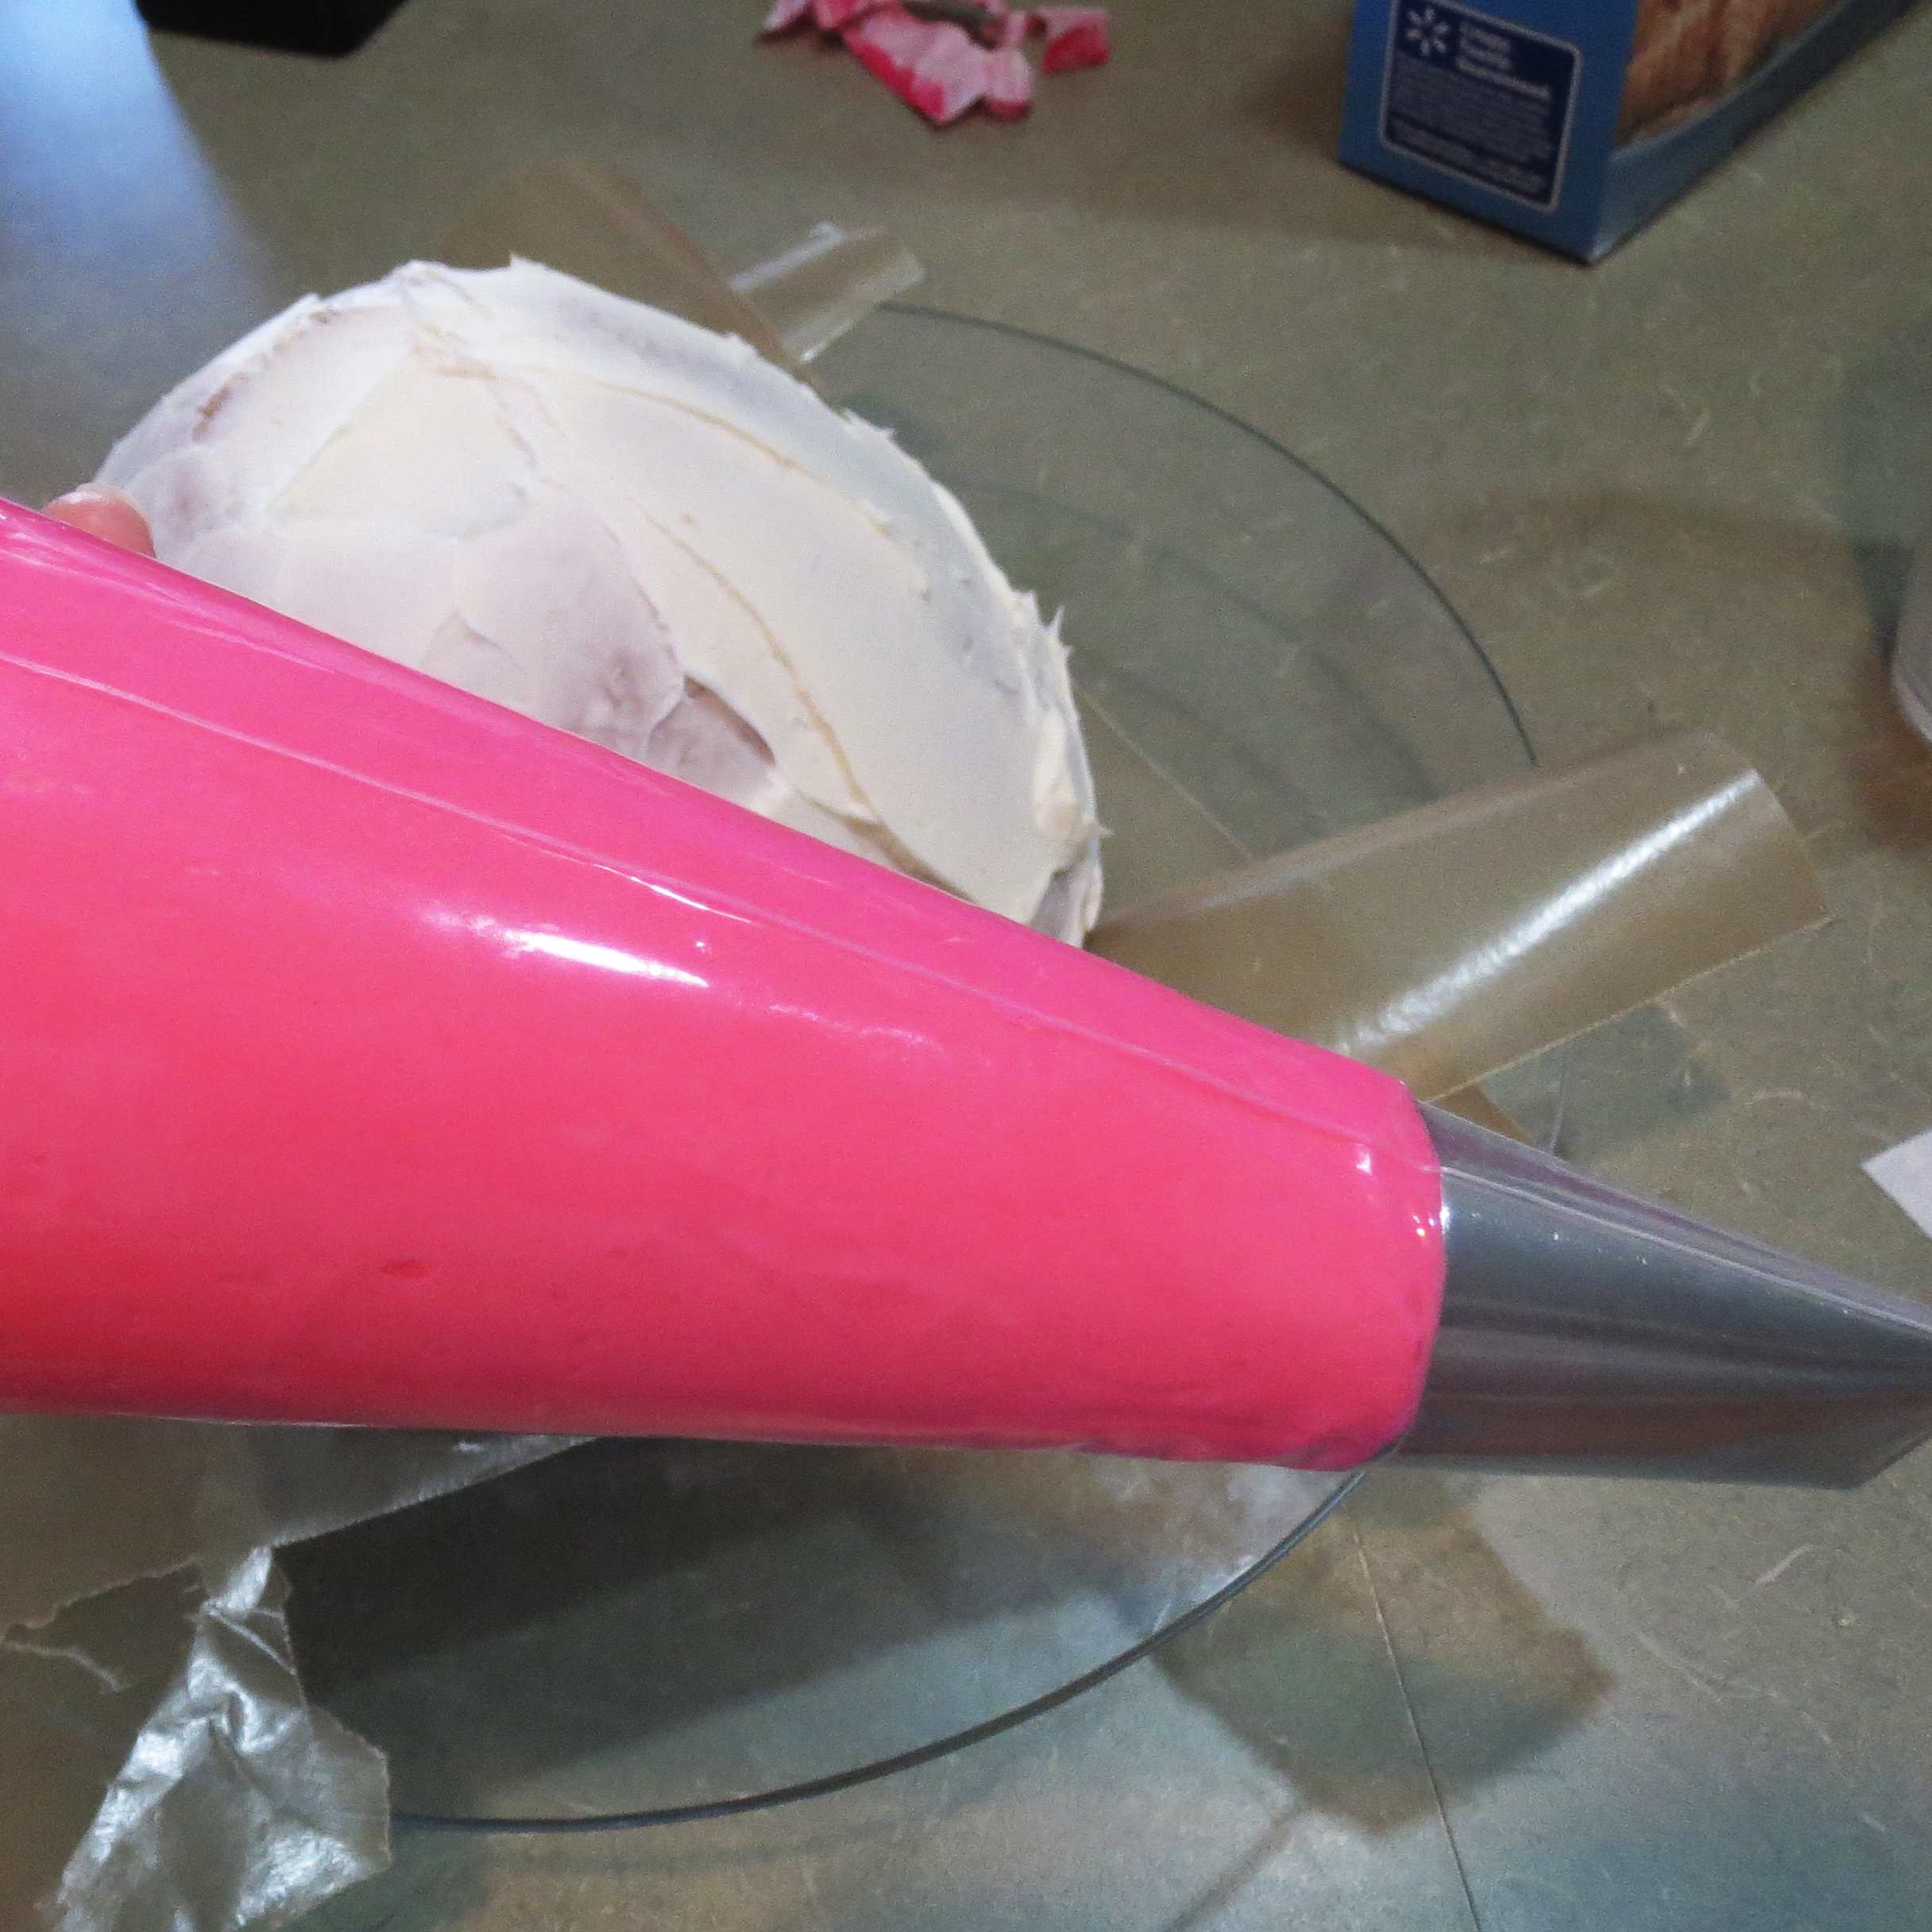
Place 4 small and long pieces of parchment along the edges of cake to line the cake plate and keep it free of frosting.
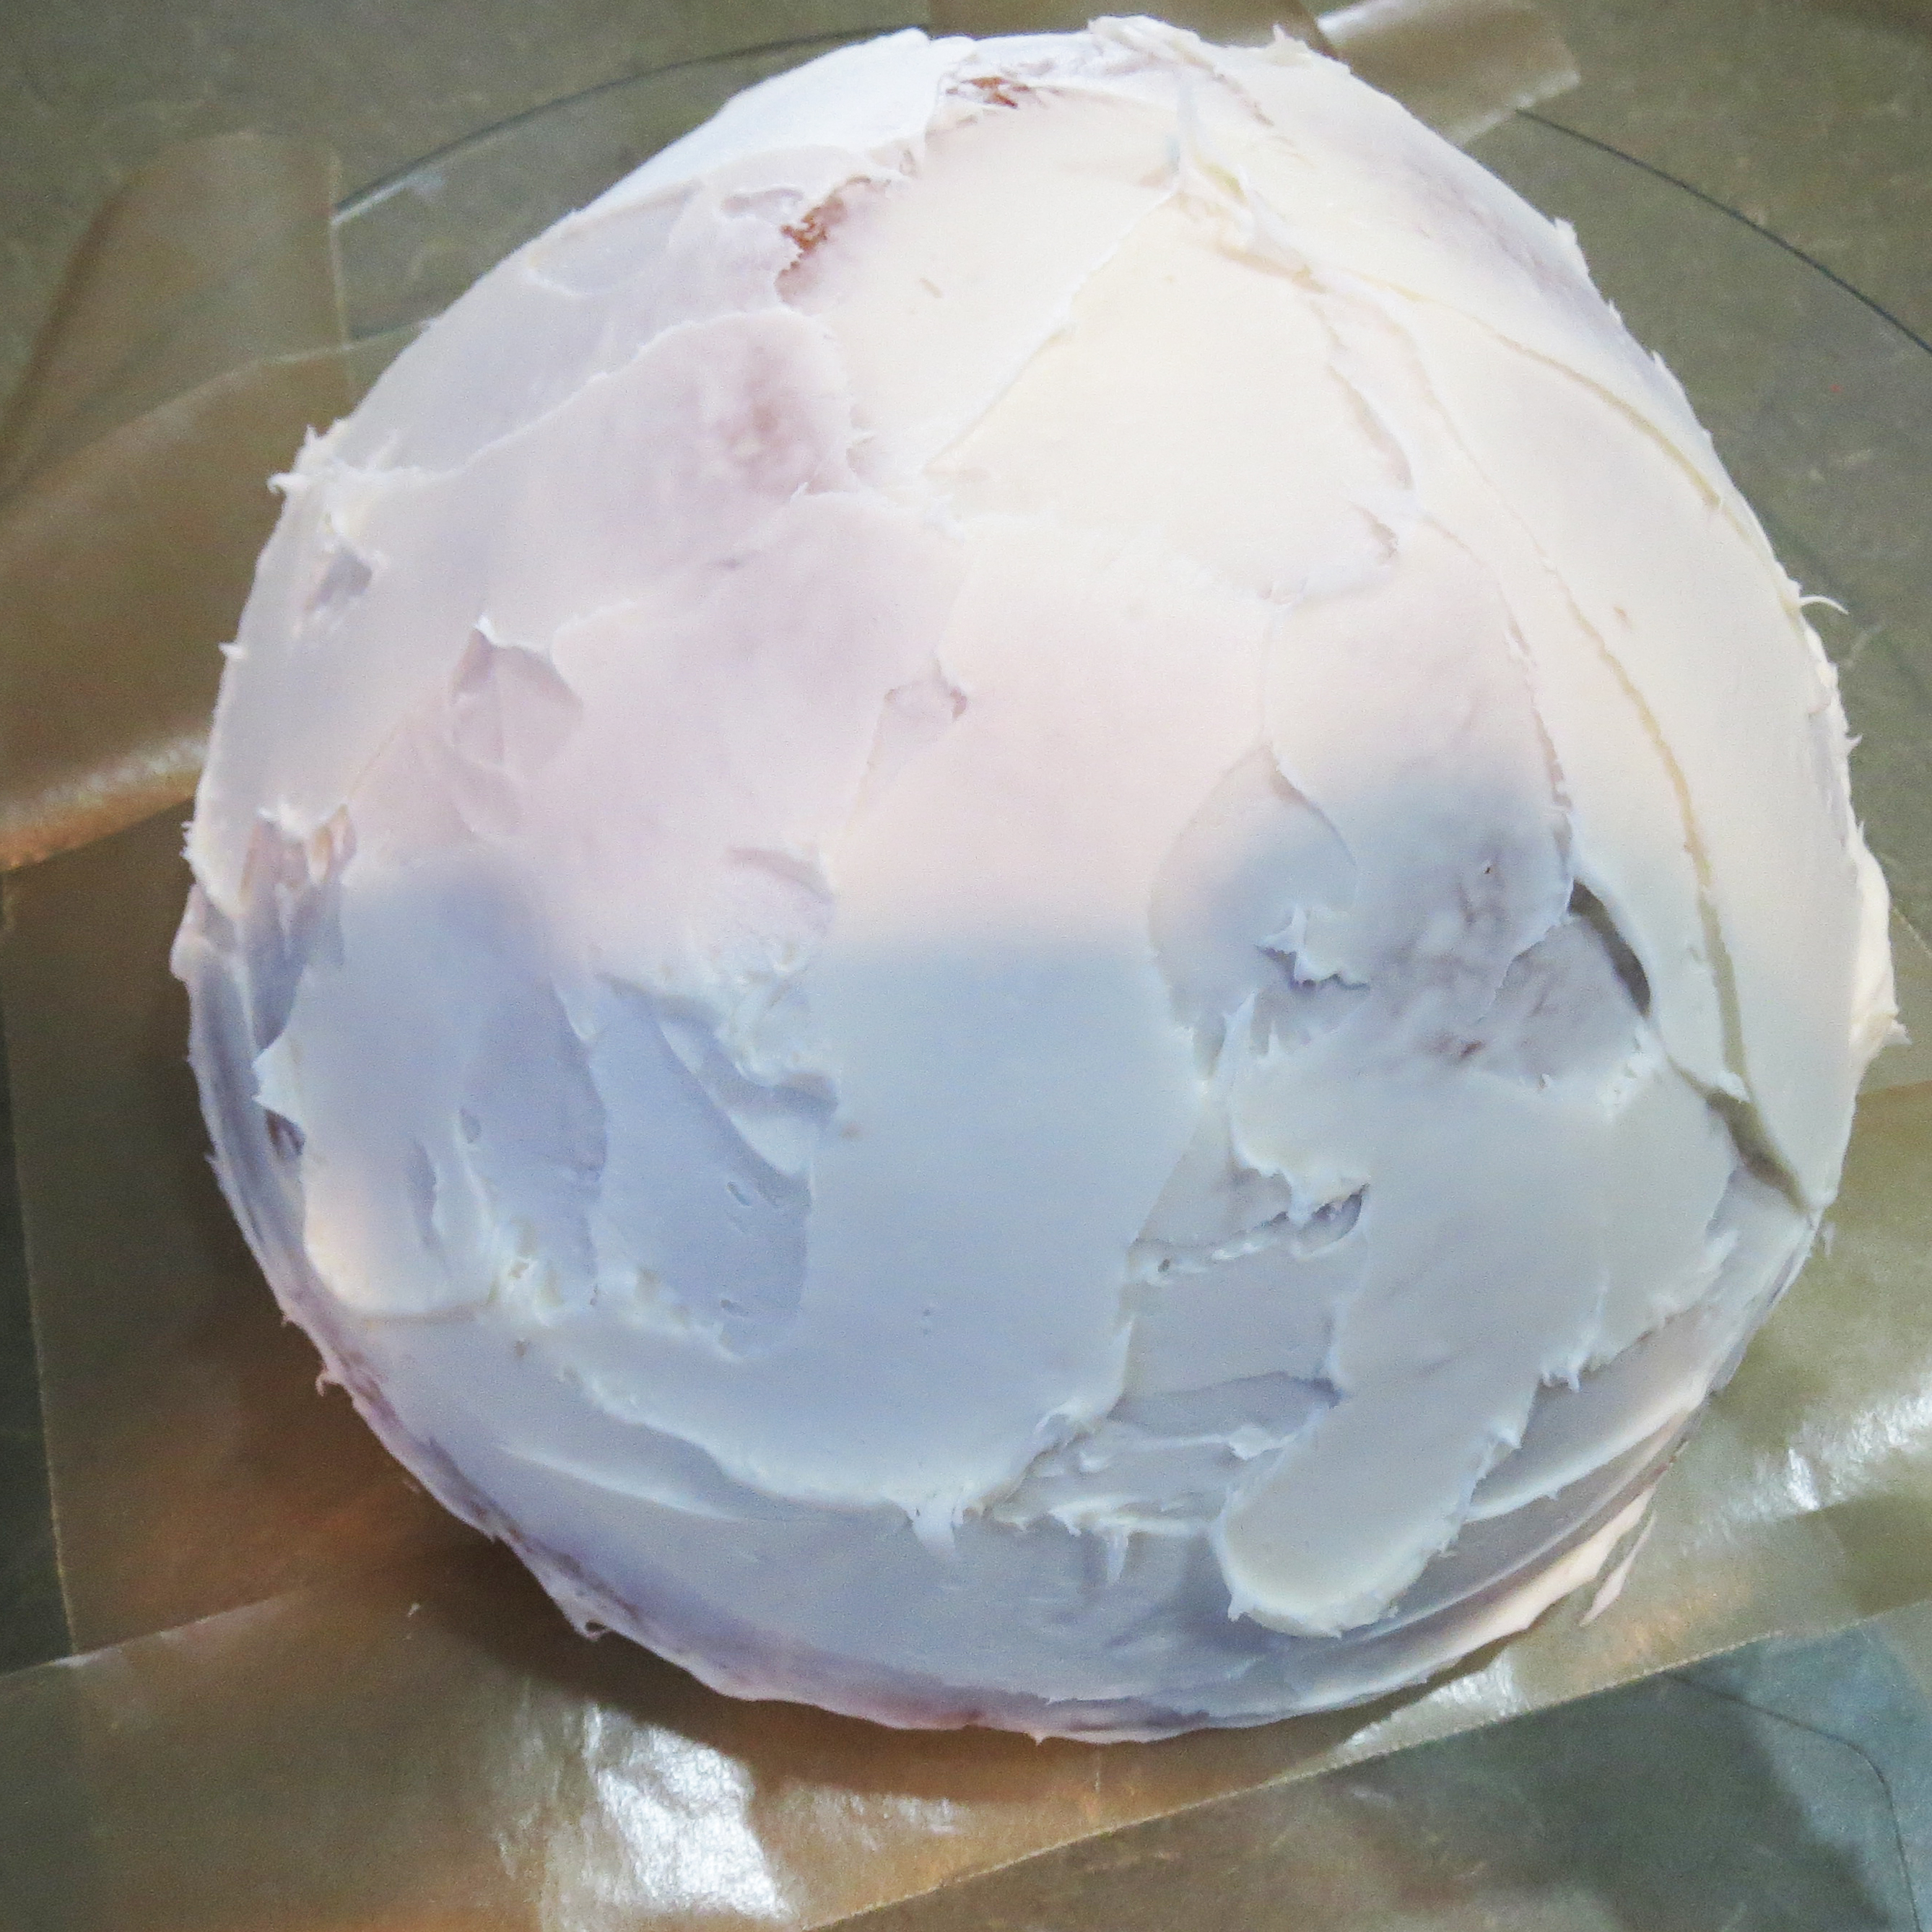
Put a thin coat of pre-made frosting (I used a tub from the grocery store) all around the cake using an offset spatula or knife. It doesn’t have to be pretty. This will not show after the cake is decorated. This will make your pretty ruffles stick on and make it so the cake doesn’t show through.
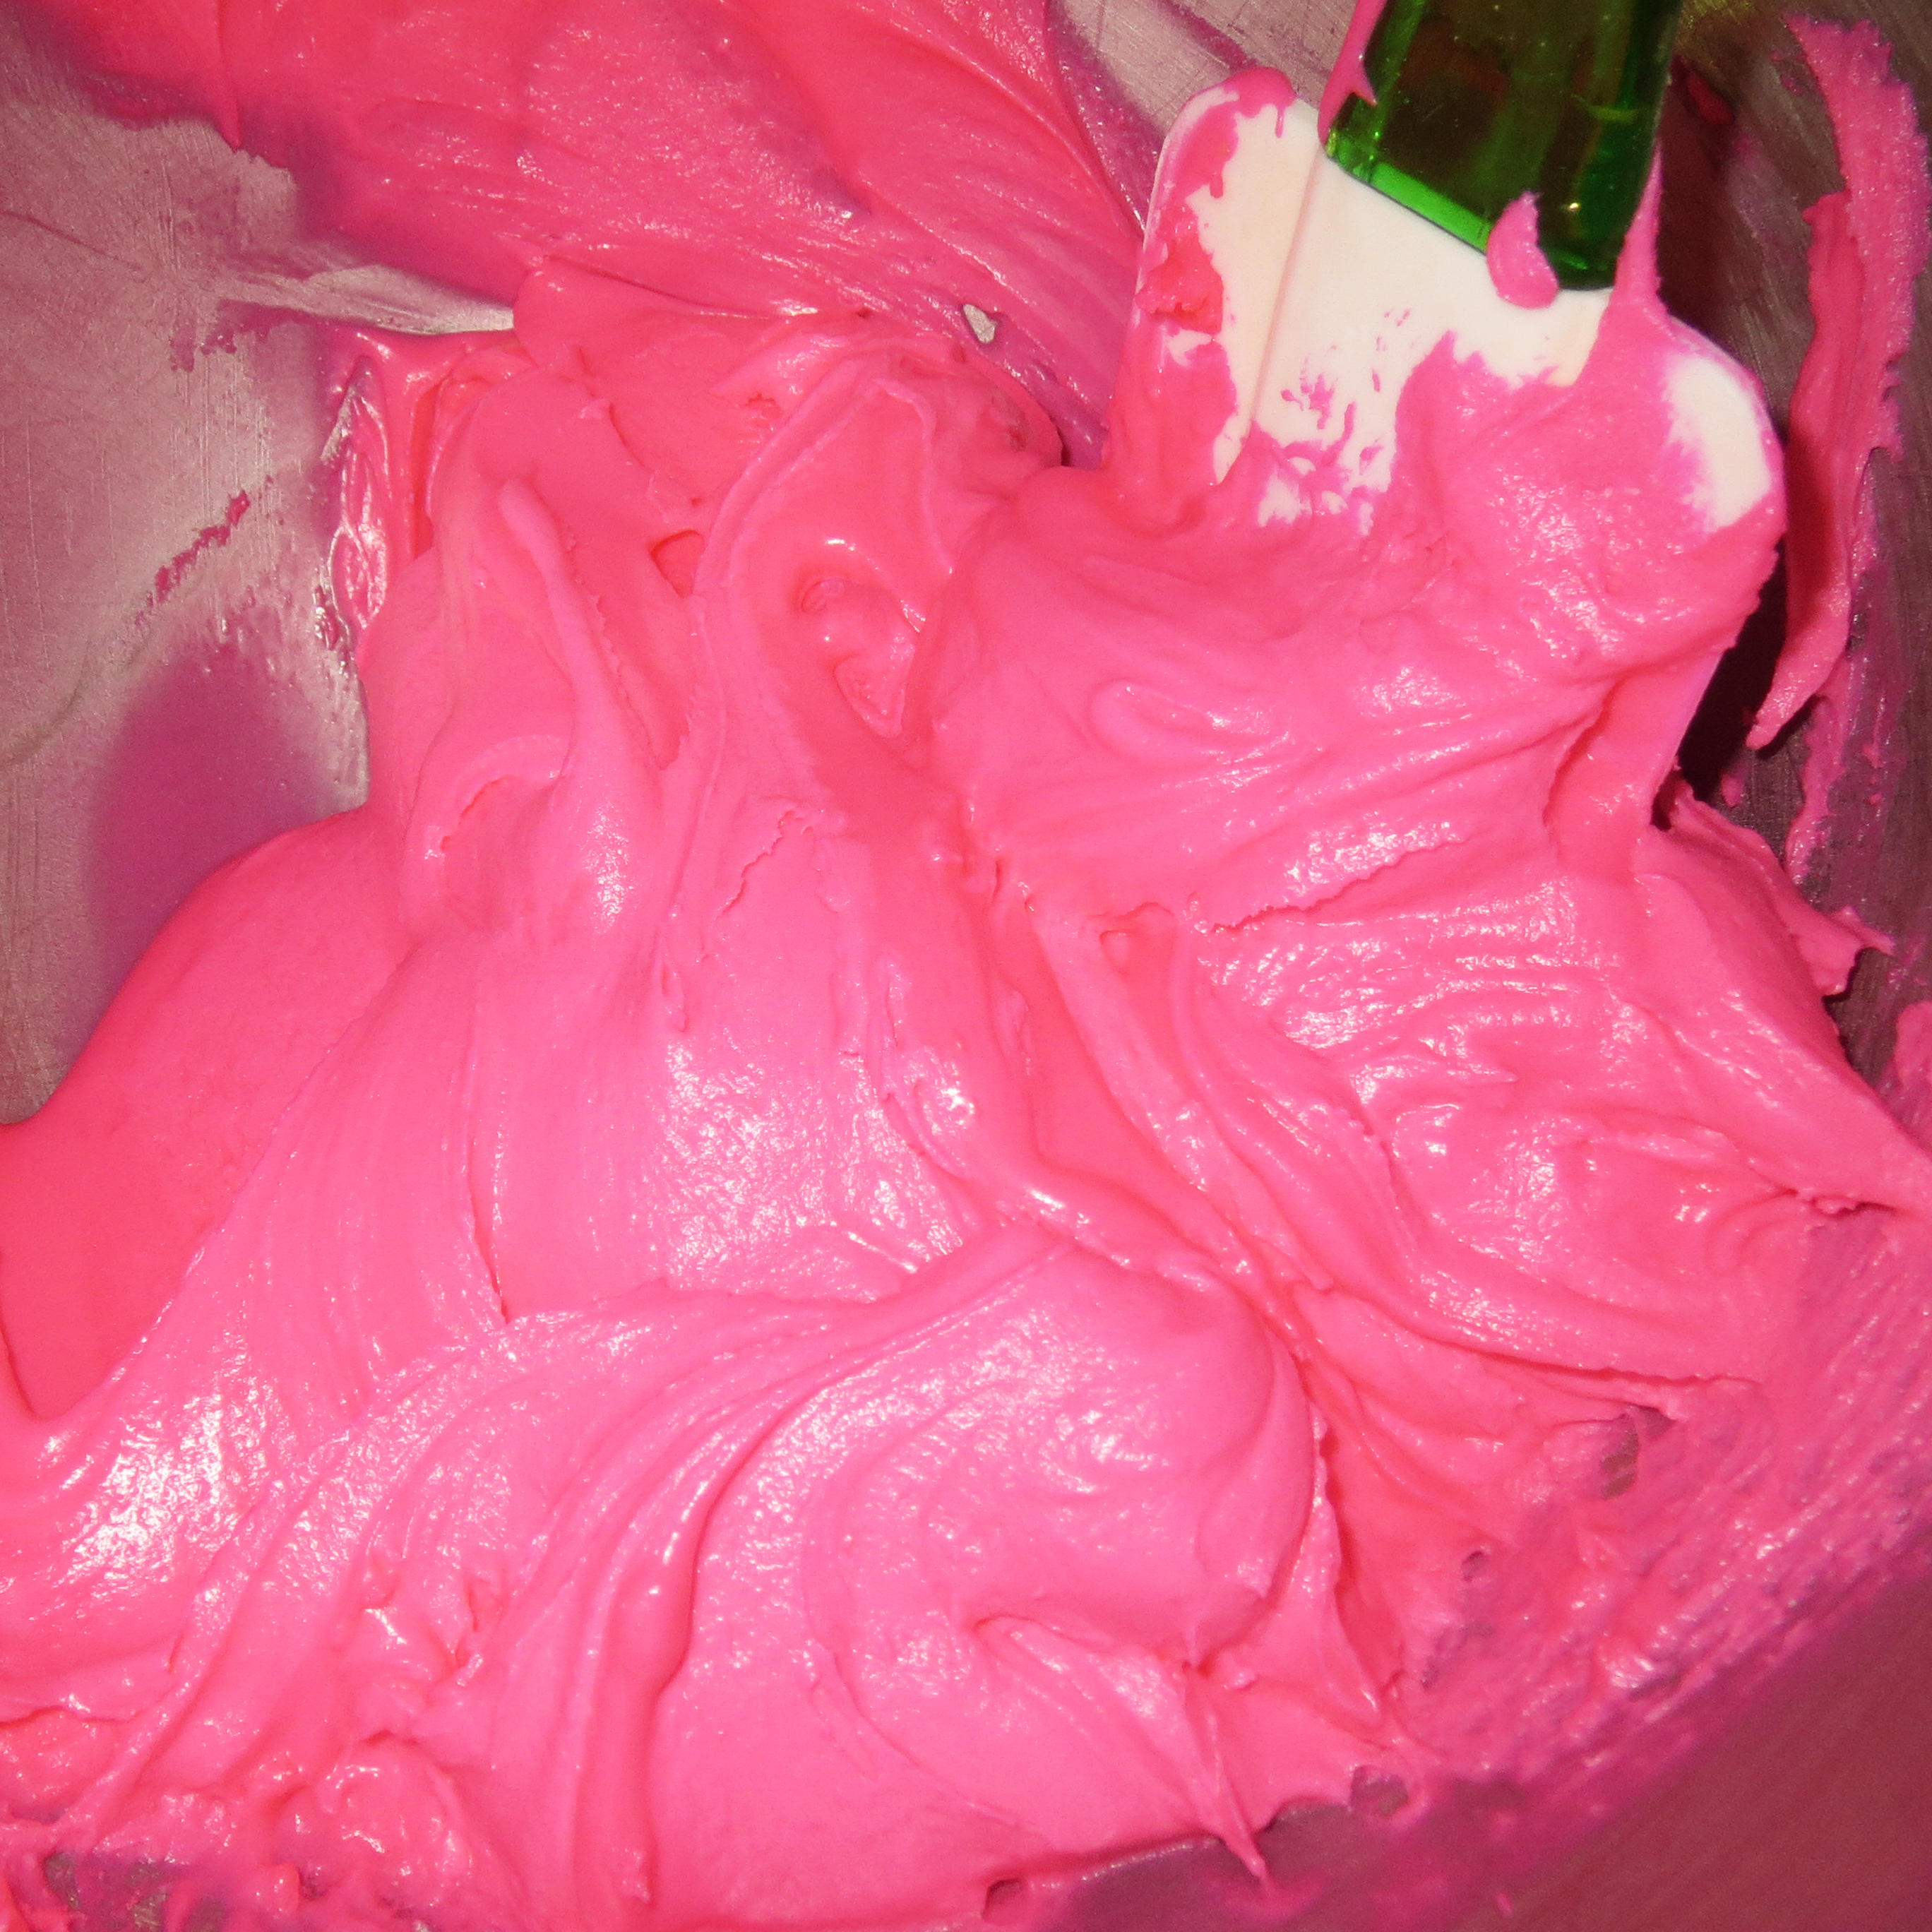
Mix up your buttercream frosting and color it the color you desire for your cake (it would be a good idea to match or coordinate it to the color of starburst that you bought to make the dress with). It will be thick, but you don’t want it too thick. I had to add more water than the package suggested. If you mix it too thin, just add some powdered sugar. Easy.
The frosting then goes in your piping bag. Wrap it tight on the top so there’s no bubbles in your bag.
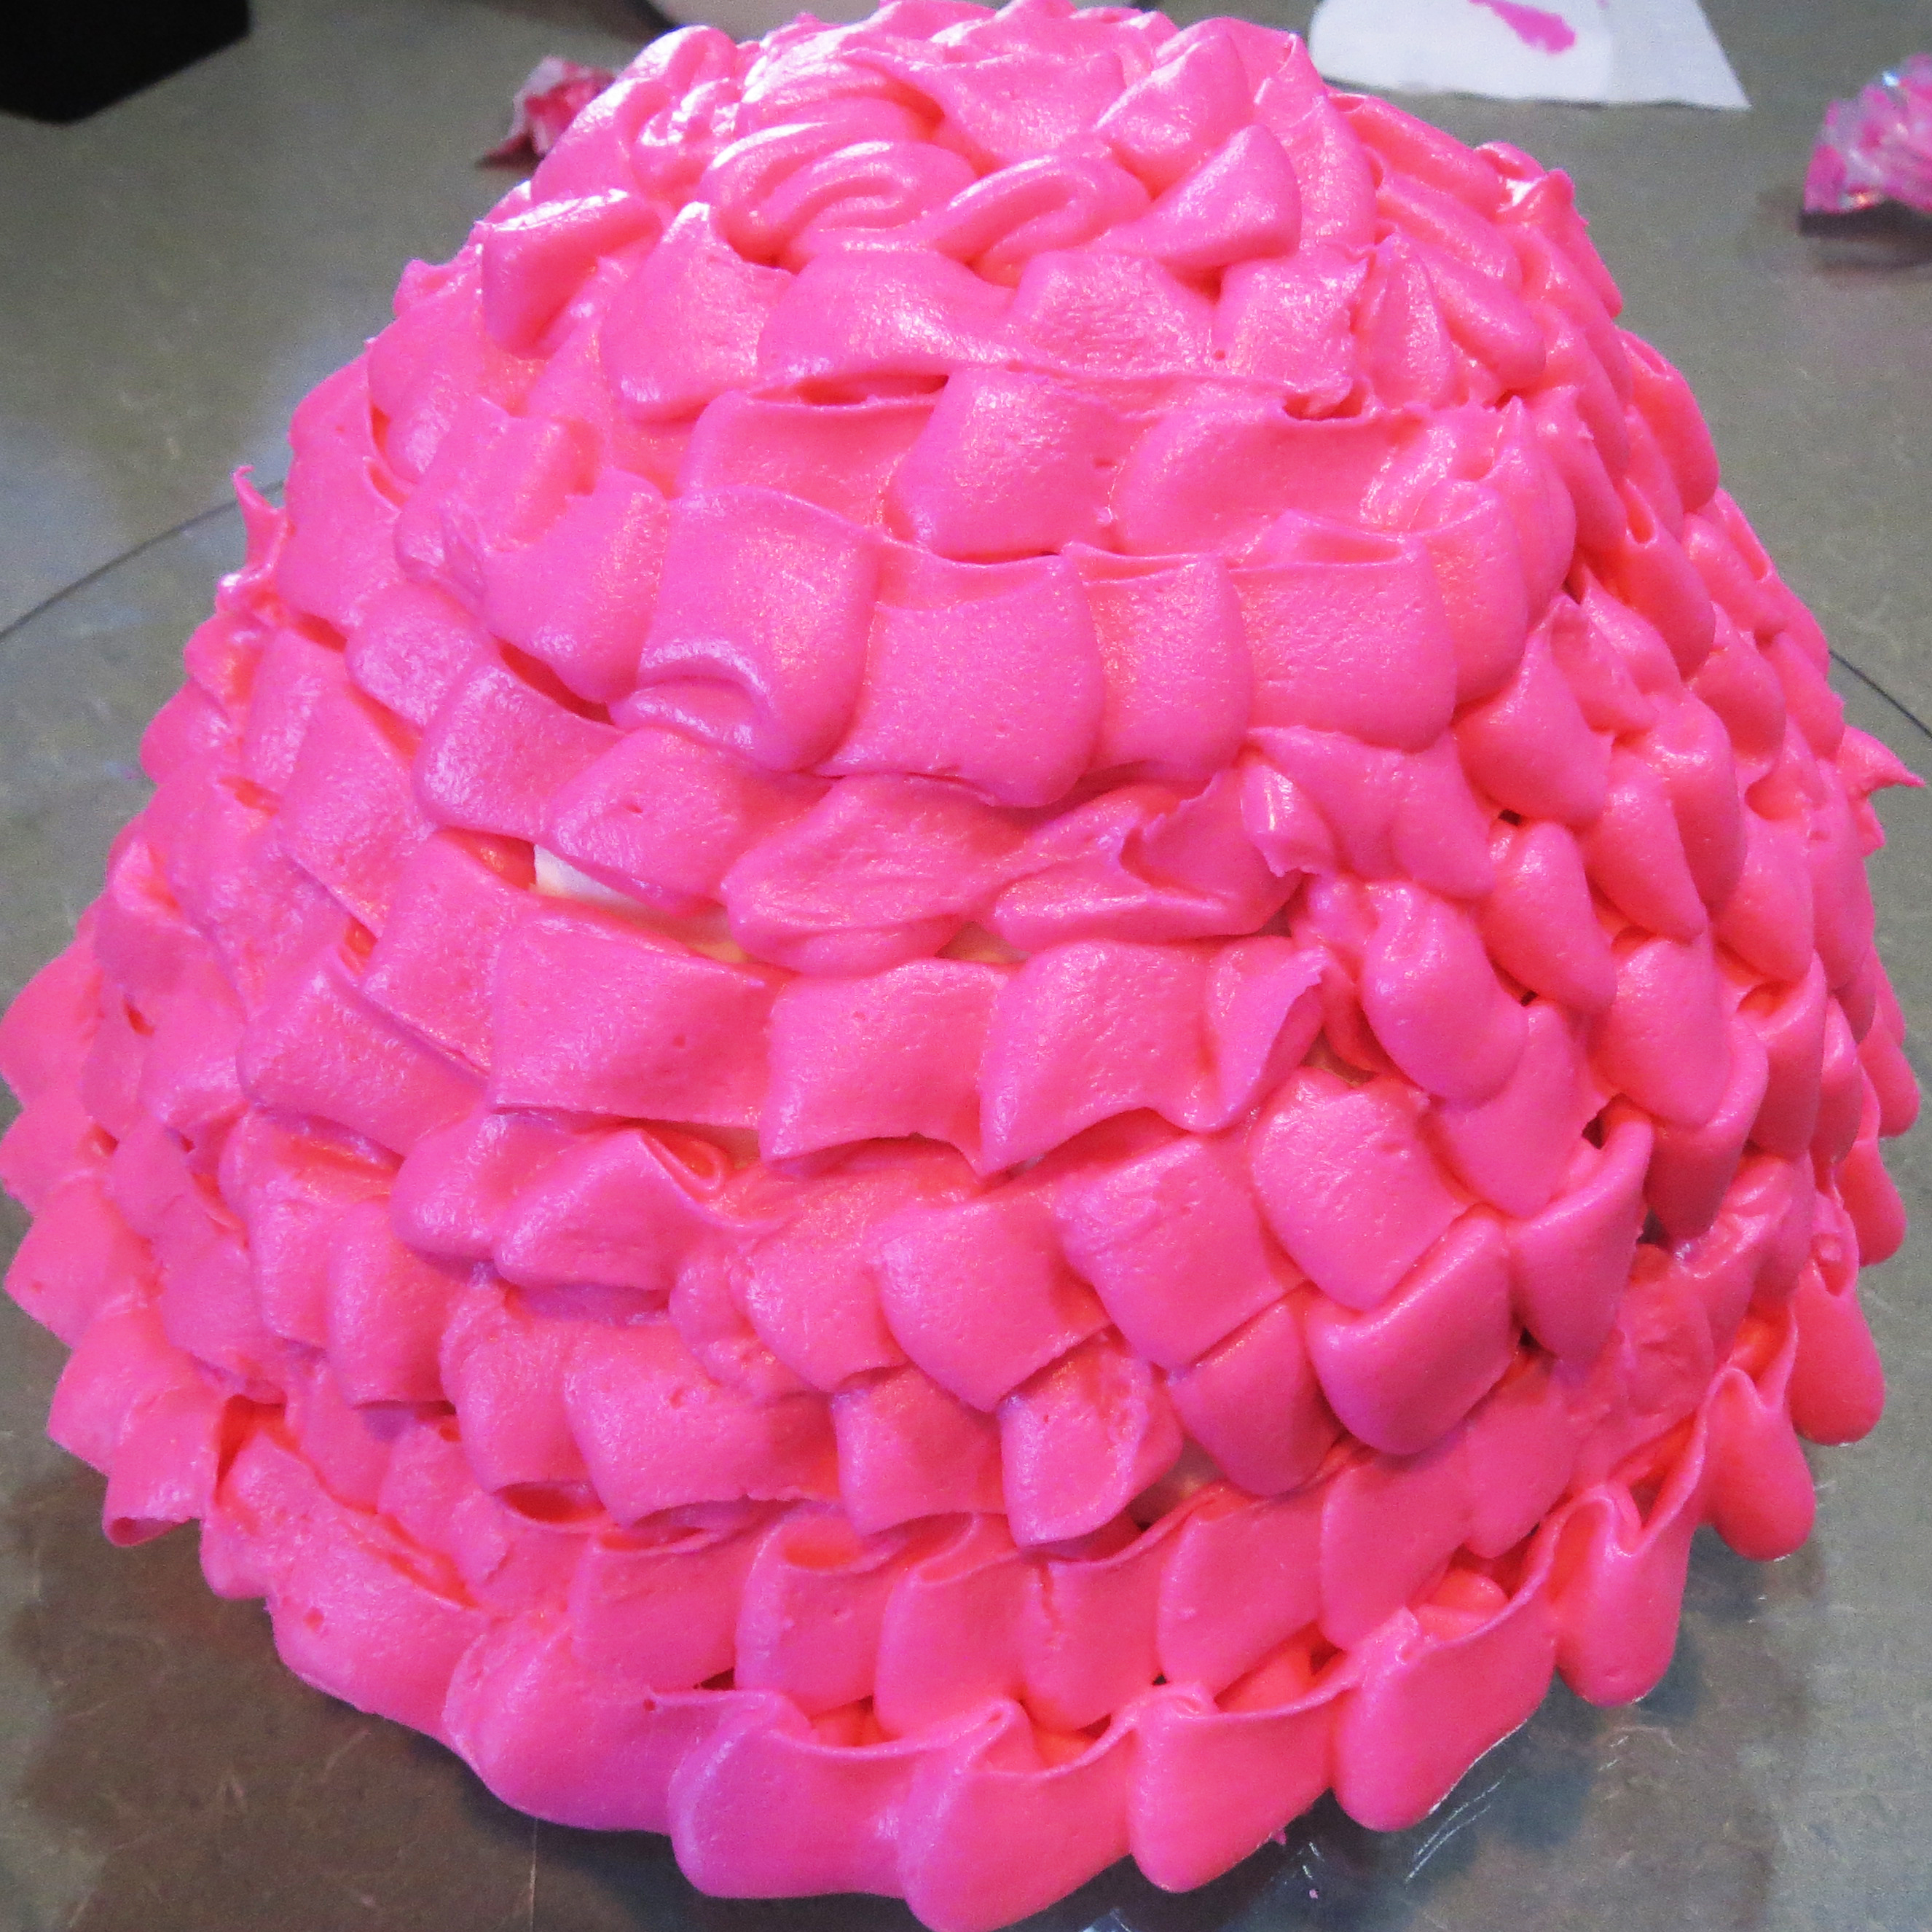
My child slowly turned the cake plate while I piped on the frosting on with a consistent back and forth motion of my hand (see video for more detailed instructions). I practiced on some parchment before trying it on the real cake :). If there are some spaces you need to fill it later, that’s ok. Just save out a little frosting for the end and stuff it in with something small and round (I used a shish-kabob skewer, but you could use the plastic top of a paintbrush or whatever you have on hand. Even a round cake tip would work.) You could also cover it up with the pearl sprinkles or embellishments later in the decorating process. Win-win.
Don’t worry about it looking perfect. It’s not going to. You can cover up any big imperfections will embellishments or just let it go. Your child won’t even notice, trust me!
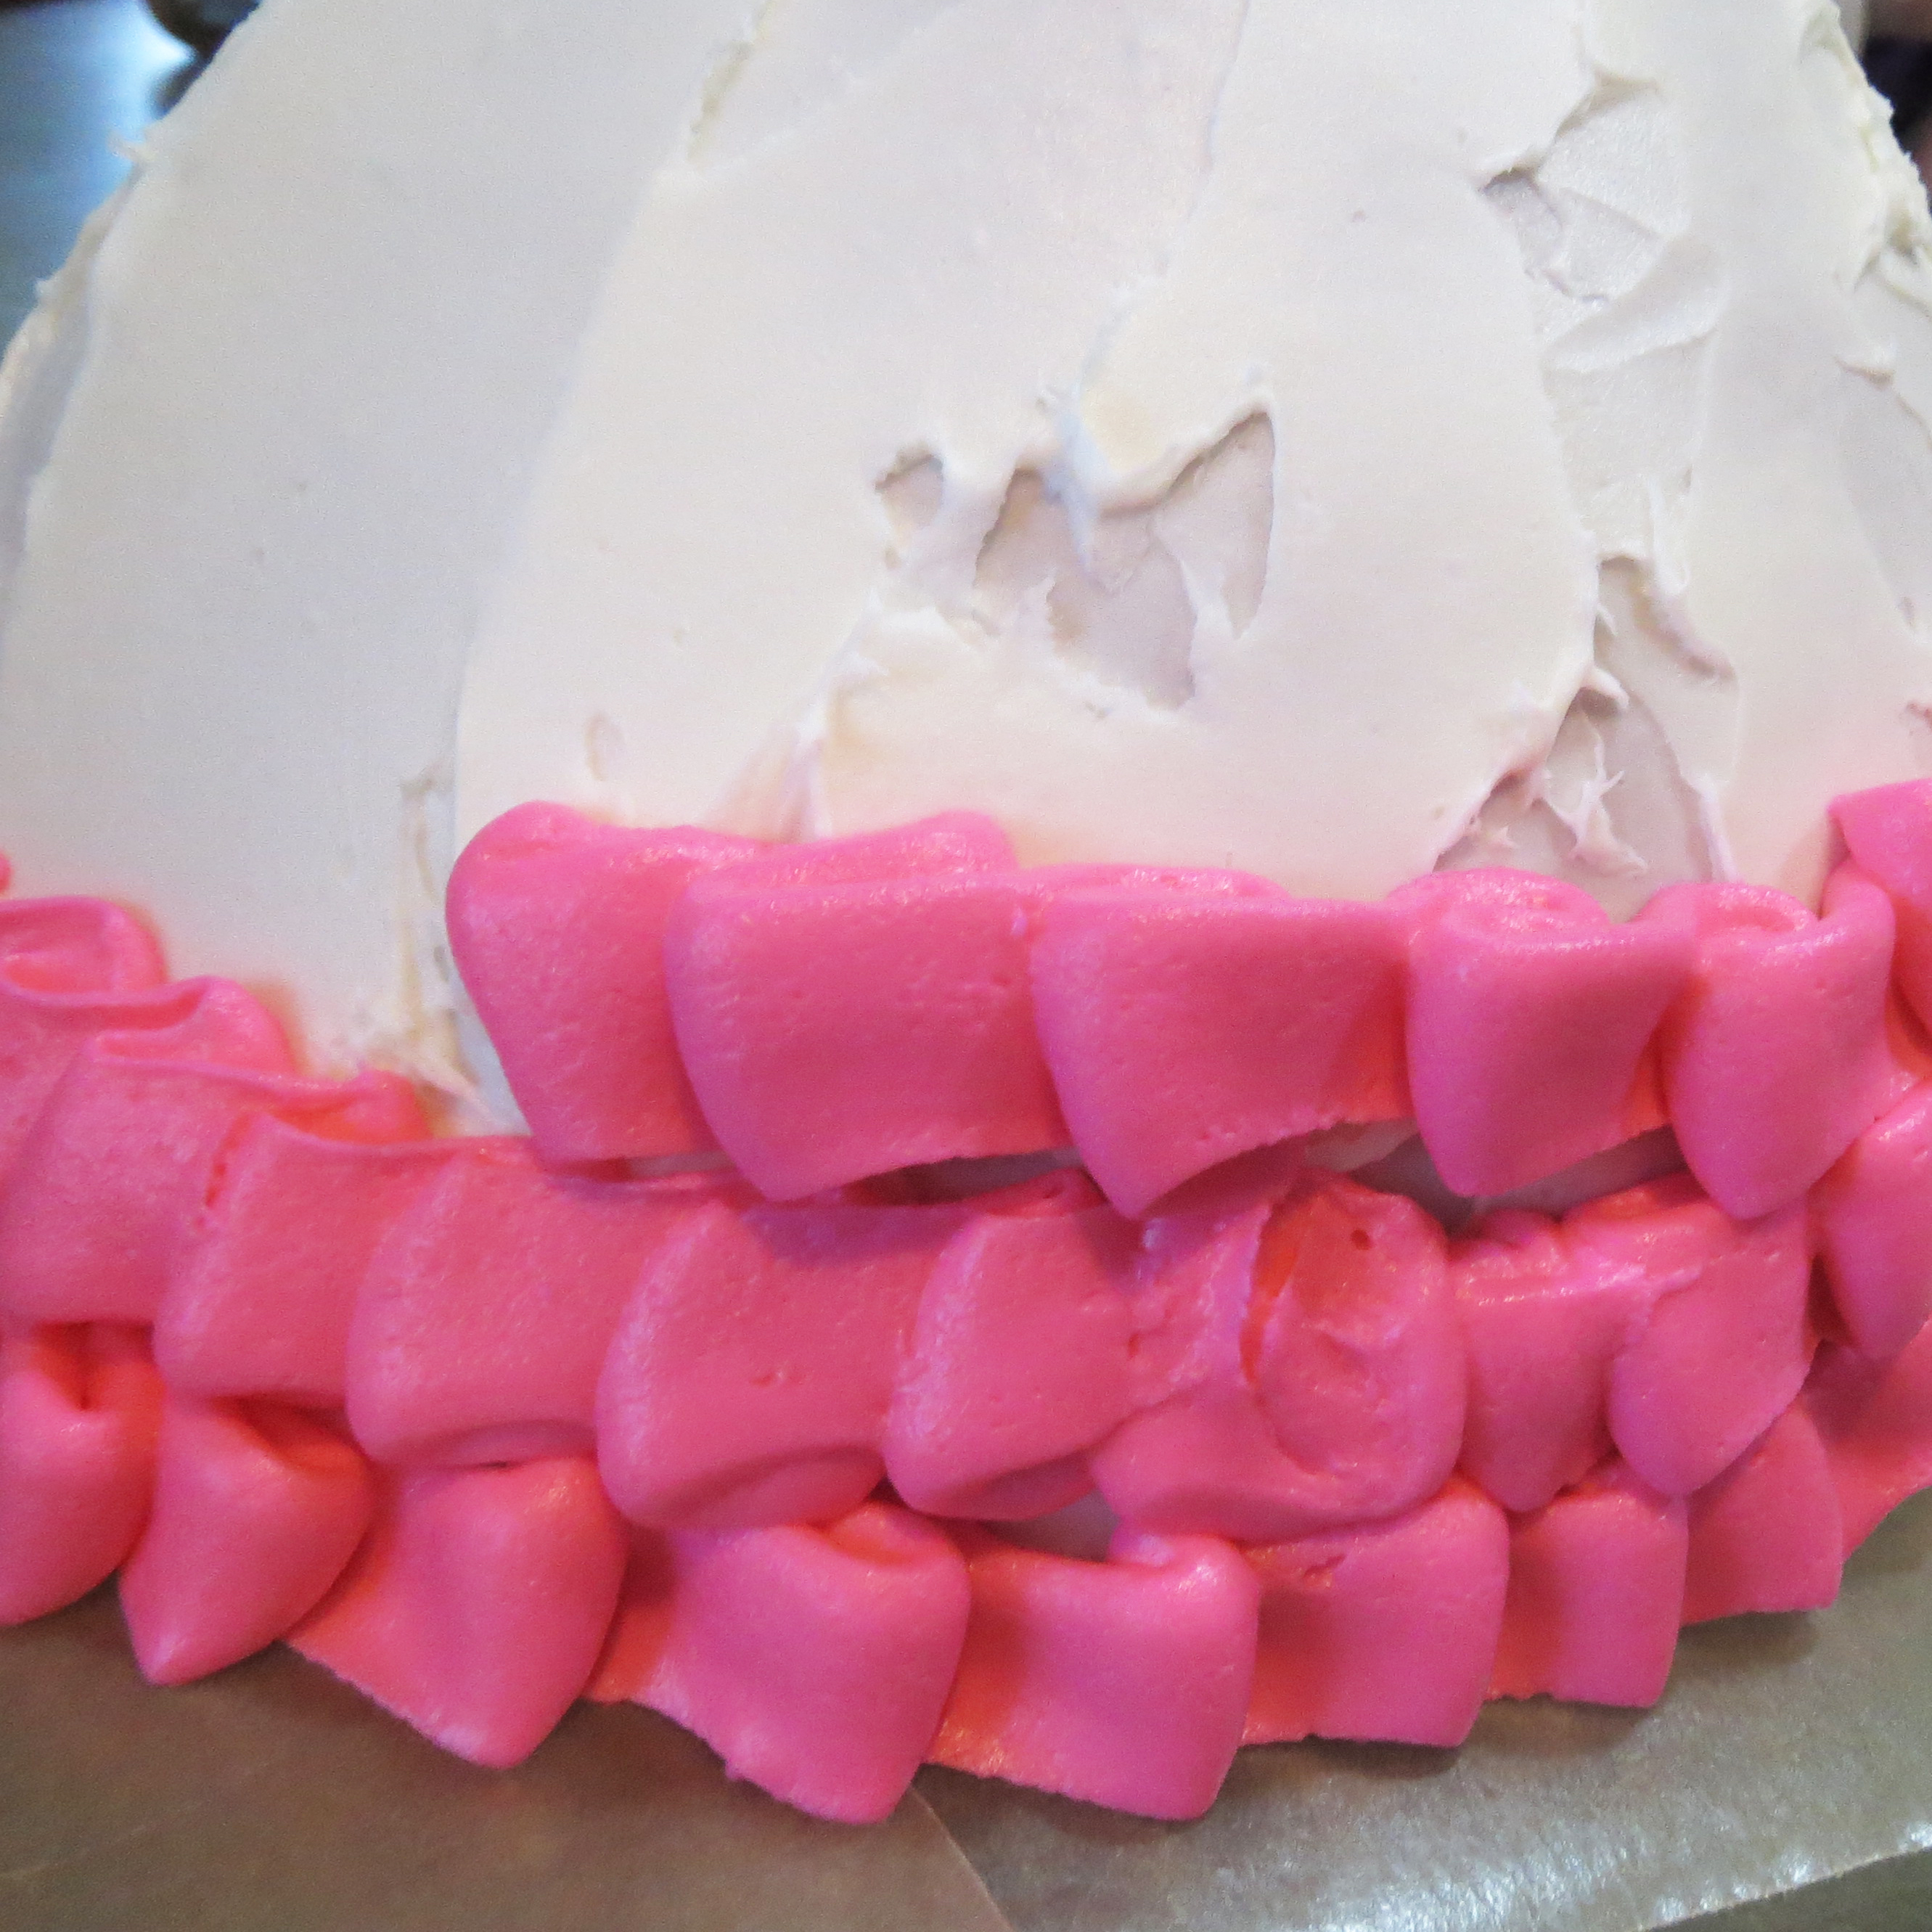
Now for the fun part, decorating the doll and the skirt! This part was really fun for us to do together and is totally customizable to our own tastes and how much time you have. You can do more or less than we did. The embellishments only took us about 5 minutes. They are surprisingly simple using the clay mold and cookie cutters! Alternatively, if you are a master cake decorator, you can use frosting to decorate the body and the embellishments.


To use candy, microwave the unwrapped Starbursts you want to use for the dress on the (naked) doll itself for 10 seconds or until soft and pliable, but not melted. Mush them together in your hand and then place on a flat surface or counter and roll out using a small rolling pin. Use a medium heart cookie cutter to cut out a heart shape and then stick it to the Barbie (the round top of the heart goes over the bust). Save the overage for other embellishments. Next, stretch and pull a little to get the heart shape to fit around her and push on it to stick it to the plastic body. You should not do this while the doll is in the cake. Do this on the counter. Putting the doll in the cake will be one of the last steps. The heart will not cover her whole back, we will put straps on later, so don’t fret! Use this same method to cut out a bow for the back of the dress (if desired).
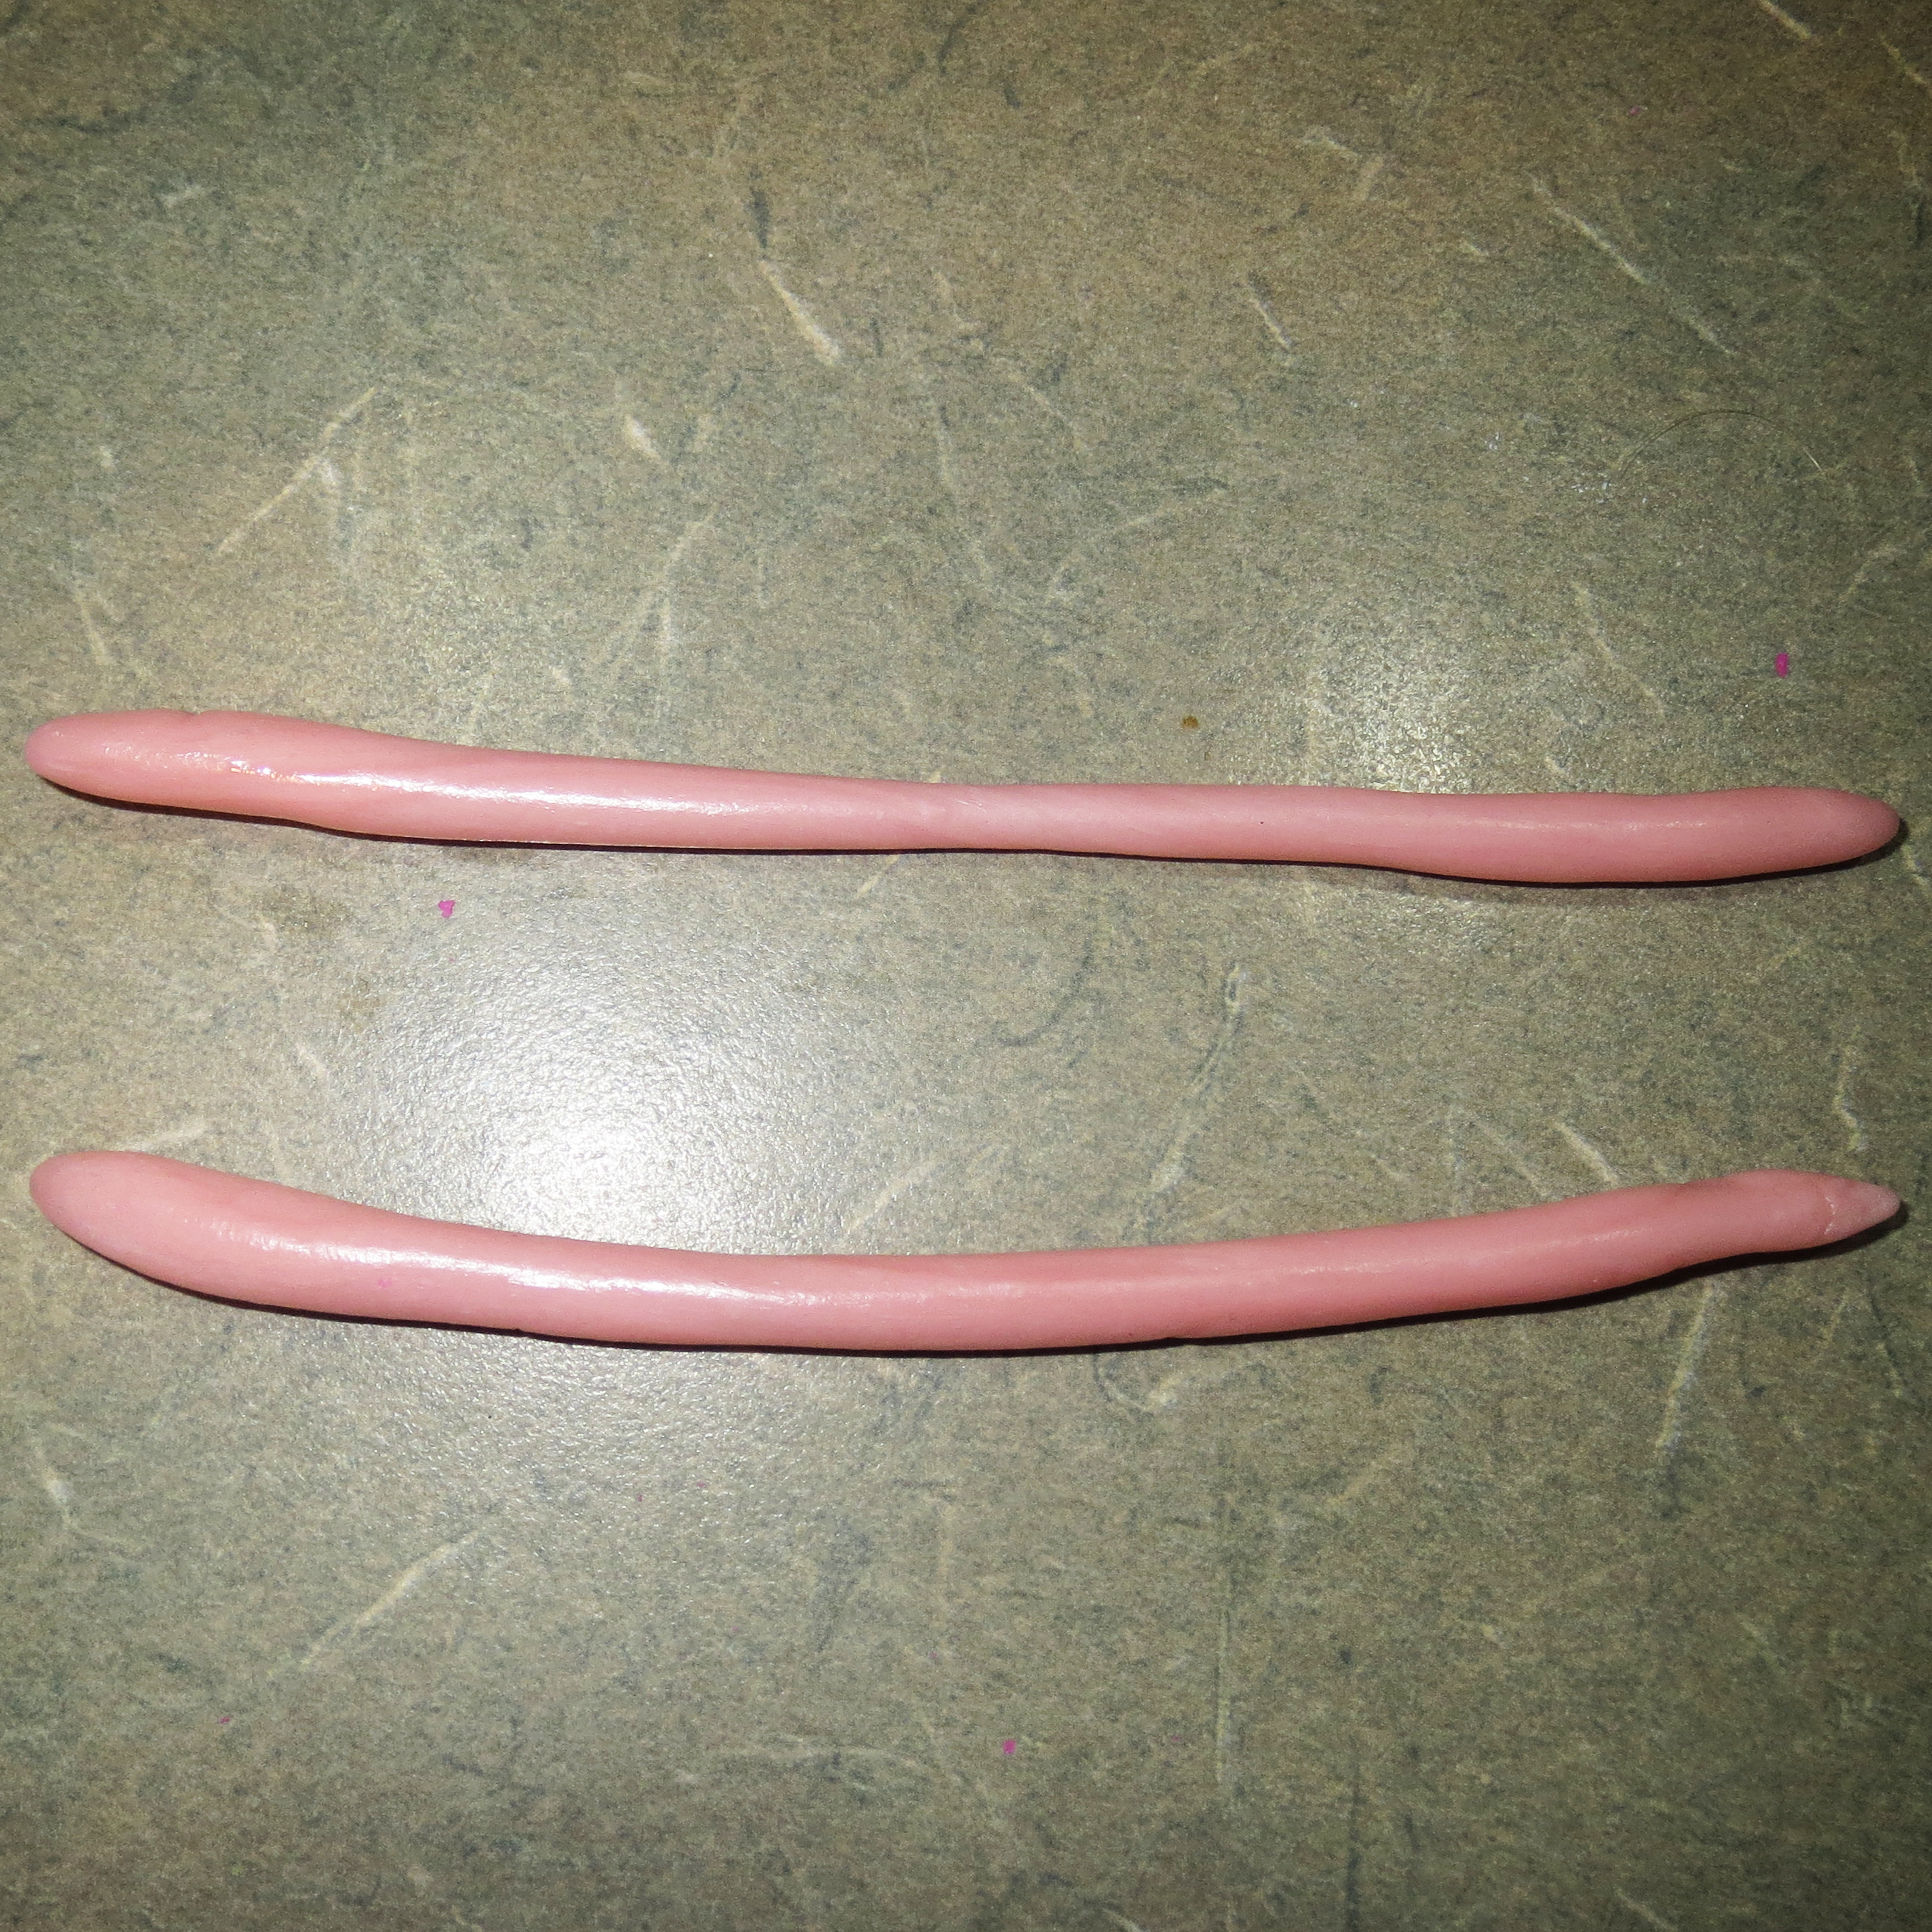
Roll out 2 logs of starburst for the dress straps and mold them into a criss-cross shape in the back and up over the shoulders. Press them down into the body and the bodice of the dress so it will stick.
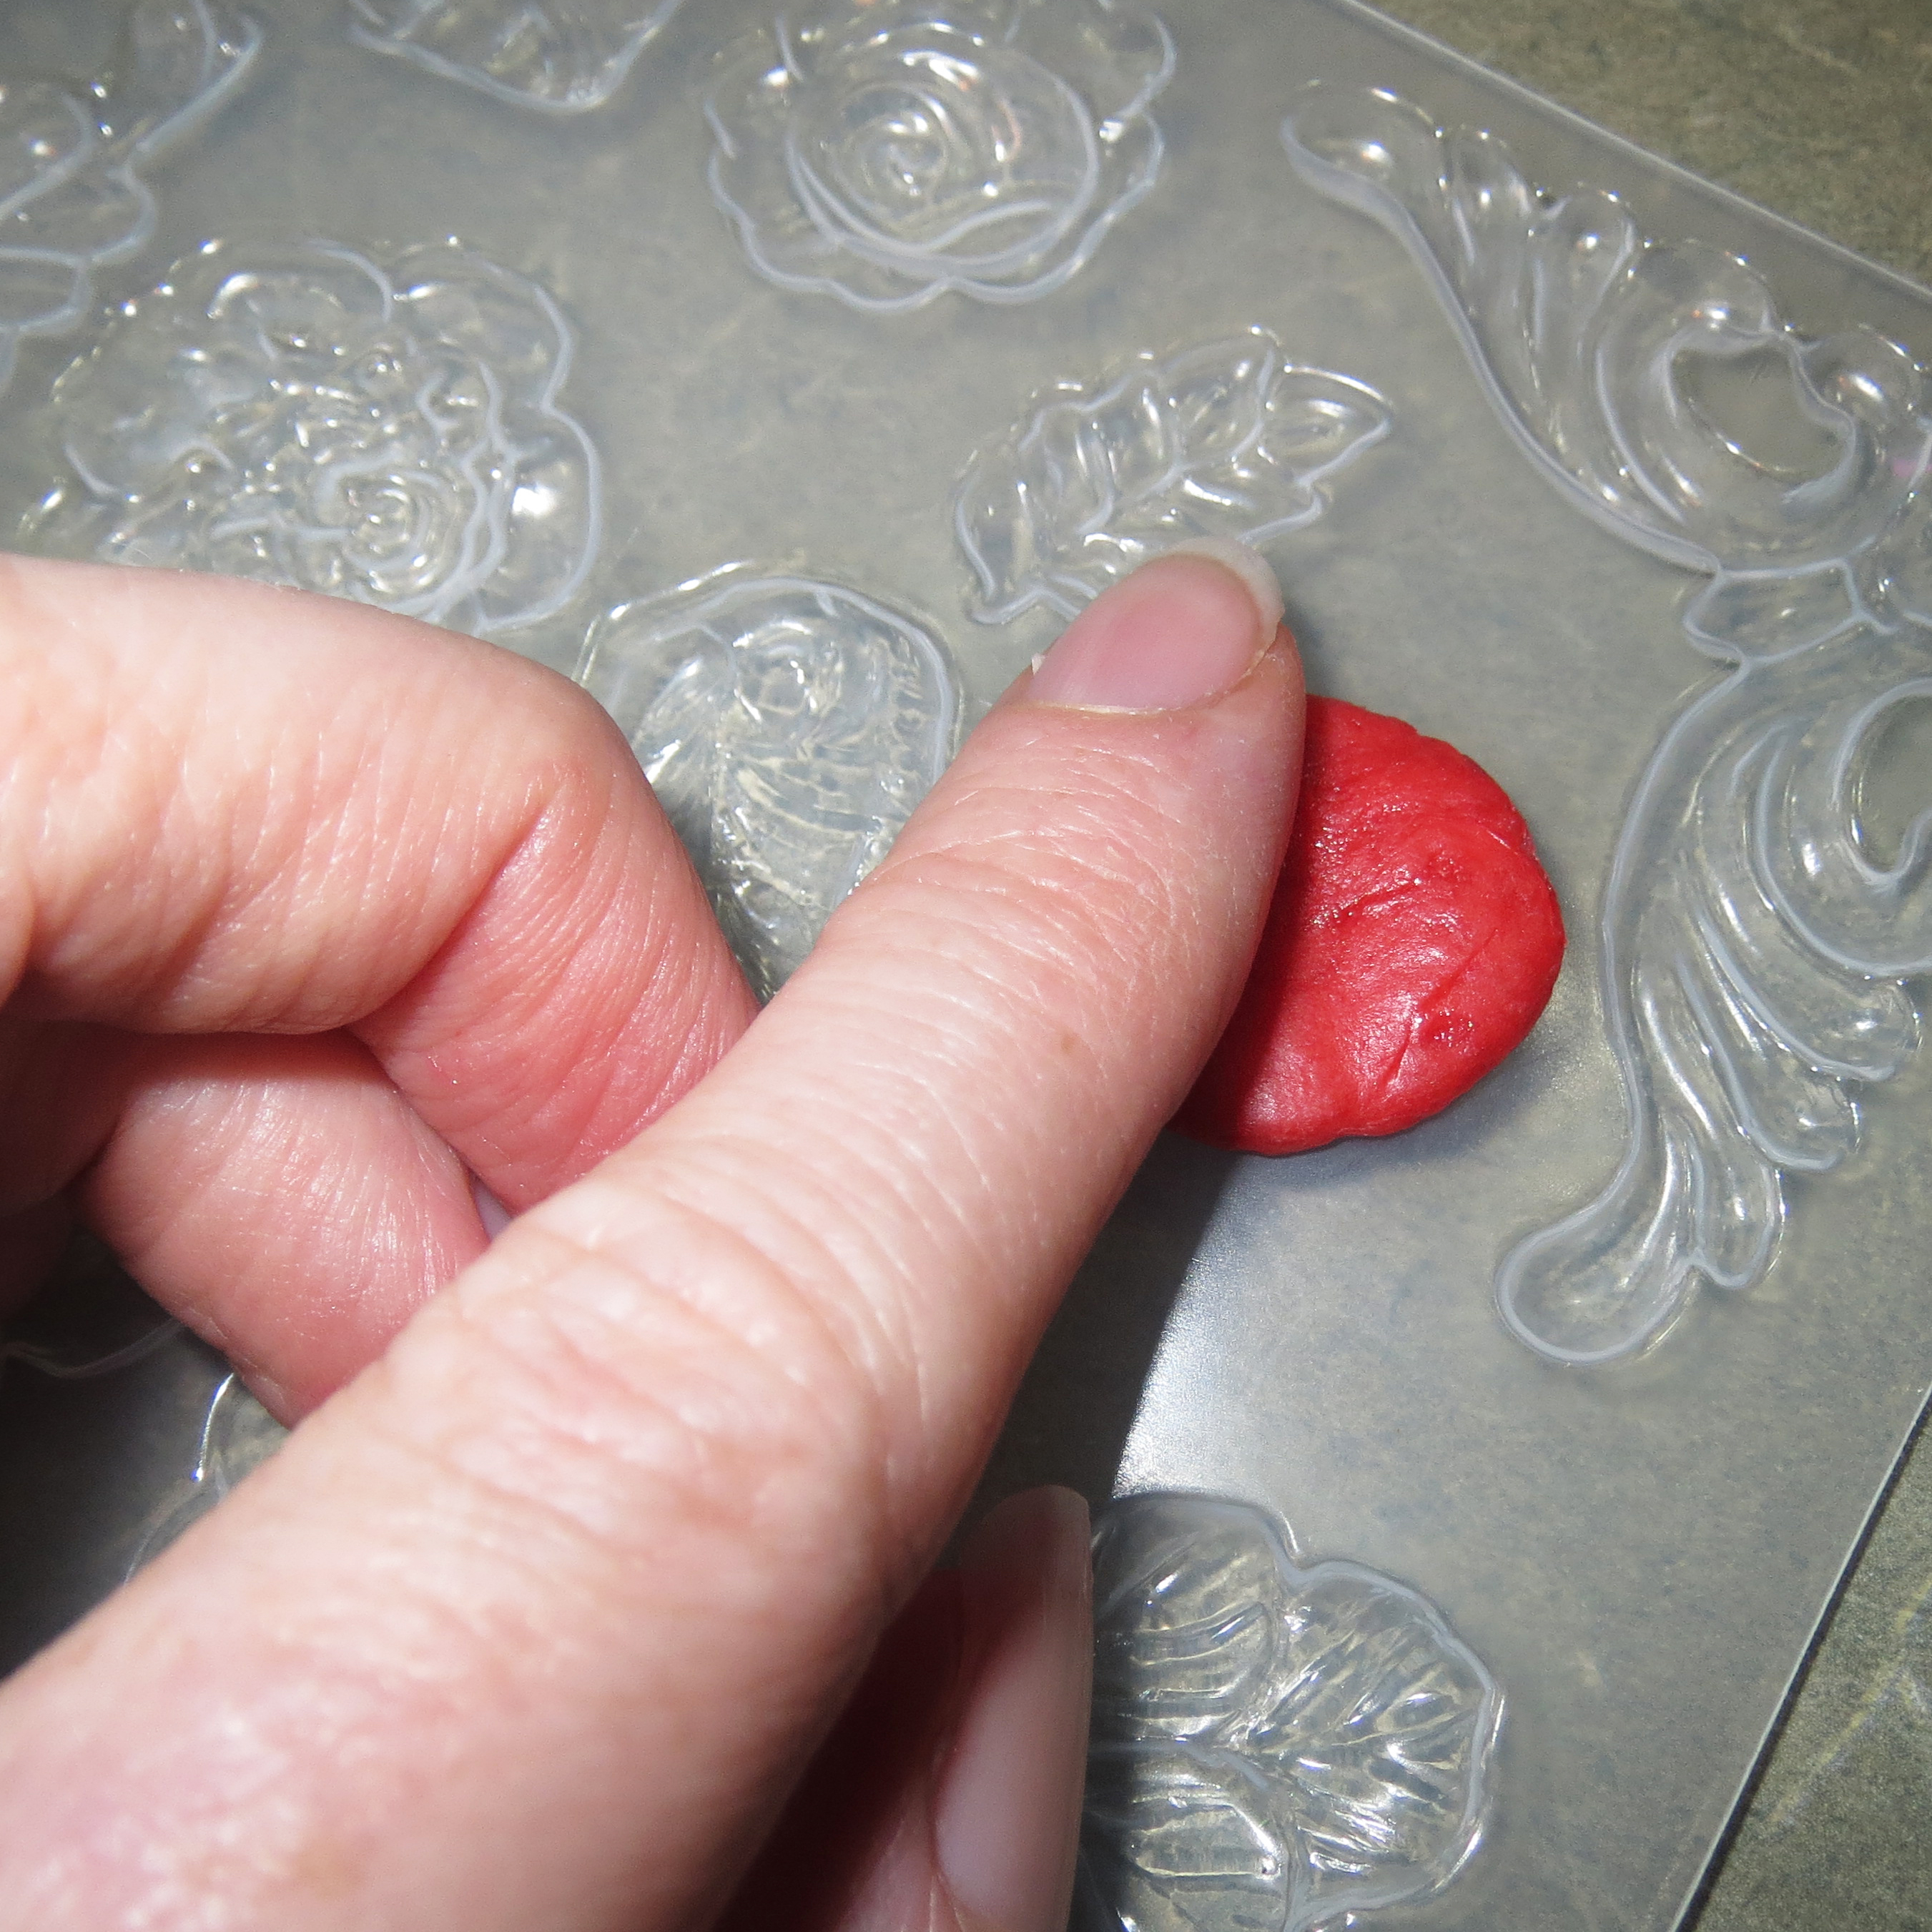
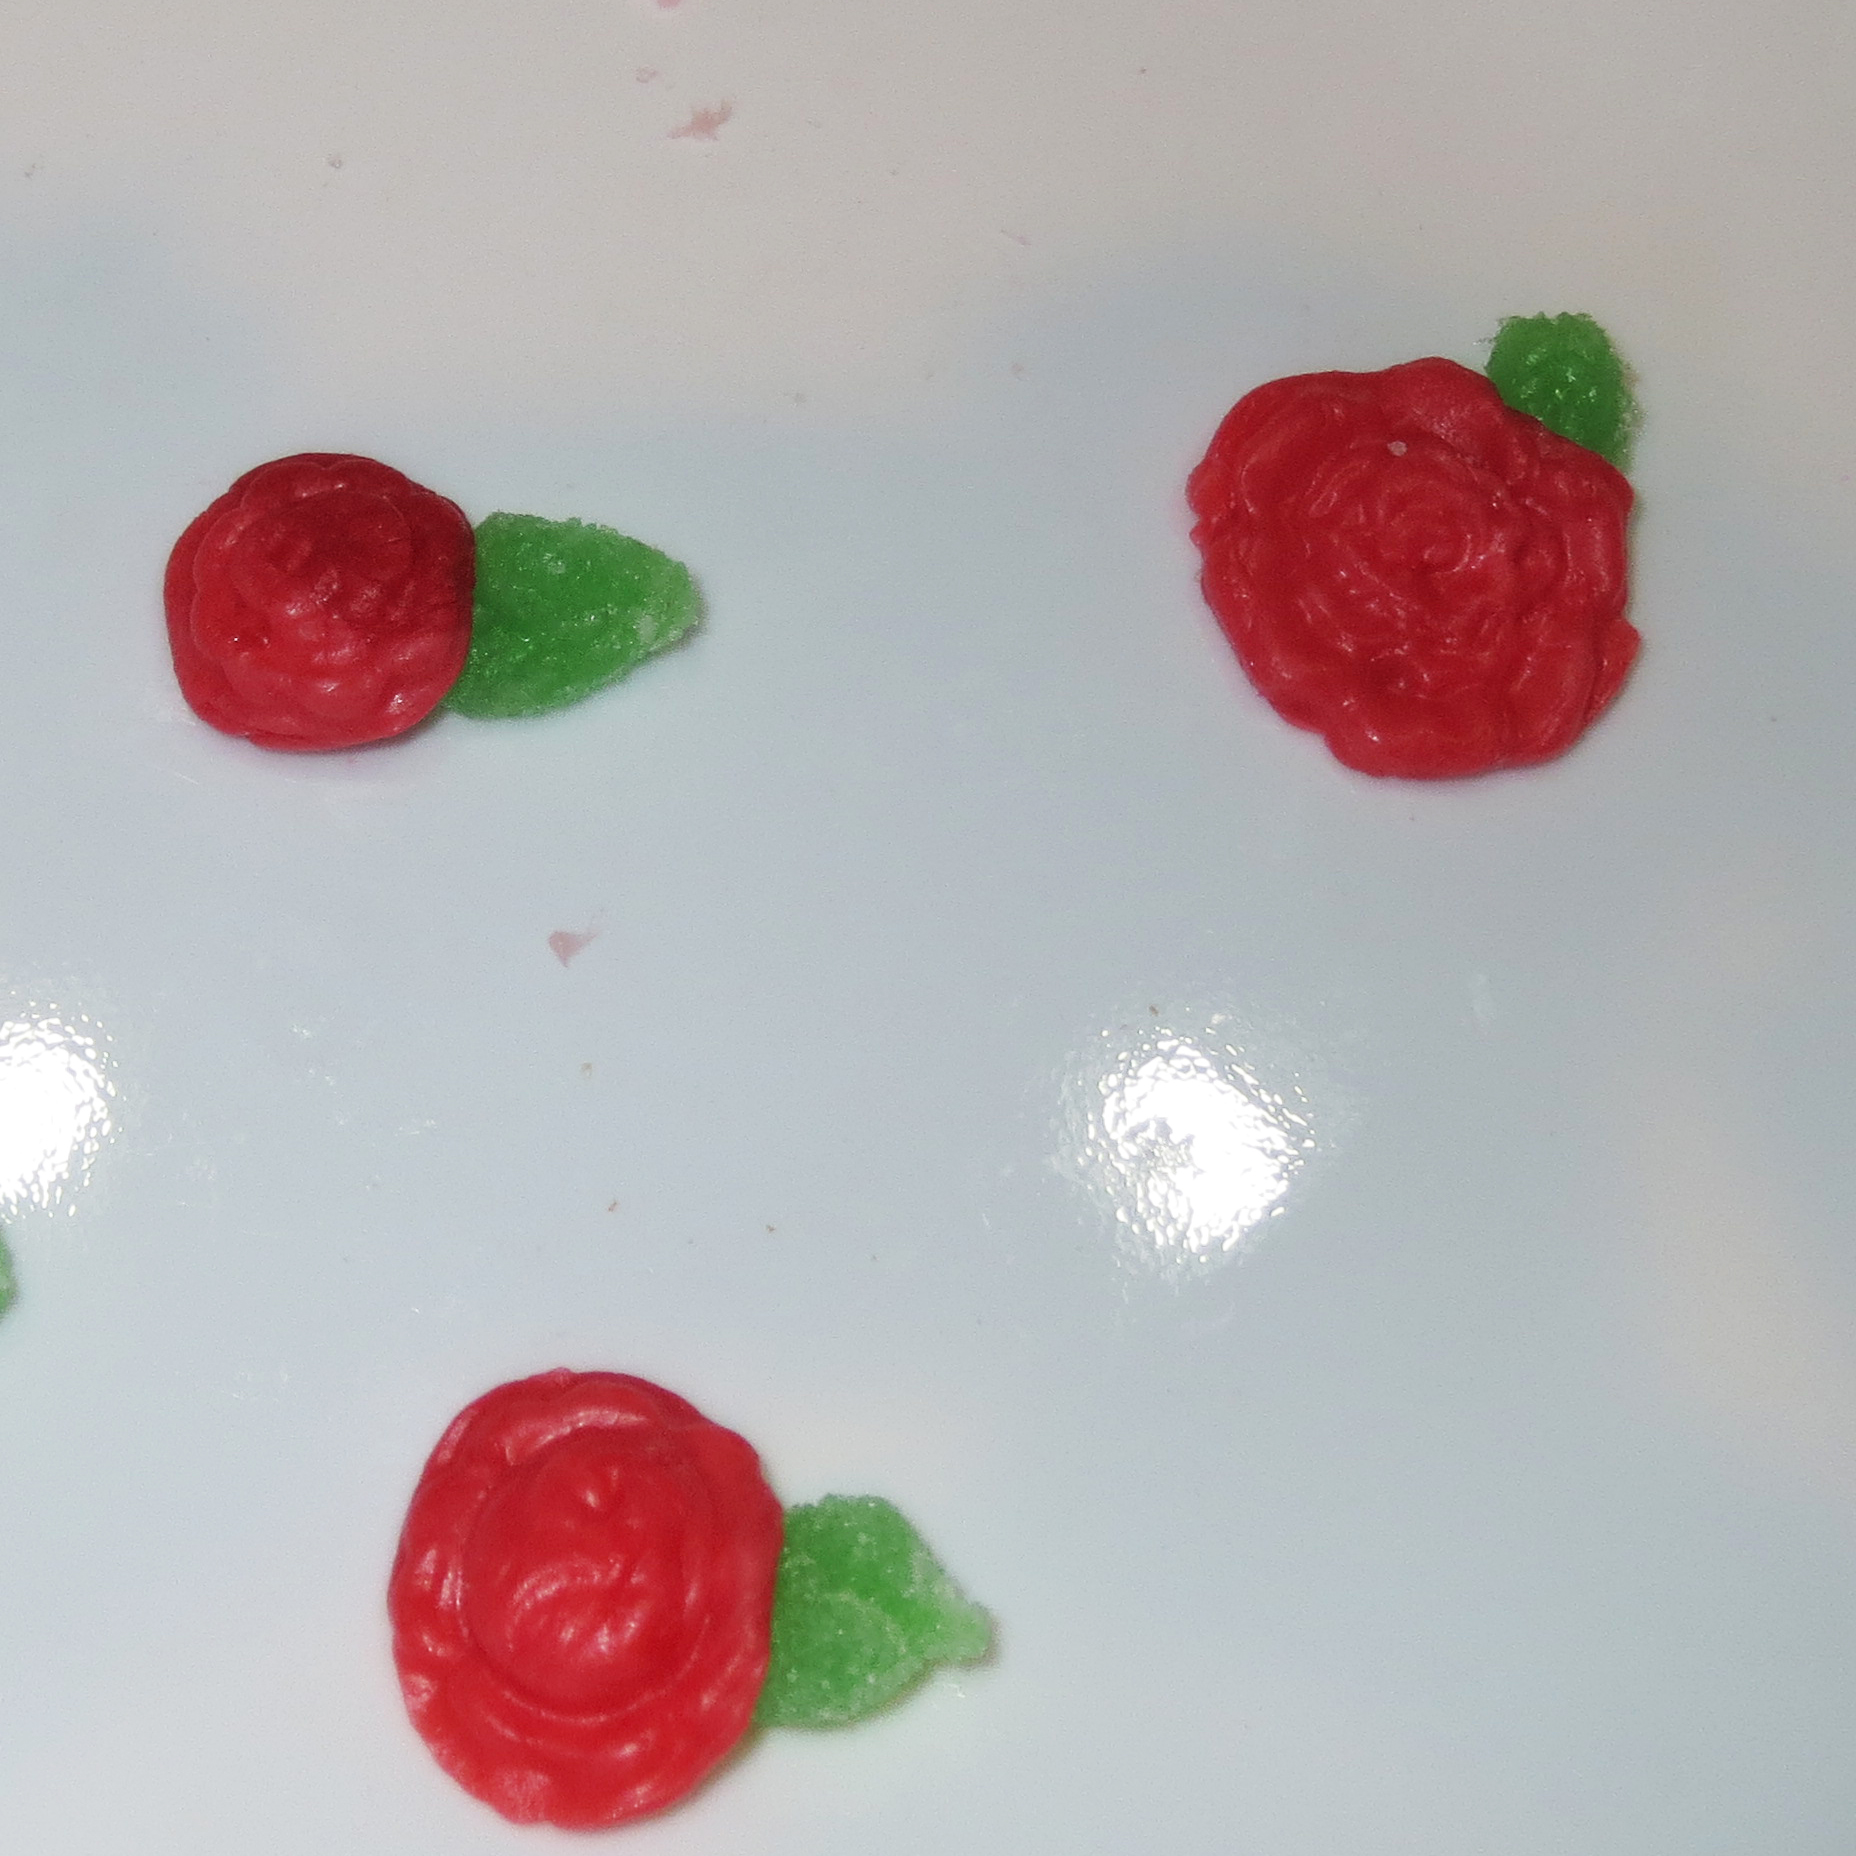
Next, make the flower embellishments using the plastic clay mold. Microwave 1 starburst for 5-10 seconds then break it in half and roll it into a ball in your hand. Then simply press down into the mold for a couple seconds and pop it out. It’s that easy! Make the leaves in the same manner using the green gummies. You can use a little water on a small paintbrush to get them to stick together or onto the cake.
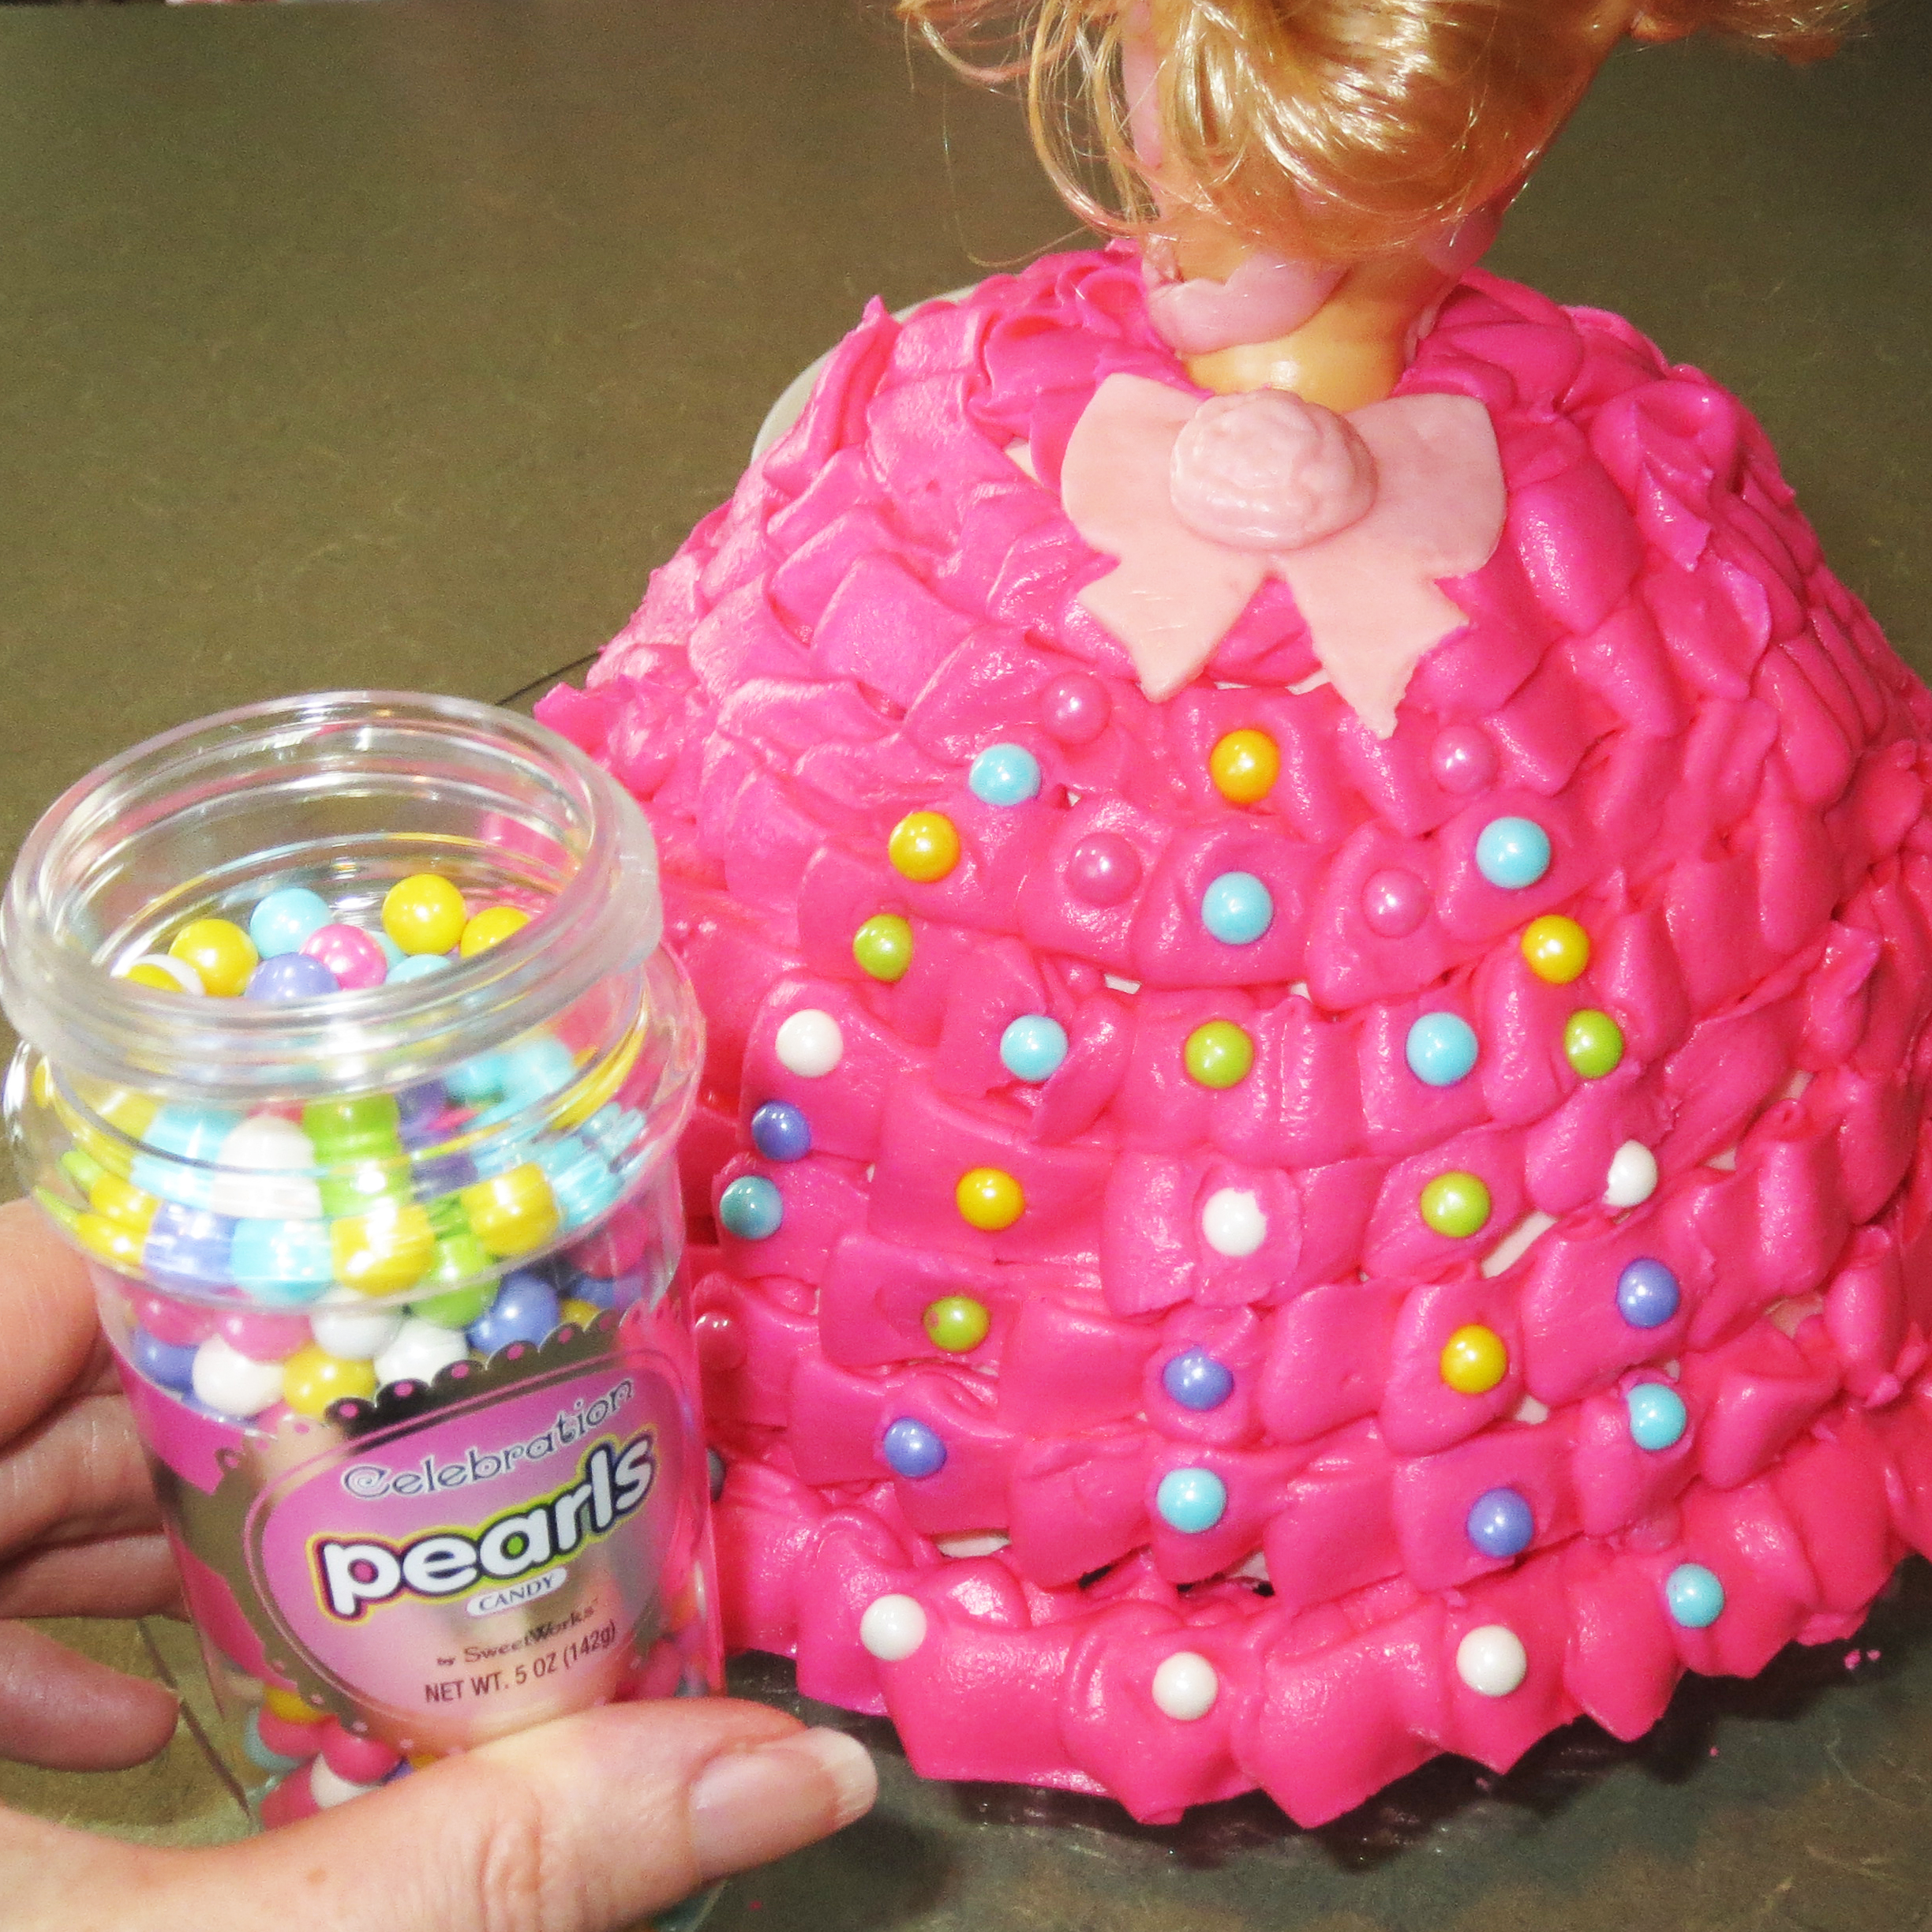
Now you can decorate how you wish using the sprinkle pearls and flowers you made. I loved making this cake because it taught me skills that I didn’t have before and it was really a fun thing to do with my daughter. See photo above for a picture of the entire front of the cake. Or watch the short video clip below with the full cake panorama.
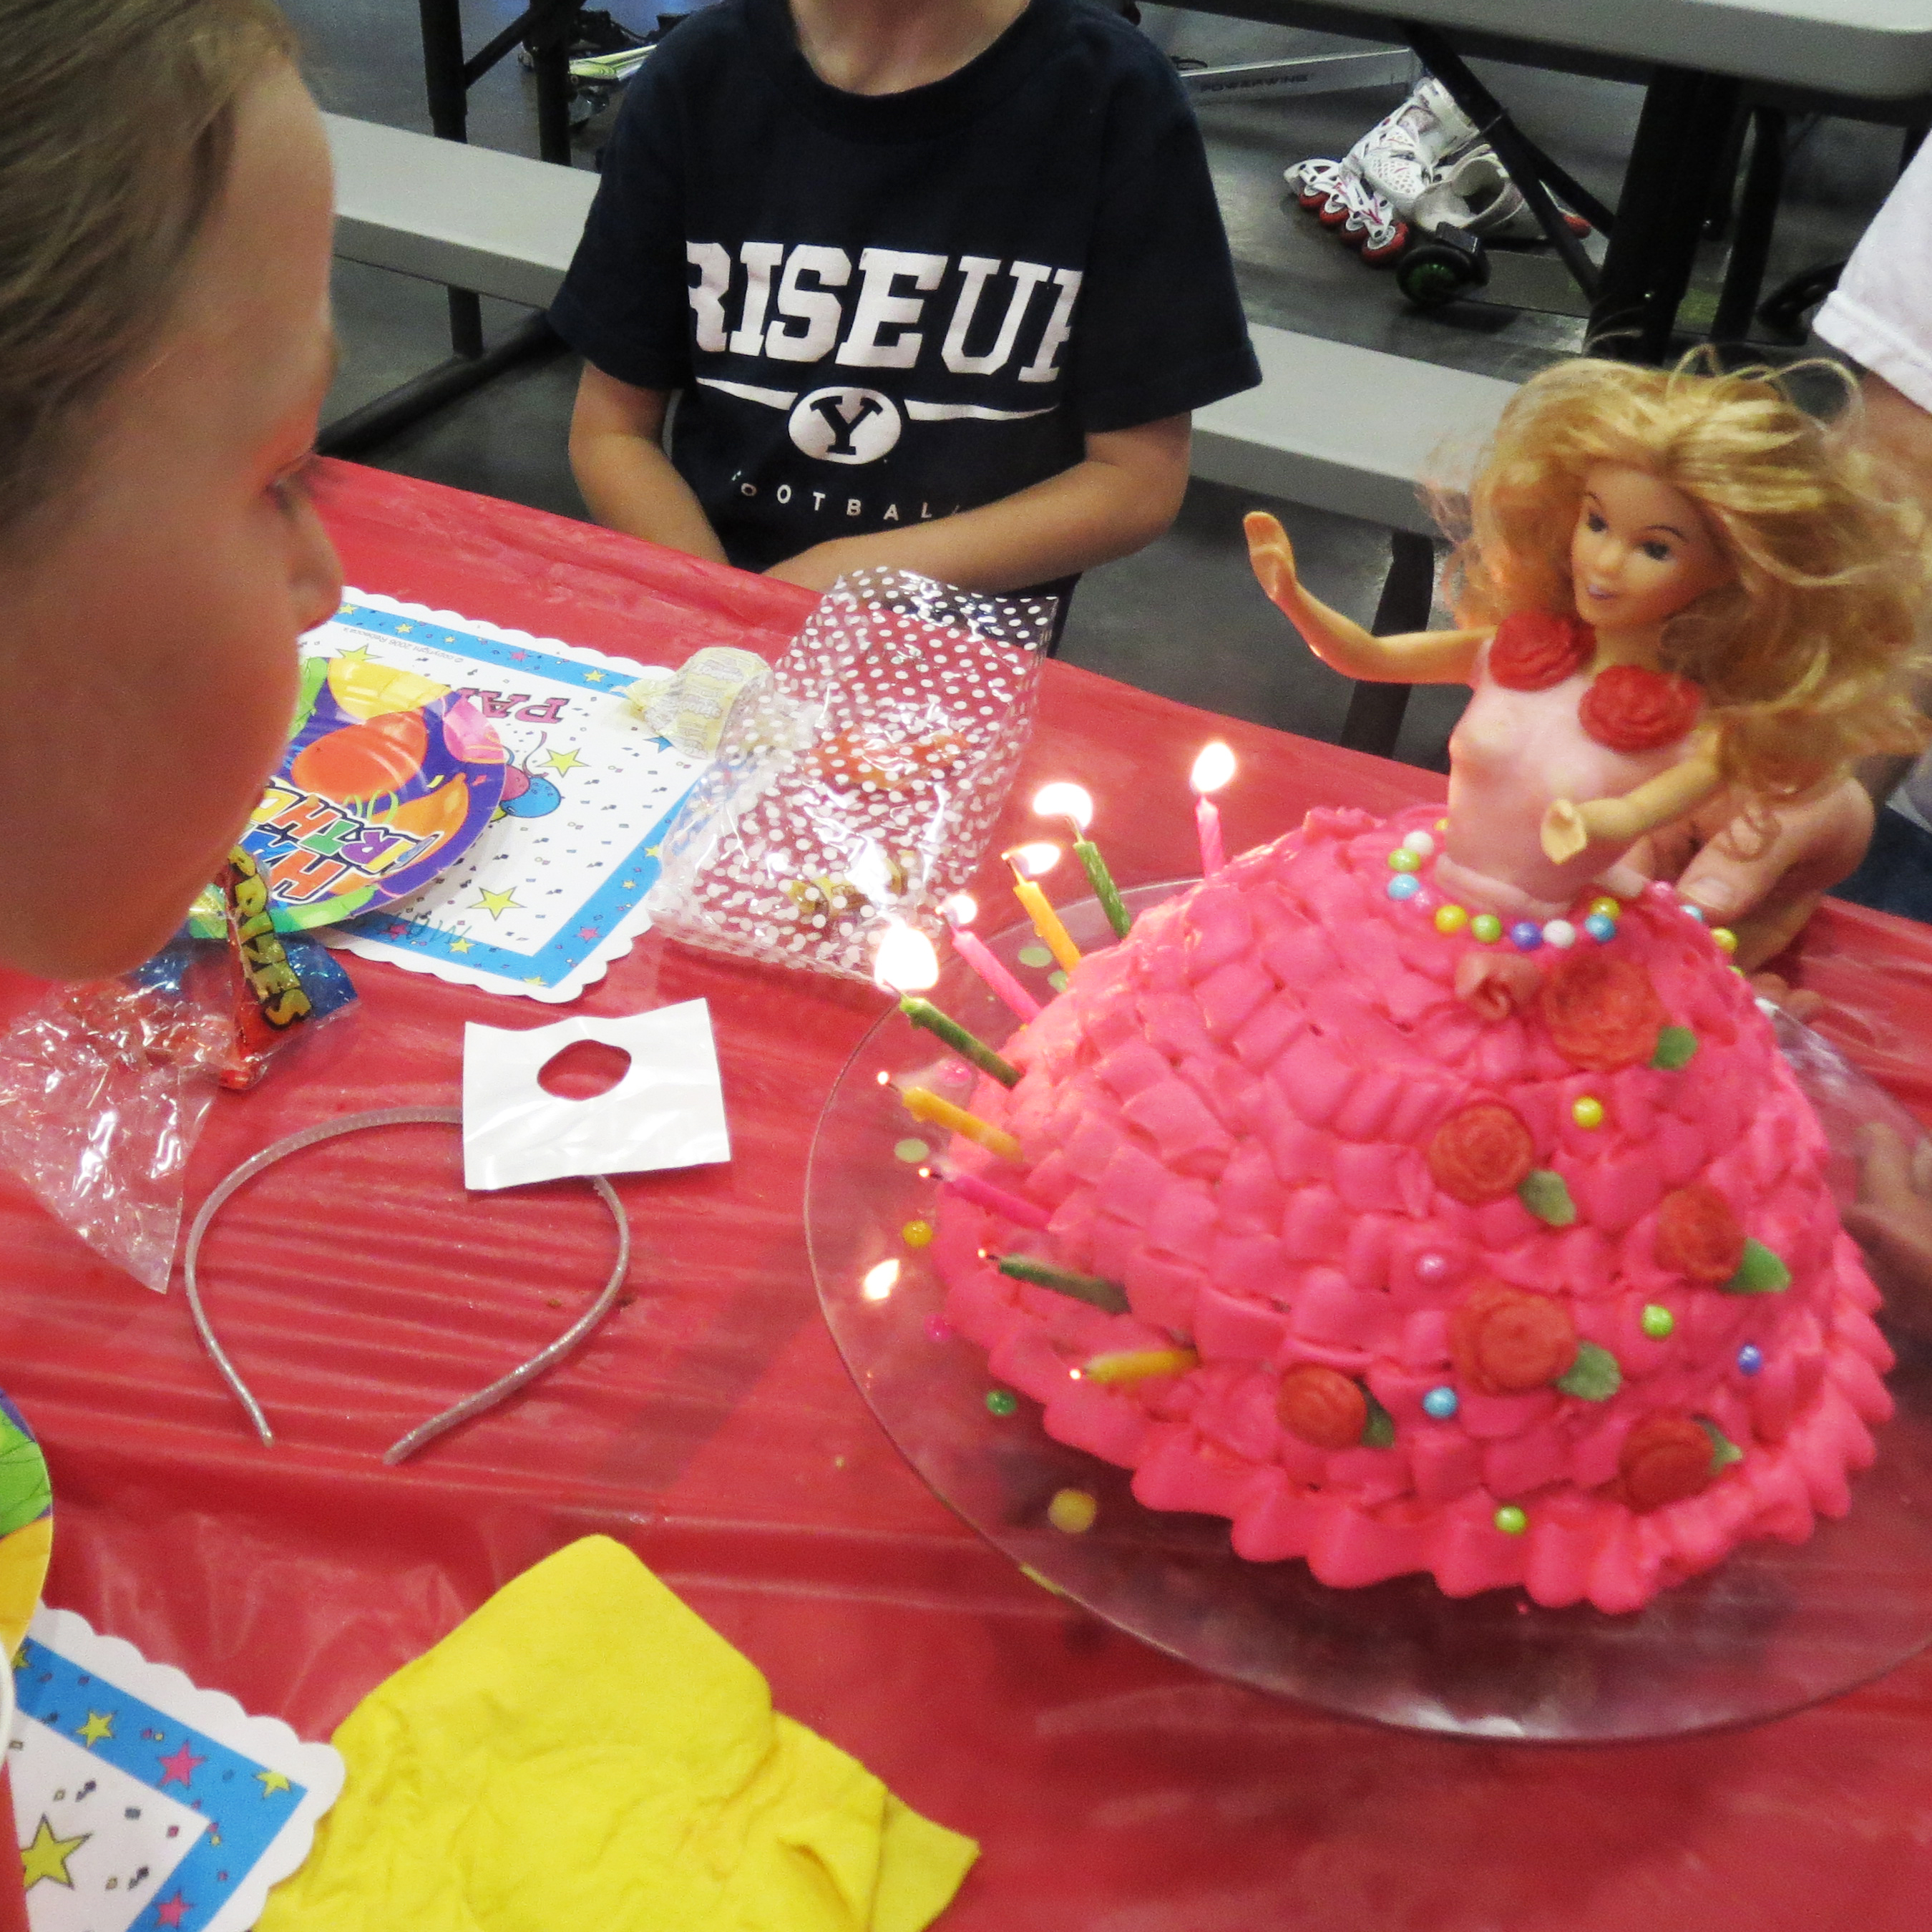
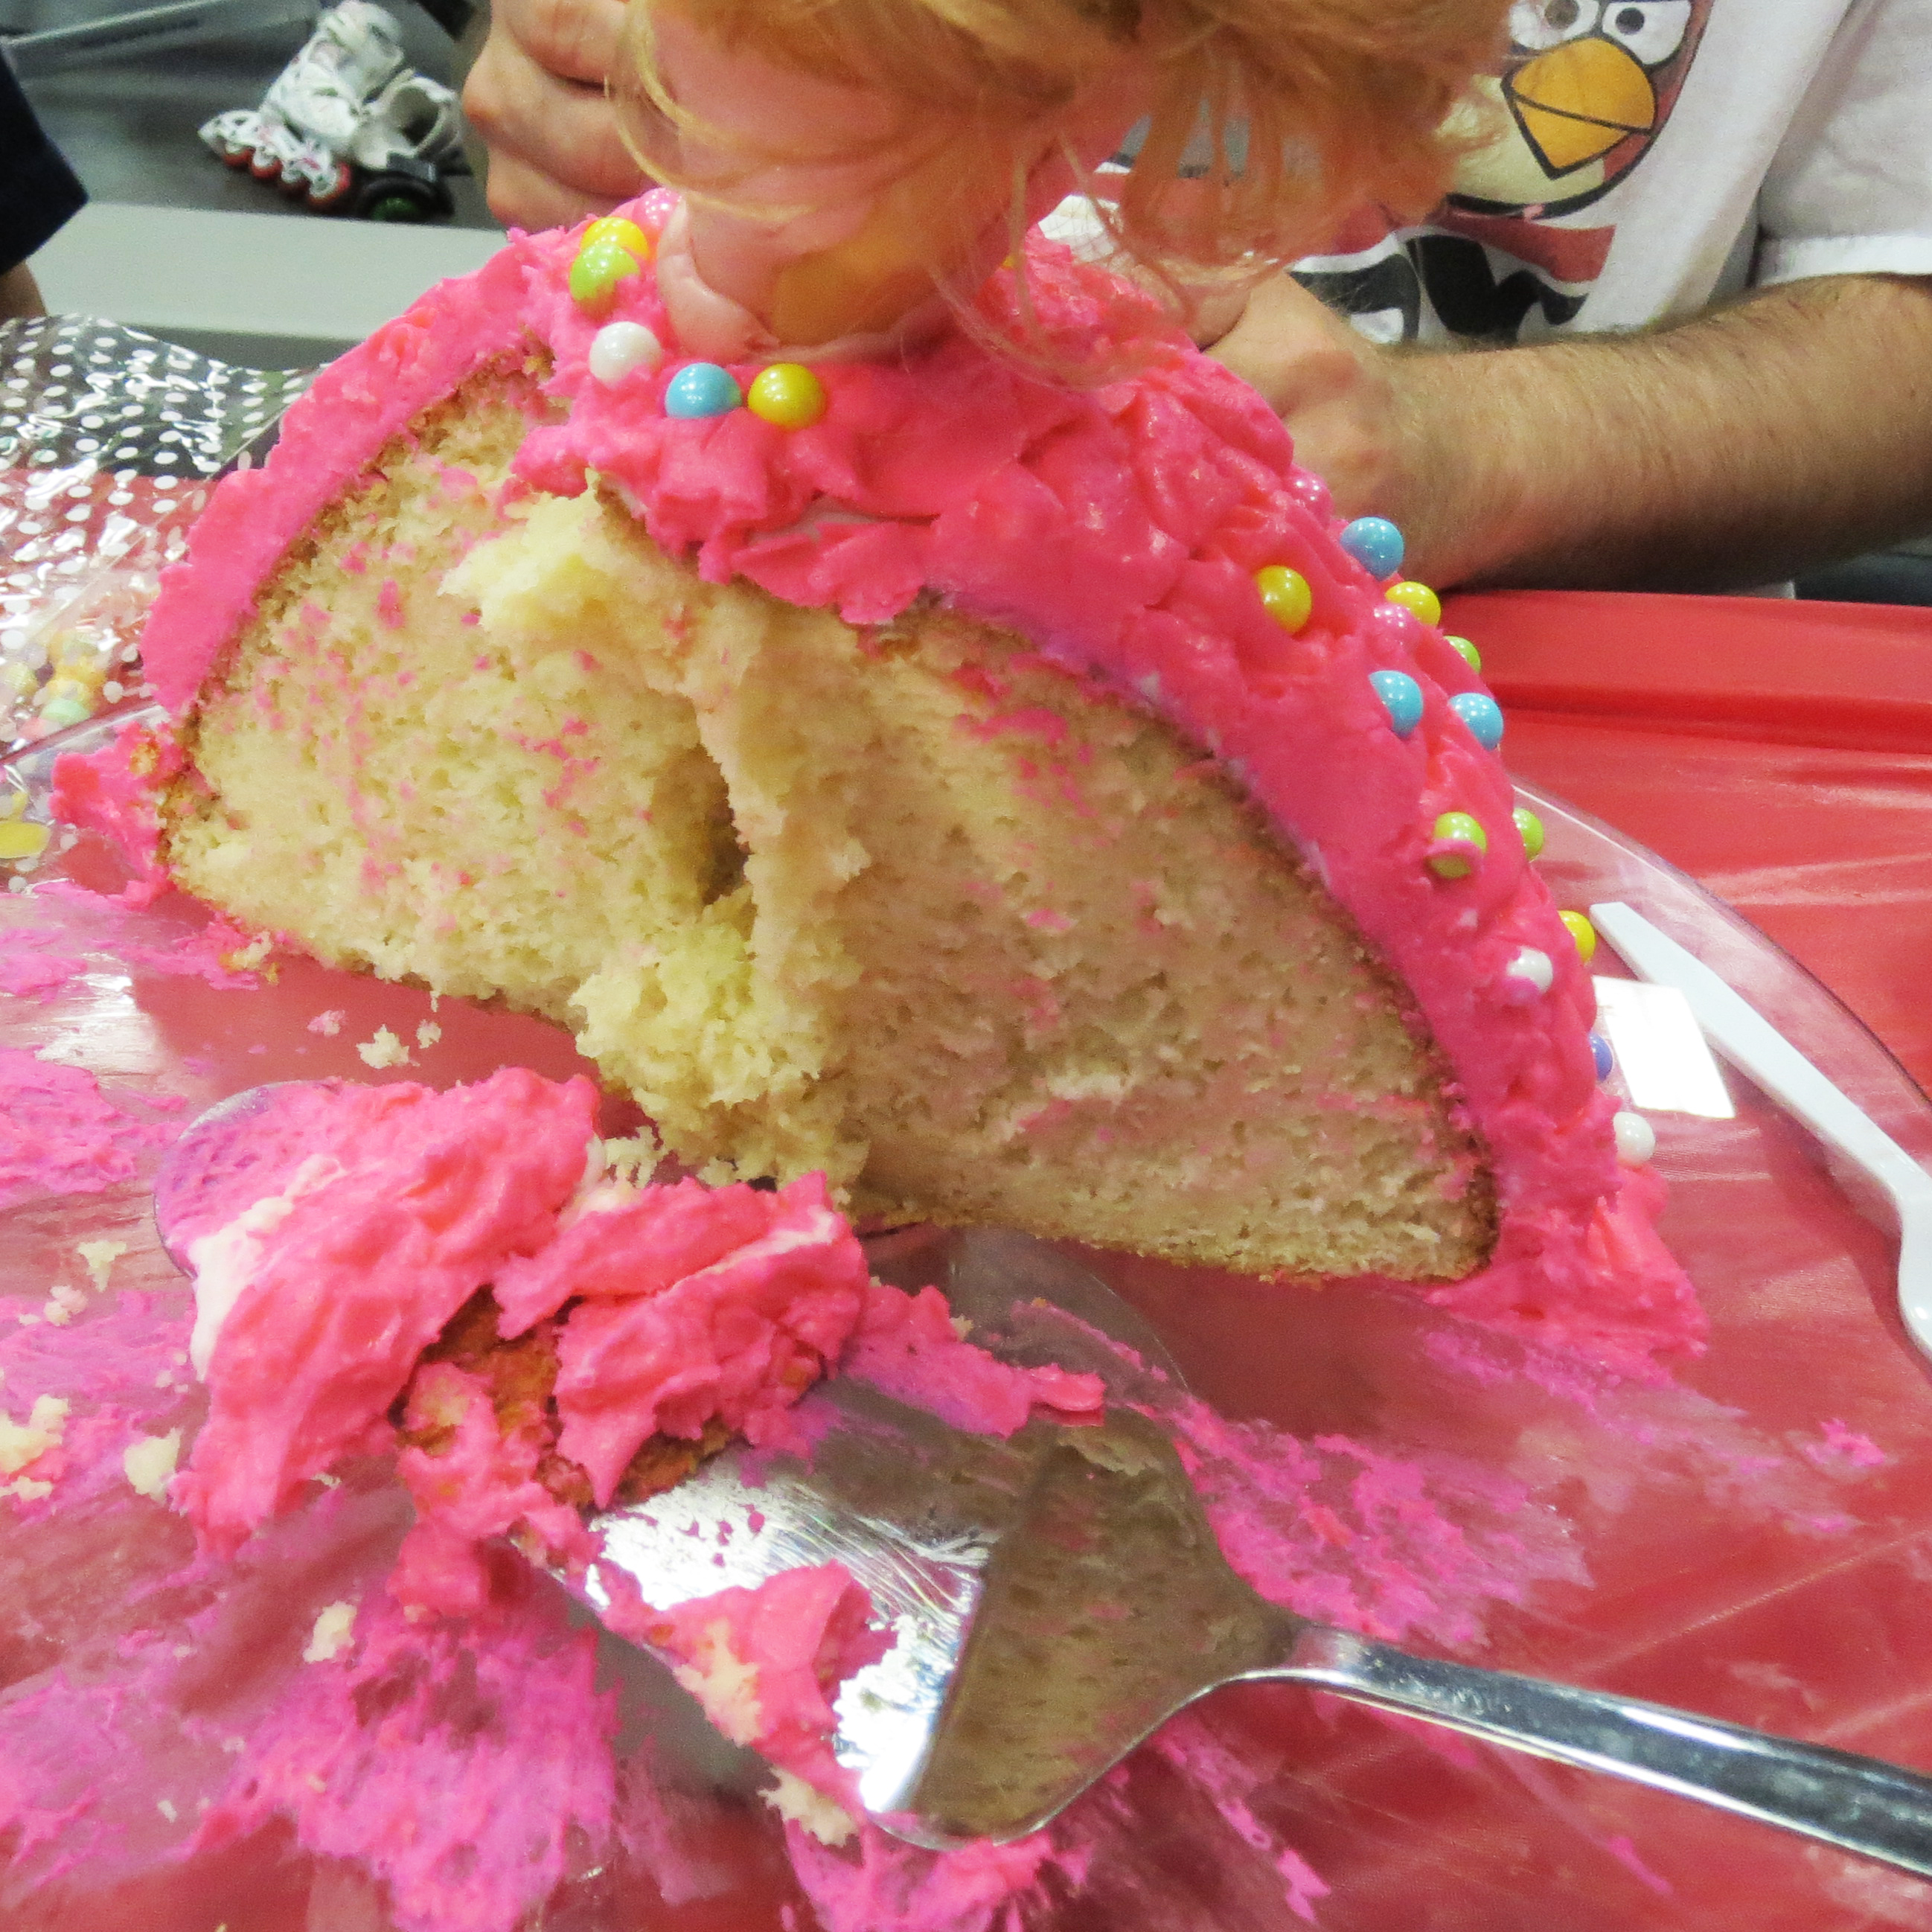
Here’s what it looked like after we blew out the candles, made a wish, and ate it! The cake traveled well (we took it to a skating rink). Even though we ate half of it, the Barbie still stayed upright until we ate the rest of the cake.
Short Video – Our full cake panorama.
Montreal Confections does a great how to video on how to make this cake. You can see it here:
2 comments
Rachel, thank you so very much for sharing! My daughter, Sophia, has been begging me to make her a cake with a Barbie doll, and we will follow your very helpful instructions!! Thanks again.
Oh, I’m so glad that it was useful. Let us know how Sophia’s birthday goes 🙂