


Hi Everyone,
My name is Rachel and I’m a fresh fruit and vegetable addict. Since going gluten and dairy free, it’s my go to food. A friend told me I could borrow her steam juicer and she also gave me a box of jars she wasn’t using. Another friend said I could pick her grapes while she was away on vacation and what came next? Grape juice! Free Grape Juice!
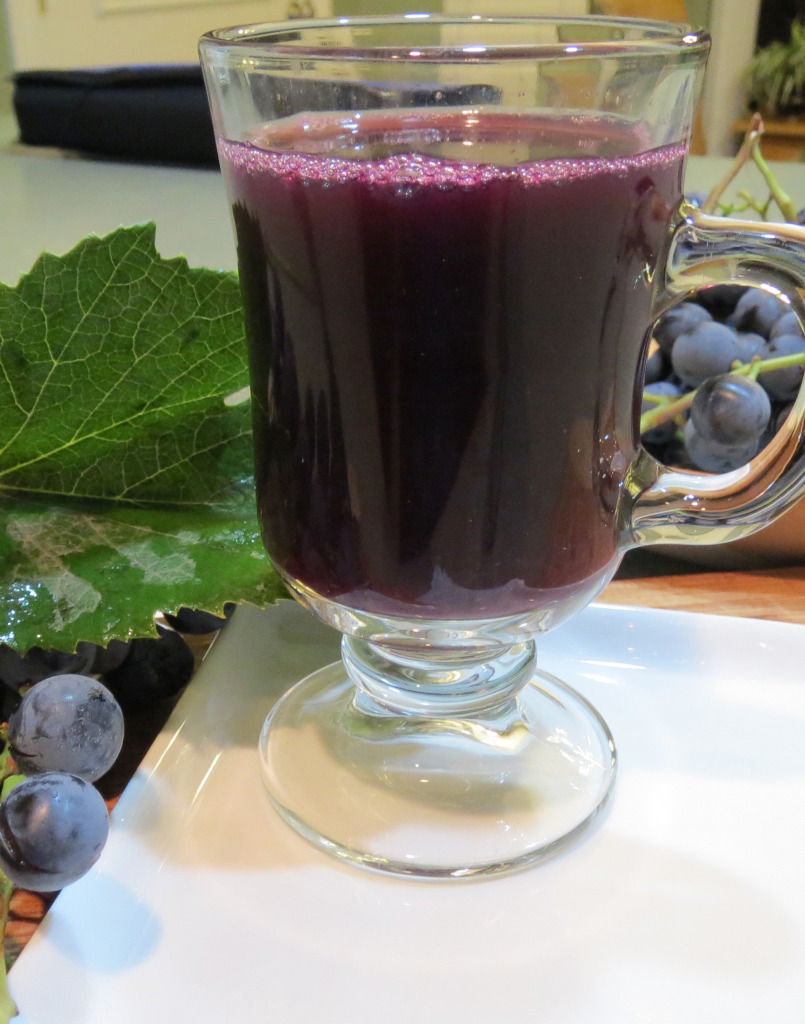
And guess what it is the most wonderful and healthy grape juice you could imagine. I wish you could take a drink, it smells fresh and sweet and delicious. The color is a deep deep purpleish red color.
Now I don’t think there is a cure to what I have. If you have it too, here’s instructions on how to can grape juice.
HOW TO CAN GRAPE JUICE
Step 1
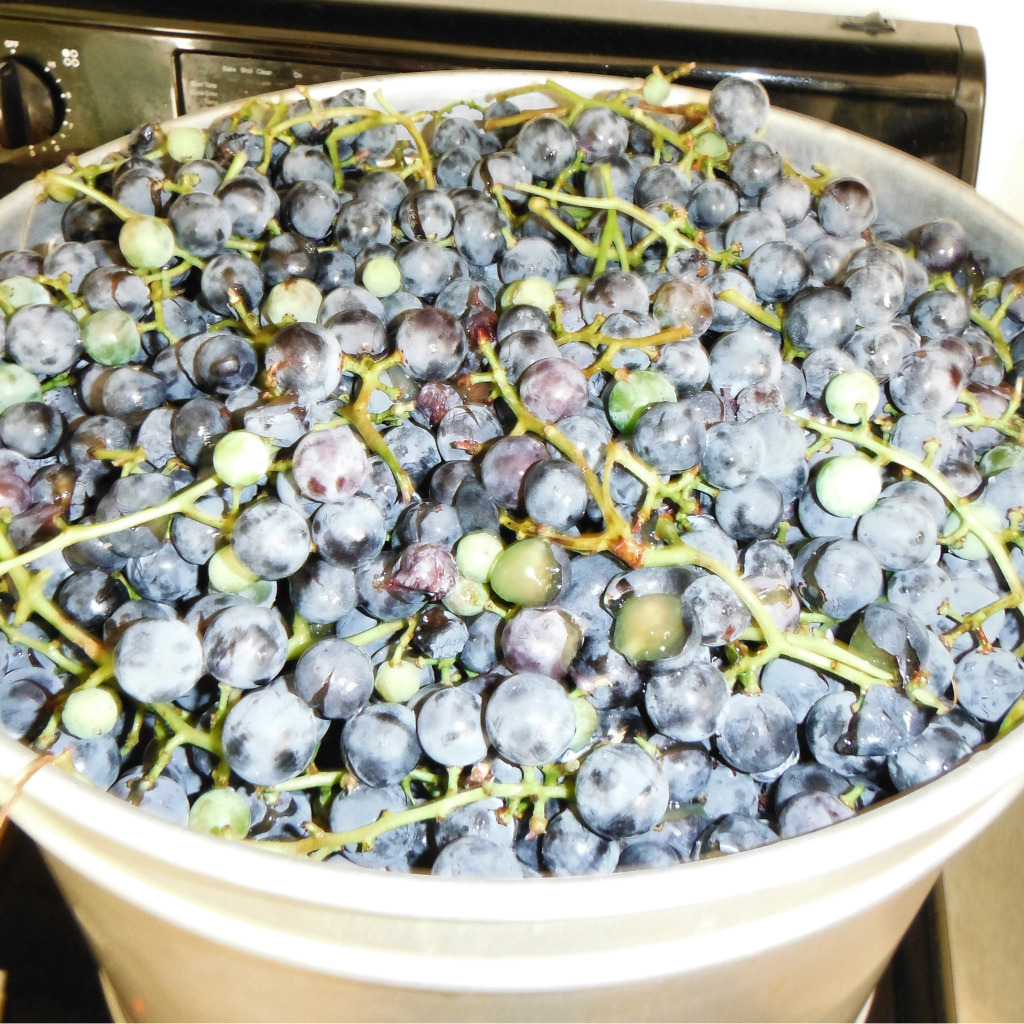
Wash grapes. I have a huge 32 cup Tupperware Bowl that I’ve had for over 10 years that serves me very well. I used 1 bowl and a half, so about 50 cups of grapes (stems on). This makes about 3-5 quarts of juice depending on how juicy your grapes are. I made 2 batches and it took me a whole evening from start to finish.

Step 2
Prepare your steam juicer according to the instructions it came with. The one I borrowed from my friend required water in the bottom third, the filter in the middle and the basket on the top. Then attach the tube so the juice can flow out. I was surprised how little space this juicer takes up for how big it is, it nests into itself for easy storage. It’s a little smaller in storage space than my steam canner.
Turn stove on medium heat. Adjust as necessary in the cooking process. I turned my heat down a little about half way through.
Step 3
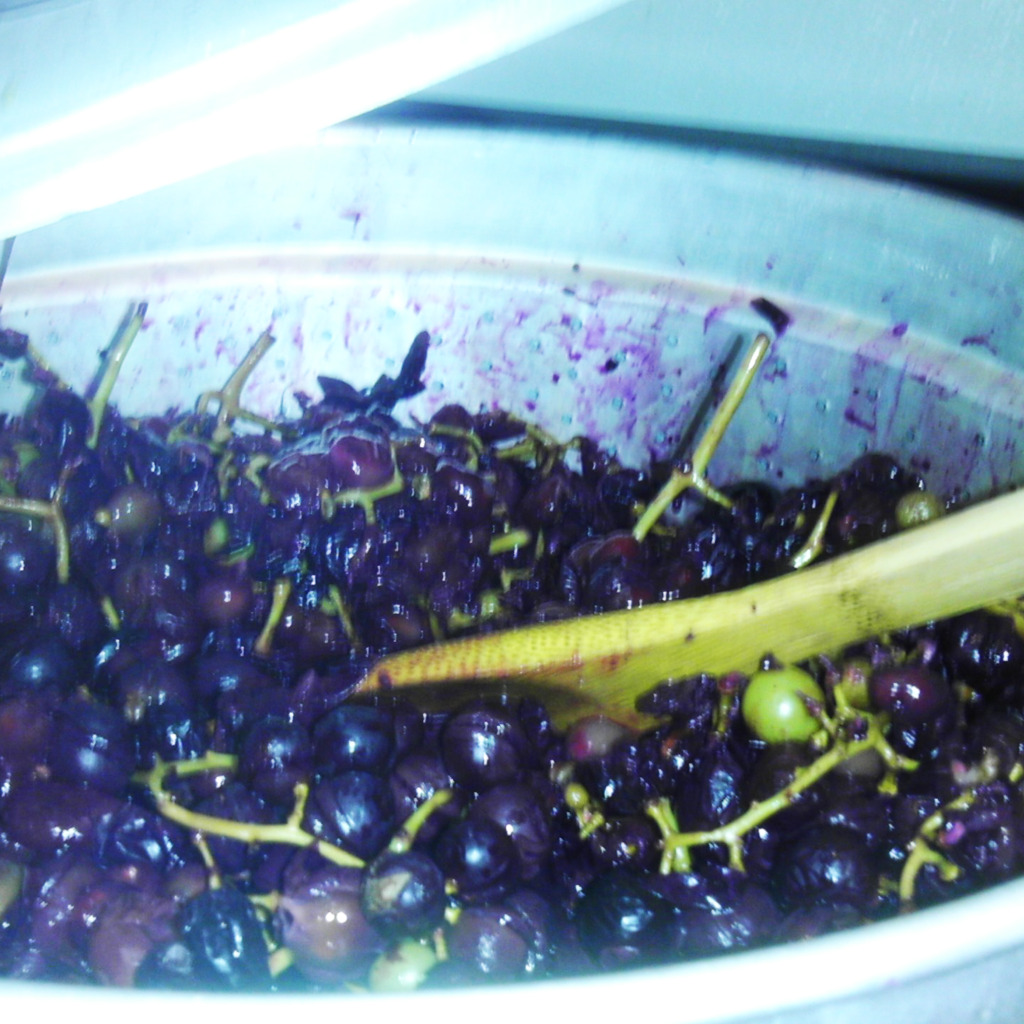
Add grapes to steam juicer basket. I used concord. I filled mine to the very tippy top which is fine because they will cook down a lot. No need to remove the stems. Add a little sugar to the top, maybe 1/4 cup. Put the lid on the steamer.
Step 5
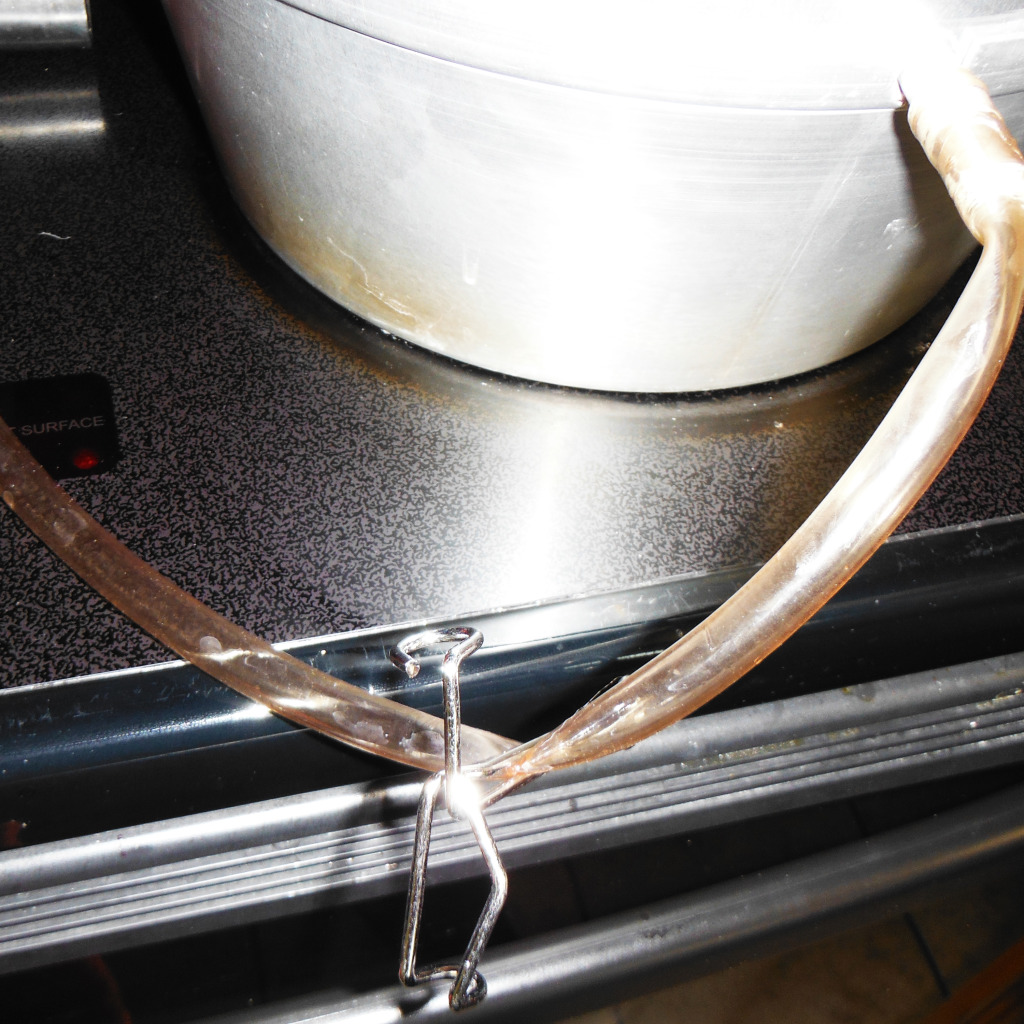
Clamp the tube so juice won’t come out until you are ready for it. Don’t skip this step or you will have a gooey sticky mess on your stove, your floor and everywhere else, but I would never be speaking from personal experience 🙂
Step 6
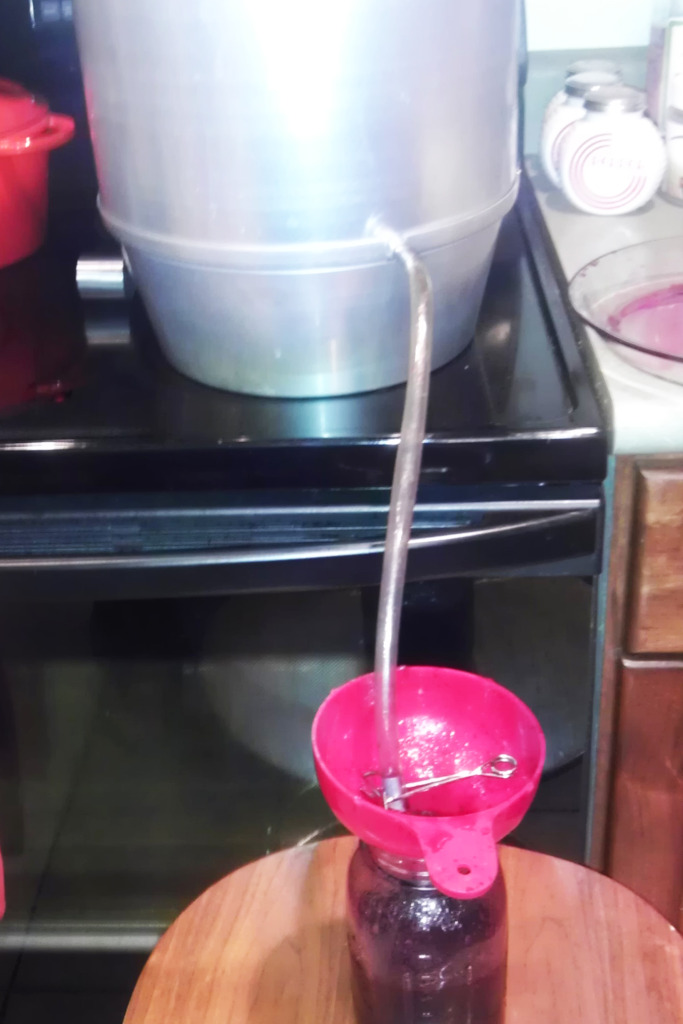
Place a sanitized jar on a chair or stool under the stove (so the juice tube can flow downward) with a jar funnel on top to keep the mouth of the jar clean and not sticky. This is how ours looked.
Step 7
When you are ready to let the juice flow from the tube to your jar, you release the clamp and pull it down to the metal casing at the end of the tube, so that the clamp stays open. Make sure you aim into the jar whenever you move the clamp (this was a 2 person job at our house). Then you move the clamp into the jar funnel (the red plastic thing on top of the jar). As the juice is released from the grapes, it will flow down the tube and into the jar.

Step 8
Occasionally you will need to stir and kind of press down on the grapes to get the juice flowing.
When you’ve stirred and pressed and the grapes are no longer producing juice, they should look like this
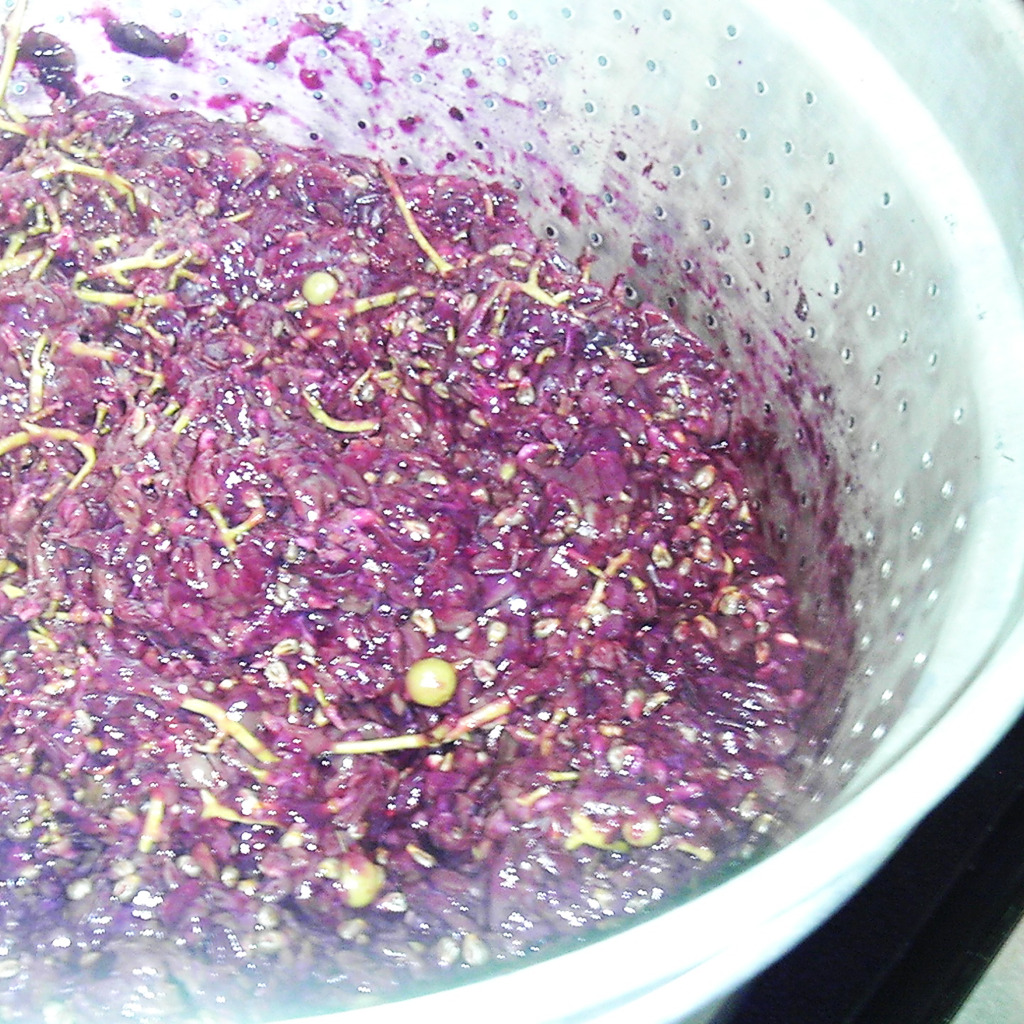
At this point I put them down the disposal, but if you have a good idea of what to do with the pulp, please let me know by posting a comment!
Step 9
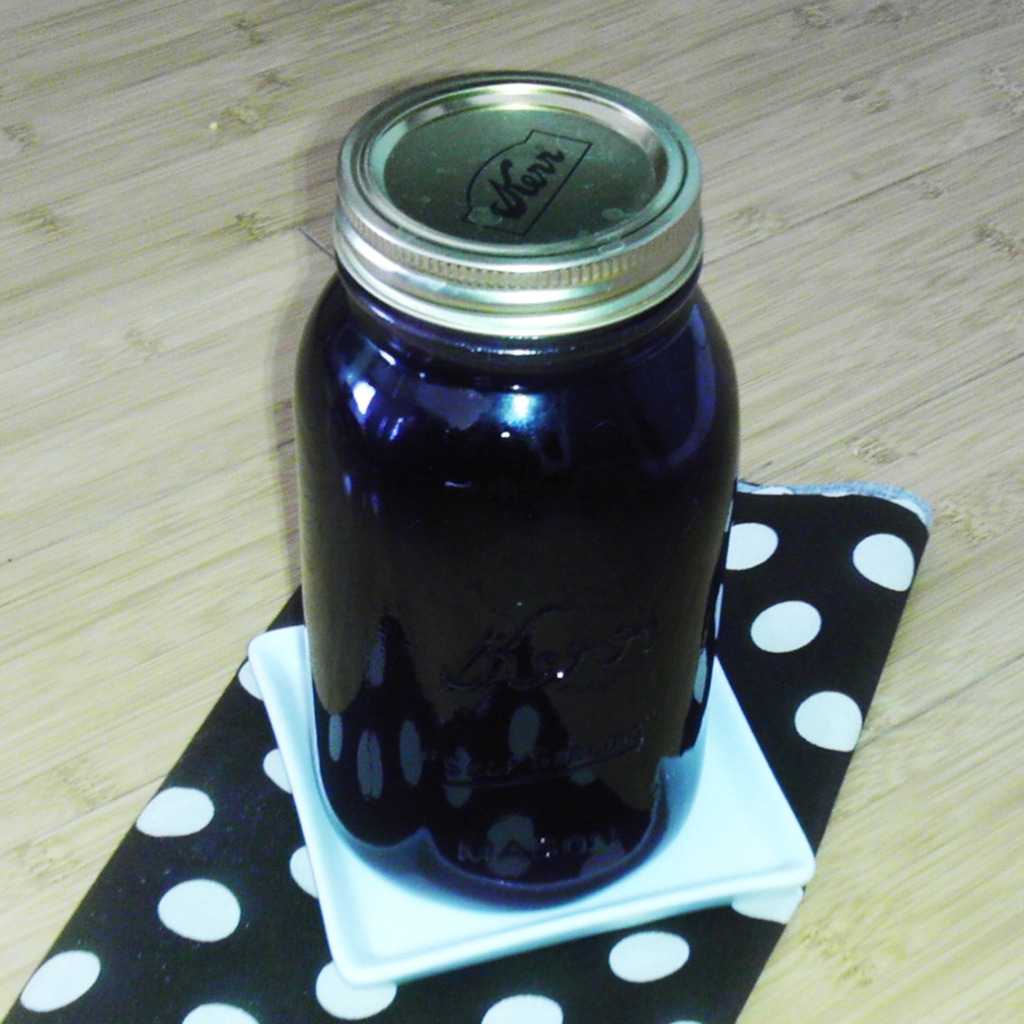
Process your jars according to your water bath canner or steam canner instructions. I washed the mouth, put on a boiled lid and processed for 25 minutes in my steam canner. I have heard from many people that you can skip this process of steam canning, but I read several things online that bacteria can grow if you don’t steam it. So, I decided to go ahead and be on the safe side and do this since it wouldn’t make any difference in flavor.
Now I have to say of all my canning endeavors, this was probably the most time consuming and messy, but it was also one of the best tasting. Please keep in mind, this probably isn’t a great item to can if you are a beginner, but it is a good skill to know and I’m glad I did it!
My kids enjoyed the juice, especially this one as you can see by the moo-stache! Stay tuned for how I canned cherry tomatoes from the garden and how I made my own pickles.

NOTE: I had some leftover grapes that I threw in my blendtec (minus the stems) and put in a tiny bit of sugar and a little water. I blended it up and honestly it was wonderful! It was a little pulpy, but I stuck it in freezer bags for smoothies. Then I could keep all those healthy grape seeds that are full of antioxidants.
The blendtec method would be a lot faster and if you wanted you could strain the pulp, boil the juice, and then bottle it. I’m not sure about the safety of this and I’m not very experienced with grapes so, just an idea!
Disclaimer: **Positively Mommy occasionally provides recipes and other information about food preparation. Please keep in mind that it is the reader’s responsibility to determine the value of these recipes, nutritional and otherwise. It is also the reader’s responsibility to determine the safety of the preparation instructions. Recipes are prepared “at your own risk.” We assume no liability, obligation, or warranty with respect to these recipes. Positively Mommy is not responsible for any damage, medically or otherwise, that could result from preparation of these recipes. Visitors must take care to check the instructions provided and determine their value and any possible medical condition that may arise from the preparation instructions and consumption of the ingredients listed in this site’s recipes.
2 pings
[…] then made another batch with dried blueberries from Costco. We served it with a banana and the grape juice we canned last […]
[…] « How to Can Grape Juice […]